
Precision in craftsmanship begins with accuracy—nowhere is this more evident than in the execution of clean, exact angle cuts. Whether you're building furniture, framing a wall, installing trim, or crafting decorative elements, the success of your project often hinges on how well you measure and cut angles. Misaligned joints, gaps in molding, or wobbly structures are usually the result of inaccurate angle work. This guide walks through the essential principles, tools, and methods that ensure flawless results every time.
Understanding Angle Cuts: The Foundation of Precision
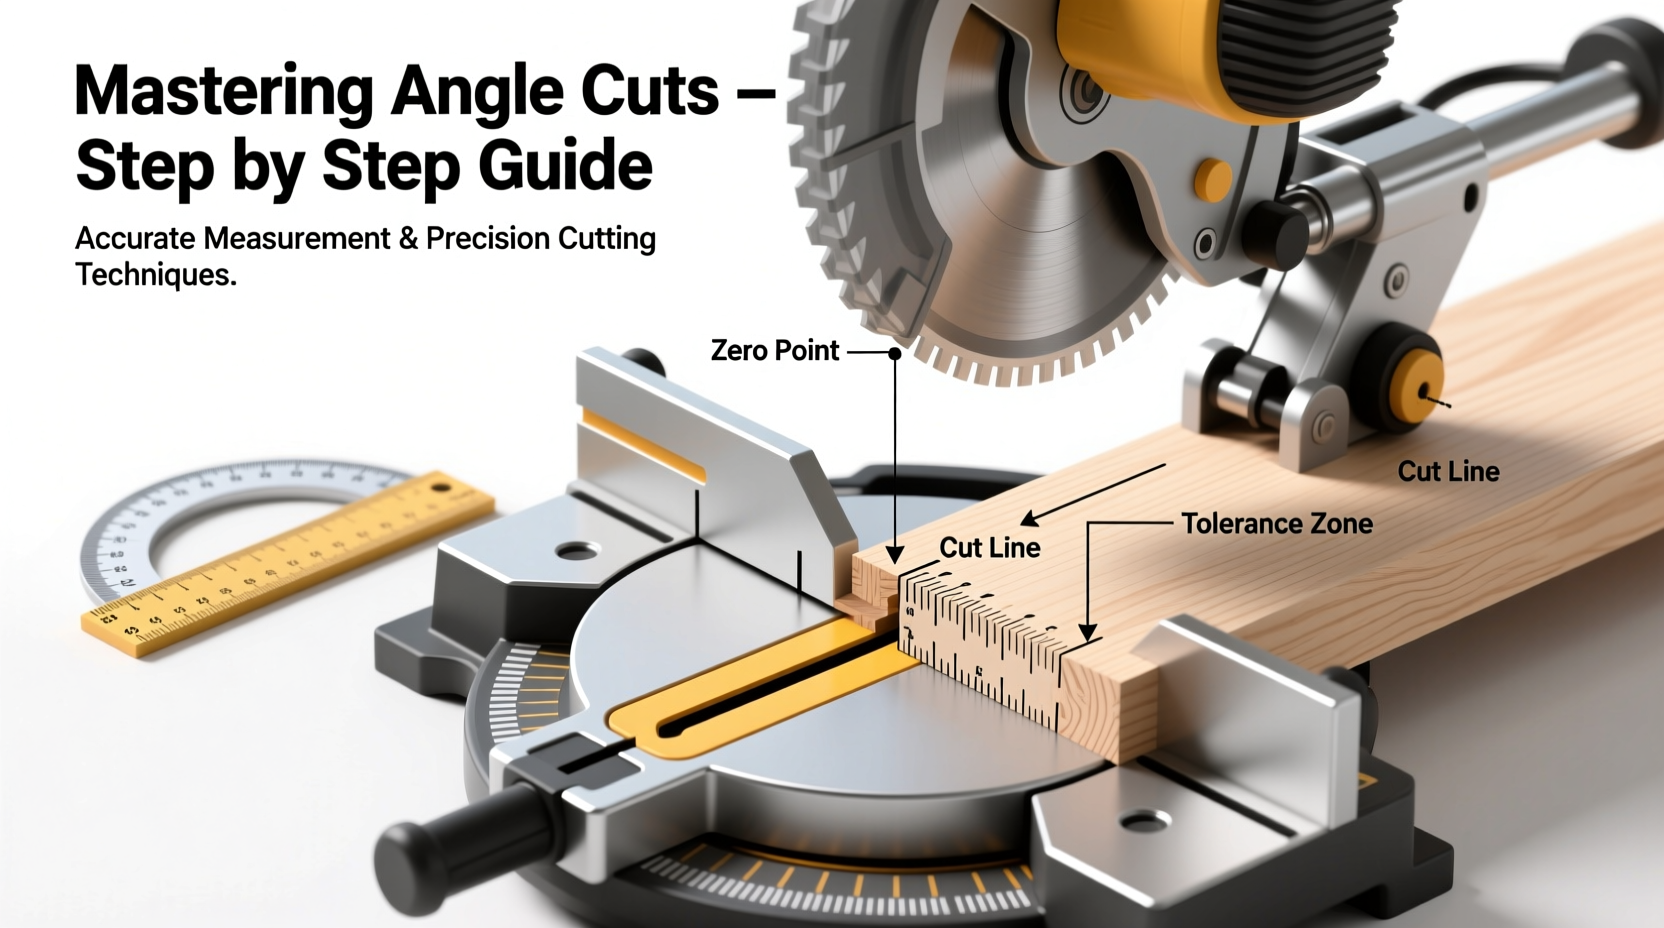
An angle cut refers to any cut made across a material at an angle other than 90 degrees relative to its edge. The most common types include miter cuts (angled across the face), bevel cuts (angled through the thickness), and compound cuts (a combination of both). These cuts are critical in creating seamless joints, especially in crown molding, picture frames, roofing, and cabinetry.
The key to mastering angle cuts lies not just in using the right tool, but in understanding geometry, material behavior, and alignment. Even a 1-degree deviation can compound over multiple joints, leading to noticeable misalignment. Therefore, accuracy starts long before the blade touches the material.
Essential Tools for Accurate Angle Measurement and Cutting
No amount of technique can compensate for poor tools. Invest in reliable equipment designed for precision. Here’s what you’ll need:
- Digital Protractor or Angle Finder: Measures existing angles accurately, especially useful when replicating irregular corners.
- Combination Square or Speed Square: Ideal for marking 45° and 90° angles quickly and reliably.
- Miter Saw (Sliding or Dual-Bevel): The go-to tool for repeatable, precise crosscuts at adjustable angles.
- Table Saw with Miter Gauge: Offers greater control for long stock and fine-tuning.
- Marking Tools: Pencil, marking knife, or fine-tip gauge for clear, precise layout lines.
- Clamps and Stops: Prevent movement during cutting and allow for consistent replication.
“Measure twice, cut once” isn’t just a slogan—it’s a discipline. The best craftsmen rely on verification, not assumption. — Rafael Mendez, Cabinetmaking Instructor & Woodworker
Step-by-Step Guide to Executing Perfect Angle Cuts
Follow this systematic approach to achieve professional-grade results:
- Assess the Joint Requirement: Determine whether you need a miter, bevel, or compound cut. For example, inside corners in crown molding typically require compound miter cuts.
- Measure the Actual Angle: Walls are rarely perfectly square. Use a digital angle finder or adjustable T-bevel to capture the true angle between two surfaces.
- Divide the Angle (for Miters): In a standard corner joint, each piece takes half the total angle. For a 90° corner, set your saw to 45°. For a 105° corner, each cut should be 52.5°.
- Set Up Your Saw: Adjust the miter gauge or table to the calculated angle. Lock it securely and verify with a protractor if possible.
- Test on Scrap Material: Make a trial cut using scrap pieces of the same thickness and width. Dry-fit them together to check for gaps.
- Adjust as Needed: If there’s a gap on the inside of the joint, the angle is too acute; increase it slightly. If the gap is on the outside, decrease the angle.
- Cut Final Pieces: Once the test fit is perfect, proceed with your final material. Cut one piece at a time and label them to avoid mix-ups.
- Assemble and Secure: Use clamps, nails, or adhesive to hold the joint while it sets, ensuring alignment doesn’t shift.
Pro Tip for Crown Molding
When installing crown molding, always cut the pieces upside down on the miter saw, resting the narrow edge against the fence to simulate how it sits on the wall and ceiling. This “nested” position ensures correct bevel and miter alignment.
Common Mistakes and How to Avoid Them
Even experienced makers fall into predictable traps. Recognizing these pitfalls early prevents wasted material and frustration.
| Mistake | Why It Happens | Solution |
|---|---|---|
| Assuming all corners are 90° | Most walls deviate due to settling or imperfect construction | Always measure the actual angle with a digital finder or bevel gauge |
| Using dull blades | Blunt teeth tear material instead of slicing cleanly | Replace or sharpen blades regularly; use carbide-tipped for hardwoods |
| Incorrect saw calibration | Factory settings drift over time | Calibrate your miter saw annually using a precision square |
| Ignoring springback in metal | Material rebounds slightly after bending or cutting | Over-bend by 2–3° depending on thickness and type |
| Relying solely on laser guides | Lasers can be misaligned or hard to see in bright light | Use physical marks and verify alignment visually |
Real-World Example: Installing Baseboard in an Older Home
Tom, a homeowner renovating a 1920s bungalow, struggled with gaps in his baseboard joints despite using a high-end miter saw. He assumed all interior corners were 90° and set his saw accordingly. After caulking and re-cutting several times, he measured the actual angles with a digital protractor and discovered variations from 86° to 94°. By adjusting each cut to half the measured angle—43° for one corner, 47° for another—he achieved tight, seamless joints without filler. His mistake wasn’t skill, but assumption. The fix? Verification.
Checklist: Pre-Cut Preparation Routine
Before making any cut, run through this checklist to ensure accuracy:
- ✅ Measure the actual angle of the corner or joint
- ✅ Calculate the individual miter angle (total ÷ 2)
- ✅ Select the appropriate blade for material type (wood, metal, PVC)
- ✅ Calibrate the miter saw or table saw setting
- ✅ Mark the cut line clearly on the correct side of the material
- ✅ Perform a dry run with scrap wood
- ✅ Clamp the workpiece securely to prevent movement
- ✅ Confirm blade depth and speed settings
Frequently Asked Questions
What’s the difference between a miter cut and a bevel cut?
A miter cut angles across the face of the material (left to right), while a bevel cut angles through the edge (tilting the blade). A compound miter combines both and is commonly used in crown molding installations.
Why do my miter joints open up over time?
This can happen due to wood movement, especially in environments with fluctuating humidity. Using stable materials like MDF for trim, or allowing wood to acclimate before cutting, reduces this risk. Reinforcing joints with splines or biscuits also improves long-term stability.
Can I use a hand saw for accurate angle cuts?
Yes, but consistency requires practice. Use a miter box to guide the saw and maintain a steady stroke. For critical work, power tools offer better repeatability and precision.
Final Thoughts: Precision Is a Practice
Mastering angle cuts isn’t about owning the most expensive tools—it’s about developing a methodical approach grounded in measurement, verification, and refinement. Every gap-free joint and seamless corner is the result of deliberate effort, not luck. Whether you’re a weekend DIYer or a seasoned tradesperson, the principles remain the same: measure the real world, not the ideal; test before committing; and never stop refining your process.


 浙公网安备
33010002000092号
浙公网安备
33010002000092号 浙B2-20120091-4
Comments
No comments yet. Why don't you start the discussion?