
The Apple Watch has become an essential companion for millions, seamlessly integrating health tracking, communication, and timekeeping into daily life. While its sleek design and advanced features are impressive, one of the most fundamental functions—accurate and personalized time display—can sometimes be overlooked. Whether you're a new user or have had your watch for years, mastering time settings ensures your device works precisely how you need it. From automatic time syncing to customizing clock faces and managing world clocks, this guide walks through every aspect of adjusting your iWatch clock with precision and ease.
Understanding How Apple Watch Handles Time Automatically
By default, the Apple Watch is designed to sync time automatically with your iPhone. This means that as long as your iPhone’s time settings are correct and both devices are connected via Bluetooth or on the same Wi-Fi network, your Apple Watch will reflect the accurate local time without manual input. The system relies on Apple’s ecosystem-wide time synchronization, which pulls data from network time servers and adjusts for daylight saving changes and time zone shifts.
This automatic behavior is ideal for most users, especially frequent travelers or those who rely on precise scheduling. However, there are situations where manual adjustments or deeper configuration may be necessary—such as when traveling across time zones, troubleshooting incorrect displays, or personalizing how time appears on the watch face.
Step-by-Step Guide to Manually Adjust Time and Time Zone
While automatic settings handle most scenarios, there may be times when you need to override them—especially during international travel or if GPS signals fail to update your location-based time zone.
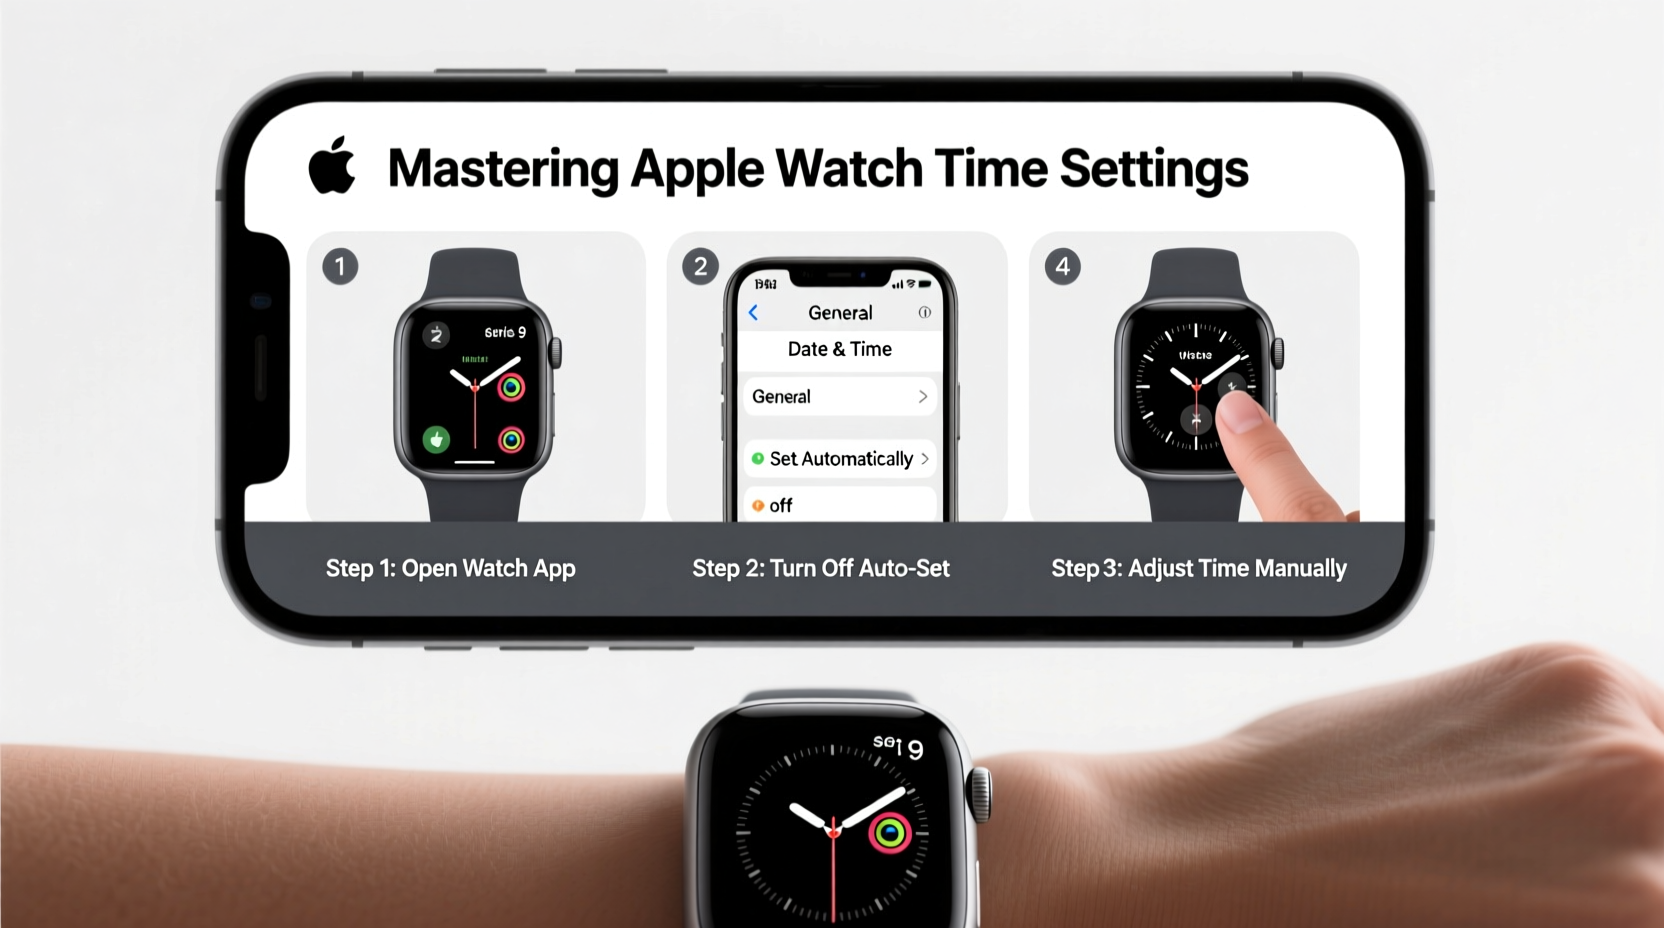
- On your iPhone, open the Watch app.
- Navigate to General > Date & Time.
- If “Set Automatically” is toggled on, turn it off to enable manual control.
- Select Time Zone to enter a specific city or region manually.
- Type in the destination city (e.g., Tokyo, London) to set the correct offset.
- Return to your Apple Watch to confirm the time has updated accordingly.
This process allows you to pre-set your watch before boarding a flight or correct discrepancies caused by poor network connectivity. Once you re-enable “Set Automatically,” the watch will resume syncing based on your current location.
Real-Time Example: Traveler Adjusts Time Before Departure
Sophie, a business consultant based in Chicago, frequently travels to Berlin. Before her 7 PM flight, she disables “Set Automatically” in the Watch app and sets her Apple Watch to Central European Time using the Time Zone feature. Upon landing, her watch already reflects the local time, allowing her to transition smoothly into meetings without waiting for GPS or network detection. After two days, she re-enables automatic settings, and her watch resumes normal syncing.
“Proactively managing time zones on the Apple Watch eliminates confusion during international transitions and supports better time management.” — David Lin, Tech Lifestyle Coach
Customizing Clock Faces for Optimal Time Visibility
Your Apple Watch offers over a dozen clock face designs, each with different ways of displaying time. Choosing and customizing the right face enhances readability and aligns with your lifestyle needs.
To change your clock face:
- Press the Digital Crown to access the Home screen.
- Long-press the watch face to enter Edit mode.
- Swipe left or right to browse available faces.
- Select one (e.g., Modular, Chronograph, or Simple) and tap “Edit.”
- Customize complications (time format, date, second time zone, etc.).
- Press the Digital Crown to save.
For example, the Modular face lets you place a large digital time at the top, while the X-Large face emphasizes oversized numerals—ideal for quick glances. If you work across time zones, adding a second time complication keeps global colleagues' hours visible at a glance.
| Clock Face | Best For | Time Display Style |
|---|---|---|
| Modular | Information density | Analog or digital with customizable complications |
| X-Large | Readability | Oversized digital numbers |
| Chronograph | Classic look + stopwatch | Analog with subdials |
| Activity Analog | Fitness focus | Analog with rings around the edge |
| GMT | Travelers | Two time zones shown simultaneously |
Managing 12-Hour vs. 24-Hour Time Format
In some regions, the 24-hour (military) time format is standard. You can switch between formats directly from your iPhone settings:
- Open the Settings app on your iPhone.
- Go to General > Date & Time.
- Toggle 24-Hour Time on or off.
- Wait a few seconds for the change to sync to your Apple Watch.
Once changed, all clock faces—including digital ones—will reflect the selected format. Note that some analog faces do not display AM/PM indicators, so switching to 24-hour mode can reduce ambiguity in professional or high-stakes environments like healthcare or aviation.
Do’s and Don’ts of Apple Watch Time Management
| Do’s | Don’ts |
|---|---|
| Enable “Set Automatically” unless traveling ahead of schedule | Manually set time without disabling auto-sync first |
| Use the GMT face for dual-time visibility | Ignore time zone updates after long flights |
| Customize complications for relevant time data | Overload the face with too many complications |
| Check battery before relying on time during critical events | Assume time will auto-correct instantly upon landing |
Frequently Asked Questions
Why is my Apple Watch showing the wrong time?
This usually occurs when “Set Automatically” is disabled or when your iPhone and Apple Watch lose connection. Re-enable automatic time settings on your iPhone and ensure both devices are within range. If issues persist, restart both devices to re-establish sync.
Can I display two time zones at once?
Yes. Use the GMT clock face or add a second time zone complication to compatible faces like Modular or Infograph. In the Watch app, edit your chosen face and assign a secondary city under the “Second Time Zone” option.
Does airplane mode affect time accuracy?
When airplane mode is active, your Apple Watch cannot receive location or network updates, which may delay time zone adjustments. However, if “Set Automatically” is on and your last known location was accurate, the time should remain correct until you cross zones. For best results, manually set the time zone before takeoff.
Essential Checklist for Mastering Apple Watch Time Settings
- ✅ Confirm “Set Automatically” is enabled in iPhone Settings > General > Date & Time
- ✅ Install the latest watchOS and iOS updates for reliable syncing
- ✅ Choose a clock face optimized for your daily needs (e.g., GMT for travel)
- ✅ Customize complications to include date, second time zone, or timer
- ✅ Disable automatic setting temporarily when pre-adjusting for travel
- ✅ Restart both devices if time fails to update after location change
Final Thoughts: Take Control of Your Time Experience
Mastering Apple Watch time settings isn’t just about accuracy—it’s about personalization and efficiency. When your watch displays time exactly how and where you need it, you gain confidence in every meeting, workout, and journey. Whether you're fine-tuning complications, switching to 24-hour format, or preparing for global travel, these small adjustments compound into meaningful improvements in daily productivity and peace of mind.


 浙公网安备
33010002000092号
浙公网安备
33010002000092号 浙B2-20120091-4
Comments
No comments yet. Why don't you start the discussion?