
Arduino has revolutionized how people learn electronics and physical computing. With its open-source platform and user-friendly interface, it's the perfect entry point for beginners eager to explore the world of microcontrollers. Whether you're a student, hobbyist, or aspiring engineer, mastering Arduino programming opens doors to building interactive devices—from smart lights to weather stations. This guide walks you through essential concepts, practical tips, and hands-on projects that lay a strong foundation in embedded systems.
Understanding the Arduino Ecosystem
Before writing code, it’s crucial to understand what makes Arduino accessible. At its core, an Arduino board is a programmable circuit board with input/output pins that interact with sensors, LEDs, motors, and other components. The most common model for beginners is the Arduino Uno, thanks to its reliability, wide community support, and compatibility with countless shields and modules.
The software side uses the Arduino IDE (Integrated Development Environment), which supports a simplified version of C++. Code written here is uploaded to the board and runs independently once powered. Unlike traditional programming environments, Arduino sketches operate in two main functions: setup(), which runs once at startup, and loop(), which repeats continuously.
“Arduino lowers the barrier to hardware development. You don’t need an electrical engineering degree to prototype something meaningful.” — Dr. Linda Chen, Embedded Systems Educator
Step-by-Step Guide to Your First Arduino Program
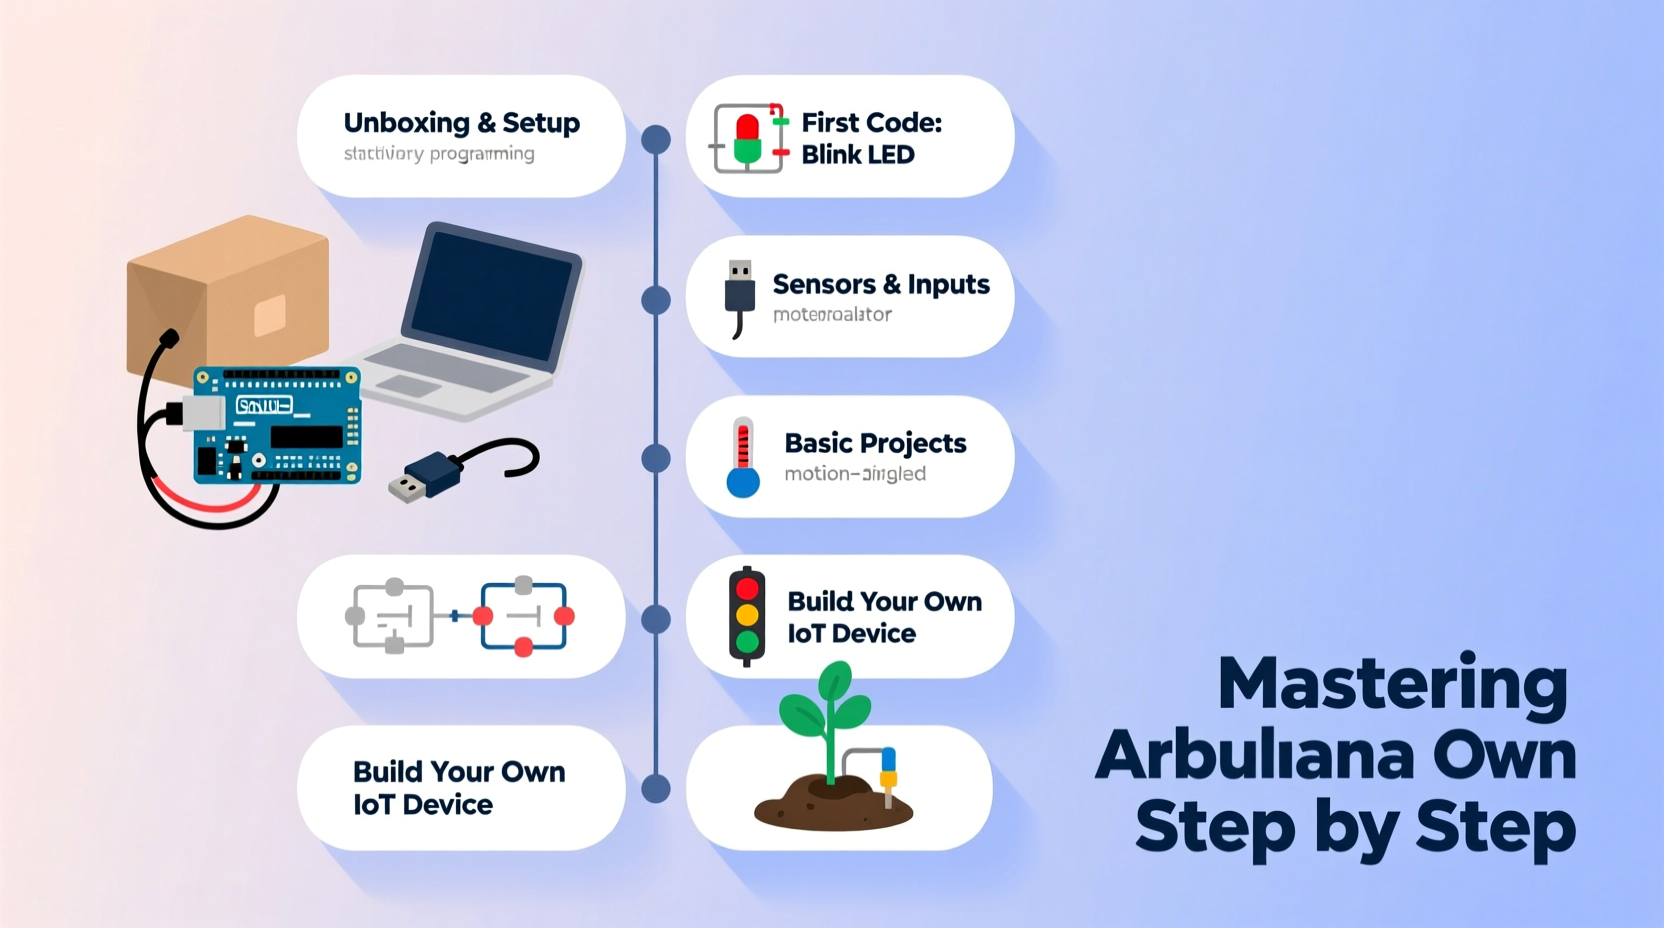
Learning Arduino begins with blinking an LED—a rite of passage for every beginner. Follow this sequence to write and upload your first sketch:
- Install the Arduino IDE: Download it from the official Arduino website for Windows, macOS, or Linux.
- Connect your board: Use a USB cable to connect the Arduino Uno to your computer.
- Select board and port: In the IDE, go to Tools > Board > Arduino Uno, then Tools > Port and select the correct COM/tty port.
- Open the Blink example: Navigate to File > Examples > 01.Basics > Blink.
- Upload the code: Click the Upload button (right arrow). If successful, the onboard LED (pin 13) will start blinking every second.
Essential Tips for Effective Arduino Programming
Success with Arduino isn't just about getting code to compile—it's about writing clean, maintainable, and efficient programs. Here are key strategies used by experienced makers:
- Use comments liberally: Explain what each block of code does, especially when using unfamiliar libraries or complex logic.
- Name variables meaningfully: Instead of
int x = 7;, useint ledPin = 7;for clarity. - Break problems into small parts: Tackle one sensor or function at a time rather than building everything at once.
- Leverage built-in functions: Functions like
digitalWrite(),analogRead(), andmillis()simplify timing and control. - Avoid delay() in multitasking scenarios: Use
millis()for non-blocking delays when managing multiple events.
| Common Mistake | Better Practice |
|---|---|
| Using delay() to control blinking while reading sensors | Use millis() to track time without pausing execution |
| Hardcoding pin numbers | Define constants at the top for easier modification |
| Ignoring serial debugging | Use Serial.println() to monitor sensor values and program flow |
Beginner Projects to Build Confidence
Applying knowledge through projects cements understanding. Start with these progressively challenging builds:
1. Traffic Light Simulator
Use three LEDs (red, yellow, green) on separate pins to mimic a traffic signal cycle. This reinforces timing logic and digital output control.
2. Temperature Monitor with LCD
Connect a DS18B20 temperature sensor and a 16x2 LCD display. Display real-time room temperature every few seconds. Introduces analog/digital sensors and I2C communication.
3. Motion-Activated Alarm
Integrate a PIR motion sensor with a buzzer and LED. When motion is detected, trigger an alert. Teaches event-based programming and digital input handling.
4. Servo-Controlled Door Lock
Attach a servo motor to simulate a lock mechanism. Control it via a push button or potentiometer. Builds mechanical interaction skills.
Checklist: Setting Up a Successful Arduino Workflow
To stay organized and avoid frustration, follow this daily practice checklist:
- ✅ Verify connections with a breadboard diagram before powering up
- ✅ Double-check polarity of components (especially LEDs and capacitors)
- ✅ Initialize all variables and define pin modes in setup()
- ✅ Use Serial.begin(9600) and print debug messages during testing
- ✅ Save sketches with descriptive names (e.g., “TrafficLight_v2”)
- ✅ Keep a notebook or digital log of wiring setups and code changes
Real Example: Building a Smart Plant Monitor
Sophie, a high school student new to electronics, wanted to create a device that would tell her when her plants needed water. She started with a moisture sensor connected to an analog pin and paired it with a red and green LED.
Her initial code used delay() to check the soil every 5 seconds, but she noticed the system felt sluggish. After researching online, she replaced the delay with millis()-based timing, allowing her to add a buzzer alert later without affecting performance.
She also added a simple calibration step: taking dry and wet soil readings to set thresholds. Within two weeks, she had a working prototype that blinked the red LED when moisture dropped below 30%. Her teacher displayed it at the school science fair.
This project taught her not only coding and circuit design but also problem-solving, iteration, and documentation—all critical skills in tech fields.
Frequently Asked Questions
Can I use Arduino without knowing C++?
Yes. While Arduino uses a C++-based syntax, beginners can start with basic commands like digitalWrite(), analogRead(), and if-statements without deep language knowledge. As you progress, learning more C++ will enhance your capabilities.
What should I do if my board isn’t recognized by the computer?
First, try a different USB cable—one that supports data transfer (not just charging). Then reinstall the drivers if necessary. On some Windows machines, the CH340 driver may be required for clone boards. Also, check Device Manager to see if the port appears when plugged in.
How can I power my Arduino project without a computer?
You can use a 9V battery with a barrel jack adapter, a USB power bank, or a regulated 5V DC supply. Ensure voltage stays within safe limits to avoid damaging the board.
Conclusion: Start Small, Think Big
Mastering Arduino programming doesn’t happen overnight, but every expert started with a blinking LED. By following structured steps, applying best practices, and building increasingly complex projects, you develop both technical fluency and creative confidence. The skills you gain—circuit design, logical thinking, debugging—are transferable to robotics, IoT, and even professional embedded development.


 浙公网安备
33010002000092号
浙公网安备
33010002000092号 浙B2-20120091-4
Comments
No comments yet. Why don't you start the discussion?