
Grooming your dog at home doesn’t have to be stressful or messy. With the right tools, technique, and a calm environment, you can achieve professional-quality results while strengthening your bond with your pet. Clippers are one of the most effective tools for managing your dog’s coat, especially during shedding seasons or for breeds that require regular trimming. However, improper use can lead to nicks, uneven cuts, or anxiety in your dog. This guide walks you through everything you need to know—from choosing the right clippers to executing a seamless trim—so you can groom your dog safely and confidently.
Selecting the Right Clippers and Accessories
Not all clippers are created equal. Using human hair clippers on dogs can overheat quickly and fail to cut through thick fur. Pet-specific clippers are designed to handle coarser coats and run cooler during extended use. Look for models with adjustable blades, low noise output, and ergonomic designs to reduce hand fatigue.
Popular brands like Andis, Oster, and Wahl offer durable options suitable for different coat types. For long-haired or double-coated breeds (e.g., Huskies, Golden Retrievers), consider a high-speed rotary motor clipper. For short-haired dogs like Beagles or Boxers, a standard magnetic motor may suffice.
Essential accessories include:
- Multiple blade sizes (commonly #10, #7, #5, #4)
- Blade coolant or spray
- A soft brush and comb for detangling
- Treats for positive reinforcement
- Nail clippers and styptic powder (in case of accidental nicks)
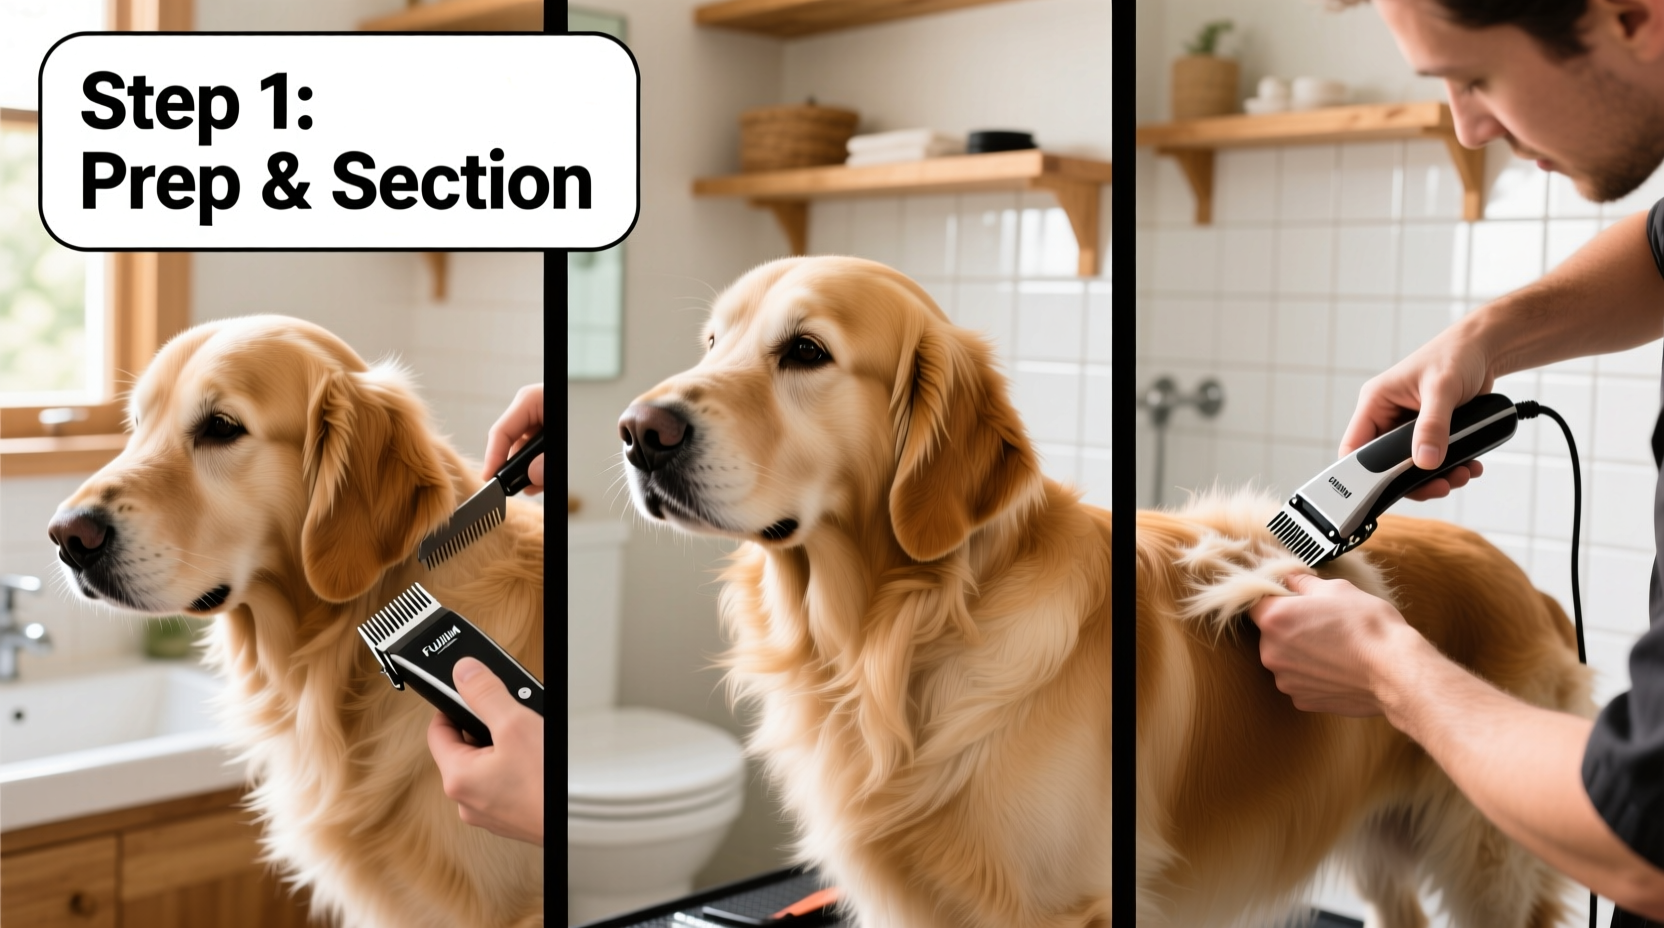
Preparing Your Dog for Grooming
Success begins before the first buzz. A well-prepared dog is calmer, more cooperative, and less likely to resist. Start by brushing your dog thoroughly to remove mats and tangles. Matted fur traps heat from clippers and increases the risk of pulling or cutting the skin.
Choose a quiet, well-lit area free from distractions. Lay down a non-slip mat to prevent slipping. If your dog is anxious, introduce the clippers gradually. Turn them on near—but not touching—the dog—and reward calm behavior with treats. Let your dog sniff the tool and associate it with positive experiences.
“Desensitization is key. Dogs respond best when introduced slowly to new sensations. Five minutes of daily exposure over a week can make a huge difference.” — Dr. Laura Bennett, Veterinary Behaviorist
Step-by-Step Guide to Safe and Smooth Trimming
Follow this timeline to ensure a controlled, efficient grooming session:
- Brush again: After initial prep, re-brush to catch any missed tangles.
- Start with large areas: Begin on the back and sides using a #10 or #7 blade. Move in the direction of hair growth with slow, overlapping strokes.
- Work systematically: Divide the body into sections—back, sides, shoulders, hindquarters—to avoid missing spots.
- Cool the blades: Spray blade coolant every 5–10 minutes to prevent overheating.
- Switch blades for sensitive areas: Use a finer blade (#15 or #30) around the face, paws, and tail. Never force the clipper through resistance.
- Check for evenness: Run your hand over trimmed areas to feel for bumps or missed patches.
- Final brush and inspection: Remove loose hair and inspect for any redness or minor cuts.
Common Mistakes and How to Avoid Them
Even experienced owners make errors. The following table outlines frequent issues and practical solutions:
| Mistake | Why It's Risky | How to Prevent |
|---|---|---|
| Using dull blades | Pulls fur, causes discomfort, increases skin irritation | Replace or sharpen blades every 3–6 months with regular use |
| Clipping against the grain aggressively | Can nick thin skin, especially on belly and legs | Always follow hair growth; use caution on delicate areas |
| Ignoring signs of anxiety | Leads to sudden movements, injury risk | Pause if dog trembles, growls, or tries to escape |
| Skipping blade maintenance | Overheating reduces efficiency and safety | Clean blades with a brush after each use; oil weekly |
Real Example: Grooming a Nervous Rescue Terrier
Max, a two-year-old Jack Russell Terrier rescued from a shelter, had never been clipped before. His owner, Sarah, attempted a full trim in one session, which ended in panic and a small cut on his leg. Discouraged but determined, she consulted a groomer who advised a phased approach.
Sarah began by letting Max hear the clippers while receiving treats. Over five days, she touched the turned-off clippers to his back, then briefly turned them on near him. On day six, she clipped just a small patch on his shoulder—rewarding him immediately. Over the next three weeks, she gradually increased coverage. By the end, Max stood calmly during a full-body trim. The key was patience and incremental progress.
Essential Grooming Checklist
Use this checklist before each grooming session to ensure safety and efficiency:
- ✅ Brush coat thoroughly to remove tangles
- ✅ Charge or plug in clippers; test function
- ✅ Prepare all tools within reach (blades, coolant, comb, treats)
- ✅ Choose correct blade size for each body area
- ✅ Calm your dog with gentle handling and verbal praise
- ✅ Clip in direction of hair growth with steady, slow passes
- ✅ Cool blades regularly during use
- ✅ Inspect skin post-groom for irritation or nicks
- ✅ Clean and oil clippers after use
Frequently Asked Questions
How often should I clip my dog’s coat?
It depends on breed and coat type. Fast-growing breeds like Poodles benefit from clipping every 4–6 weeks. Short-haired dogs may only need seasonal grooming. Monitor coat length and condition to determine frequency.
Can I use human clippers on my dog?
No. Human clippers lack the power and cooling features needed for dog fur. They can overheat quickly and increase the risk of burns or pulling. Always use clippers designed for pets.
What should I do if I accidentally cut my dog’s skin?
Stay calm. Apply gentle pressure with a clean cloth. Use styptic powder or cornstarch to stop bleeding. Most minor nicks heal quickly. If the cut is deep or won’t stop bleeding, contact your vet.
Final Tips for Long-Term Success
Consistency builds confidence—for both you and your dog. Regular grooming isn’t just about appearance; it supports skin health, reduces shedding indoors, and allows early detection of lumps, ticks, or infections. As you become more familiar with your dog’s coat and temperament, you’ll develop a rhythm that makes each session smoother than the last.
Keep a log of grooming dates, blade usage, and behavioral notes. This helps track patterns and improve future sessions. And don’t hesitate to consult a professional groomer for tricky areas like sanitary trims or ear feathering, especially when starting out.
“Home grooming empowers owners to take charge of their pet’s hygiene. When done correctly, it’s cost-effective, bonding, and beneficial for overall wellness.” — Tina Reyes, Certified Master Groomer
Take the Next Step
You now have the knowledge and structure to begin grooming your dog at home with confidence. Start small, stay patient, and celebrate progress. Every stroke of the clipper strengthens your ability to care for your pet independently. Share your journey with other pet owners, leave a comment with your experience, or pass this guide to someone who could use a little help keeping their furry friend looking sharp.


 浙公网安备
33010002000092号
浙公网安备
33010002000092号 浙B2-20120091-4
Comments
No comments yet. Why don't you start the discussion?