
Drawing a bowl may seem like a basic exercise, but it’s a foundational skill that teaches form, perspective, light, and shadow. Whether you're a beginner artist or someone refining their observational drawing abilities, mastering the bowl offers surprising depth. A well-drawn bowl isn’t just about shape—it's about volume, texture, and realism. With attention to proportion, contour, and tonal gradation, even a simple ceramic dish can become a compelling study in visual perception.
The key lies in breaking down the complex into manageable steps. By understanding how light interacts with curved surfaces and how perspective alters circular forms, you can transform a flat circle on paper into a three-dimensional object that feels tangible.
Understanding Form and Perspective
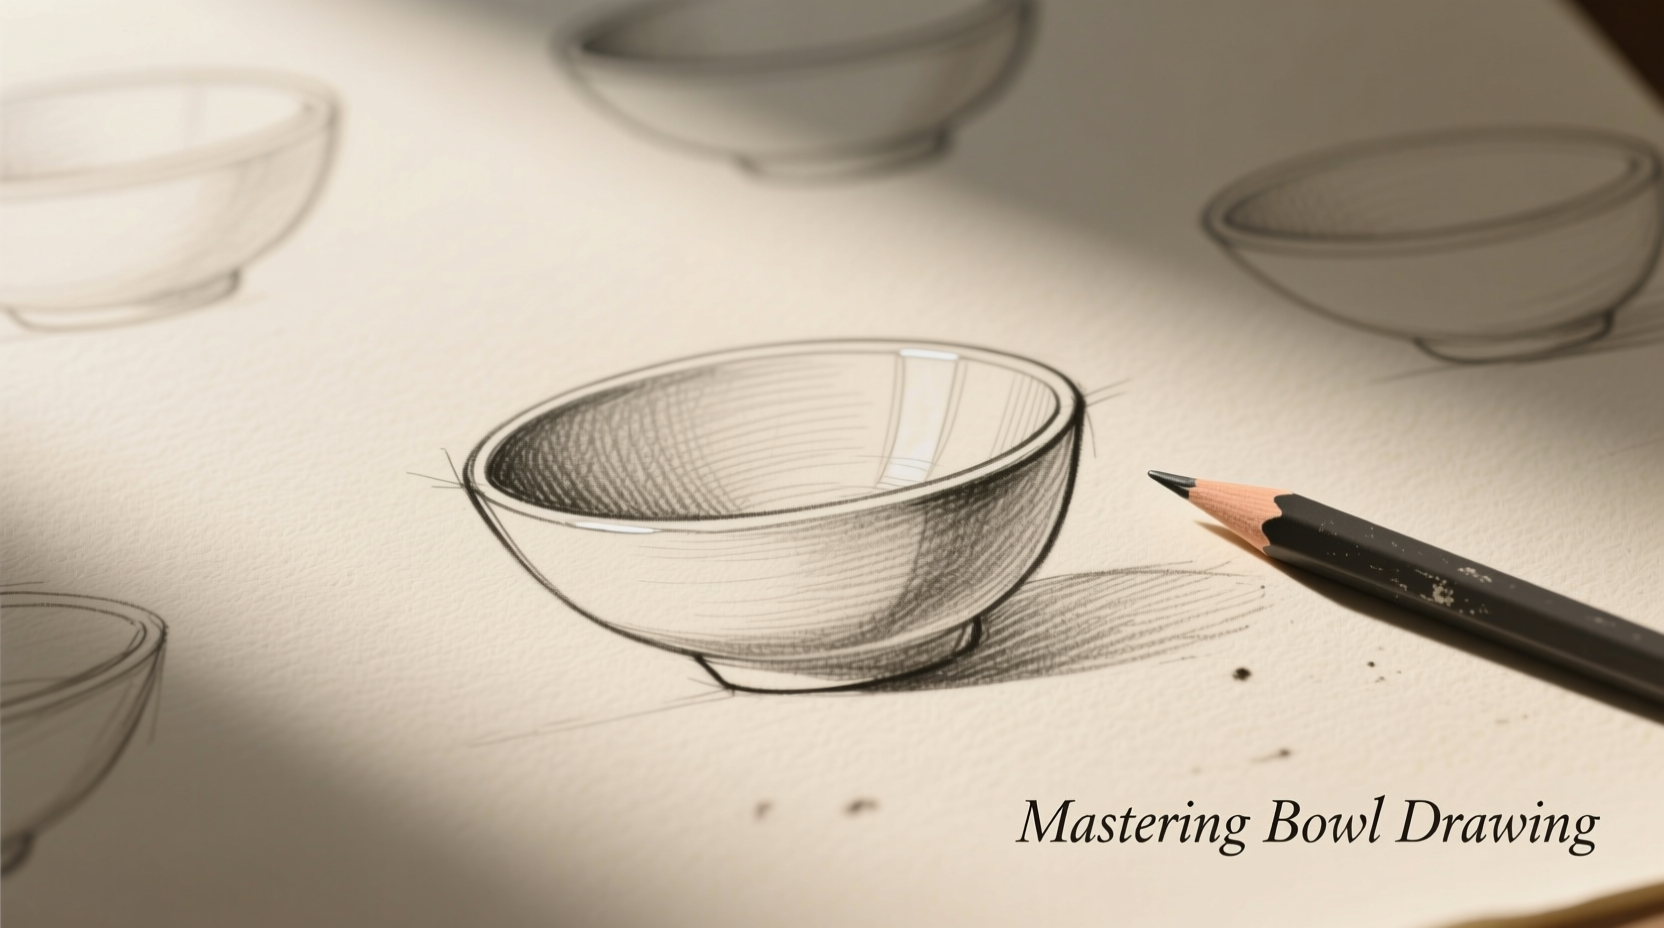
A bowl is essentially a hollow cylinder or hemisphere viewed from various angles. The way it appears changes dramatically depending on your viewpoint. From directly above, the rim forms a perfect circle. At eye level, it becomes an ellipse. From below, you see the interior curvature more prominently. Recognizing these shifts is essential for accurate representation.
Start by lightly sketching the outer edge using gentle curves. Avoid pressing too hard—this is a guide, not the final line. Use a ruler or compass if needed, especially when practicing symmetry. Then draw the inner rim, which should follow the same elliptical logic but appear slightly narrower due to depth.
The illusion of depth comes from understanding foreshortening—the visual effect where objects appear compressed when seen from certain angles. For example, the far side of the bowl’s interior will look higher and tighter than the near side. This subtle shift creates realism.
Step-by-Step Guide to Drawing a Realistic Bowl
- Choose Your Reference Angle: Decide whether you’re drawing the bowl from above, front, or below. Each angle affects the shape of the rim and visibility of the interior.
- Sketch the Outer Rim: Lightly draw an oval (ellipse) representing the top edge. Make sure the sides are symmetrical and balanced.
- Add the Inner Rim: Draw a second, smaller ellipse inside, following the same orientation. Its width depends on the thickness of the bowl’s wall.
- Connect the Edges: Draw two vertical or curved lines connecting the outer and inner ellipses at both ends. These define the thickness of the rim.
- Draw the Interior Curve: Sketch the inner surface rising from the base to meet the inner rim. Pay attention to curvature smoothness—avoid sharp corners unless drawing angular modern designs.
- Define the Base: If visible, add the bottom curve or flat underside, keeping perspective consistent.
- Refine Contours: Go over your sketch with firmer lines, cleaning up any wobbles while preserving accurate proportions.
- Add Shading: Identify a single light source. Shade the opposite side darkest, use mid-tones along the curve, and leave highlights where light hits directly.
Shading Techniques for Realism
Shading brings a flat outline to life. Begin by identifying where the light source is located—typically top-left or top-right for consistency. The area closest to the light remains brightest, often left white or lightly toned. As the surface curves away, value darkens gradually.
Use a range of pencils (HB, 2B, 4B, 6B) to achieve smooth transitions. Start with lighter pressure and build up darkness slowly. Blend with a tortillon or tissue for soft gradients, especially inside the bowl where shadows deepen toward the center.
Pay special attention to the cast shadow—the shadow the bowl projects onto the surface beneath. It anchors the object and enhances realism. Make it slightly blurred at the edges and darker near the base.
| Technique | Purpose | Best Tools |
|---|---|---|
| Hatching | Creating directional texture and tone | HB–2B pencil |
| Blending | Smooth gradient transitions | Tortillon, tissue, finger |
| Erasing for Highlights | Recovering bright spots on curved surfaces | Kneaded eraser |
| Crosshatching | Adding depth in recessed areas | 4B–6B pencil |
Stylistic Variations: From Minimalist to Ornate
Once you’ve mastered the basic form, experiment with style. A minimalist bowl might feature clean lines and subtle shading, emphasizing simplicity and elegance. In contrast, a decorative bowl could include intricate patterns, textures like wood grain or ceramic glaze, or even handles and feet.
To draw a patterned bowl, first establish the underlying structure. Then overlay designs, making sure they conform to the curvature. For instance, stripes should bend around the form, getting closer together as they wrap around the back.
Materials also influence appearance. A glass bowl reflects light sharply and shows transparency; a clay pot has rougher texture and muted tones. Observe real examples closely to capture these nuances.
Common Mistakes and How to Avoid Them
- Misaligned Ellipses: When the outer and inner rims don’t share the same angle, the bowl looks distorted. Align their major axes carefully.
- Flat Shading: Applying uniform gray instead of gradual value shifts kills dimension. Practice gradient scales regularly.
- Overworking the Paper: Too much erasing or layering can damage the surface. Work progressively from light to dark.
- Neglecting the Interior: Many beginners shade only the outside. The inside holds deeper shadows and complex reflections.
- Ignoring Proportions: A bowl that’s too tall or wide breaks believability. Measure against reference points early in the process.
“Drawing simple objects like bowls trains your eye to see beyond outlines—to perceive volume, space, and light as interconnected elements.” — Rafael Mendez, Drawing Instructor at Pacific Art Academy
Mini Case Study: From Flat to Three-Dimensional
Sophie, a self-taught artist, struggled with making her drawings look “solid.” Her early sketches of bowls appeared flat, almost like stickers pasted on paper. After studying perspective principles and practicing ellipses daily for two weeks, she began incorporating consistent light sources and gradual shading.
She started placing a white ceramic bowl under a desk lamp and sketching it from multiple angles. Within a month, her work showed dramatic improvement. One piece—a low-angle view of a flared rice bowl with soft graphite gradients—was selected for a local community art display. Her breakthrough came not from talent, but from disciplined focus on fundamentals.
Checklist for Mastering Bowl Drawing
- Set up a real bowl or reference image with clear lighting
- Lightly sketch the outer and inner ellipses aligned to the same axis
- Connect the rims to define thickness and depth
- Draw the interior curve with smooth, flowing lines
- Identify the primary light source
- Apply graduated shading from highlight to core shadow
- Add a cast shadow to ground the object
- Refine edges and enhance contrasts for clarity
- Review proportions and symmetry before finalizing
- Practice variations: transparent, metallic, textured bowls
Frequently Asked Questions
How do I make my bowl look round and not flat?
The illusion of roundness comes from continuous tonal gradation. Avoid hard lines across curved surfaces. Instead, blend smoothly from light to dark, mimicking how light wraps around a sphere. Also ensure your ellipses are correctly angled to suggest depth.
What pencil should I use for drawing a realistic bowl?
Start with an HB for light construction lines, then use 2B–4B for mid-tones and 6B for deep shadows. Having a range allows control over contrast and softness. A mechanical pencil can help with precision in small details.
Can I draw a bowl without a reference?
You can, but working from observation significantly improves accuracy. Even experienced artists use references to capture subtle curves and lighting effects. Use photos or real objects until spatial reasoning becomes intuitive.
Conclusion: Elevate Your Art Through Simple Forms
Mastering bowl drawing is not about creating masterpieces overnight. It’s about developing the discipline to observe, measure, and render with intention. Every stroke teaches something—about proportion, about light, about patience. These lessons compound, forming the foundation for drawing any rounded object, from vases to fruit to human faces.
The simplicity of a bowl belies its power as a training tool. Return to it often, challenge yourself with new angles and materials, and notice how your confidence grows. Soon, what once seemed mundane will feel like mastery in motion.


 浙公网安备
33010002000092号
浙公网安备
33010002000092号 浙B2-20120091-4
Comments
No comments yet. Why don't you start the discussion?