
A cluttered desk undermines both productivity and peace of mind. Beneath the surface—literally—lurks the real culprit: a tangle of power cords, USB cables, Ethernet lines, and charging leads. Left unchecked, this mess can lead to tripping hazards, accidental disconnections, and even reduced airflow around sensitive electronics. But with thoughtful planning and consistent execution, it’s entirely possible to transform that chaotic web into an organized, nearly invisible system. The goal isn’t just aesthetics—it’s functionality, safety, and long-term sustainability of your workspace.
Why Cable Management Matters Beyond Looks
Cable clutter is more than an eyesore. It affects how you interact with your workspace on a daily basis. A study by Princeton University’s Neuroscience Institute found that physical clutter in your environment reduces your ability to focus and process information efficiently. When cables snake across your floor or drape over the edge of your desk, they become constant visual distractions—even subconsciously.
Beyond cognitive load, poor cable organization poses tangible risks:
- Safety hazards: Loose cables increase the risk of tripping, especially in shared workspaces or homes with children and pets.
- Equipment damage: Yanking or pinching cables during cleaning or movement can fray insulation or loosen connectors.
- Heat buildup: Tightly bundled wires without airflow can trap heat, potentially shortening device lifespans.
- Maintenance difficulty: Troubleshooting becomes harder when you can’t trace which cable serves which device.
Effective cable management is not about hiding problems—it's about solving them systematically. And one of the most impactful places to start? Right under your desk.
Step-by-Step Guide to Hiding Wires Under Your Desk
Transforming your under-desk area from chaos to order requires a repeatable process. Follow these steps for lasting results:
- Unplug and Remove Everything
Start with a blank slate. Disconnect all devices and remove every cable from beneath your desk. Lay them out on the floor so you can assess what you’re working with. - Inventory Your Cables
List each cable by type and purpose: monitor power, laptop charger, USB hub, Ethernet, speakers, etc. Identify duplicates or outdated cords (like old AC adapters) and recycle them responsibly. - Shortlist Only What You Need
Adopt a minimalist mindset. If a device isn’t used daily, consider storing its cable separately. This reduces bulk and simplifies future access. - Group by Device Zone
Cluster cables based on their endpoint: computer tower, monitor setup, charging station. This makes routing logical and modular. - Measure Required Lengths
Use a tape measure to determine how much slack each cable needs. Avoid excess looping—this creates unnecessary volume. For longer runs, use velcro straps to coil neatly. - Route Along Designated Paths
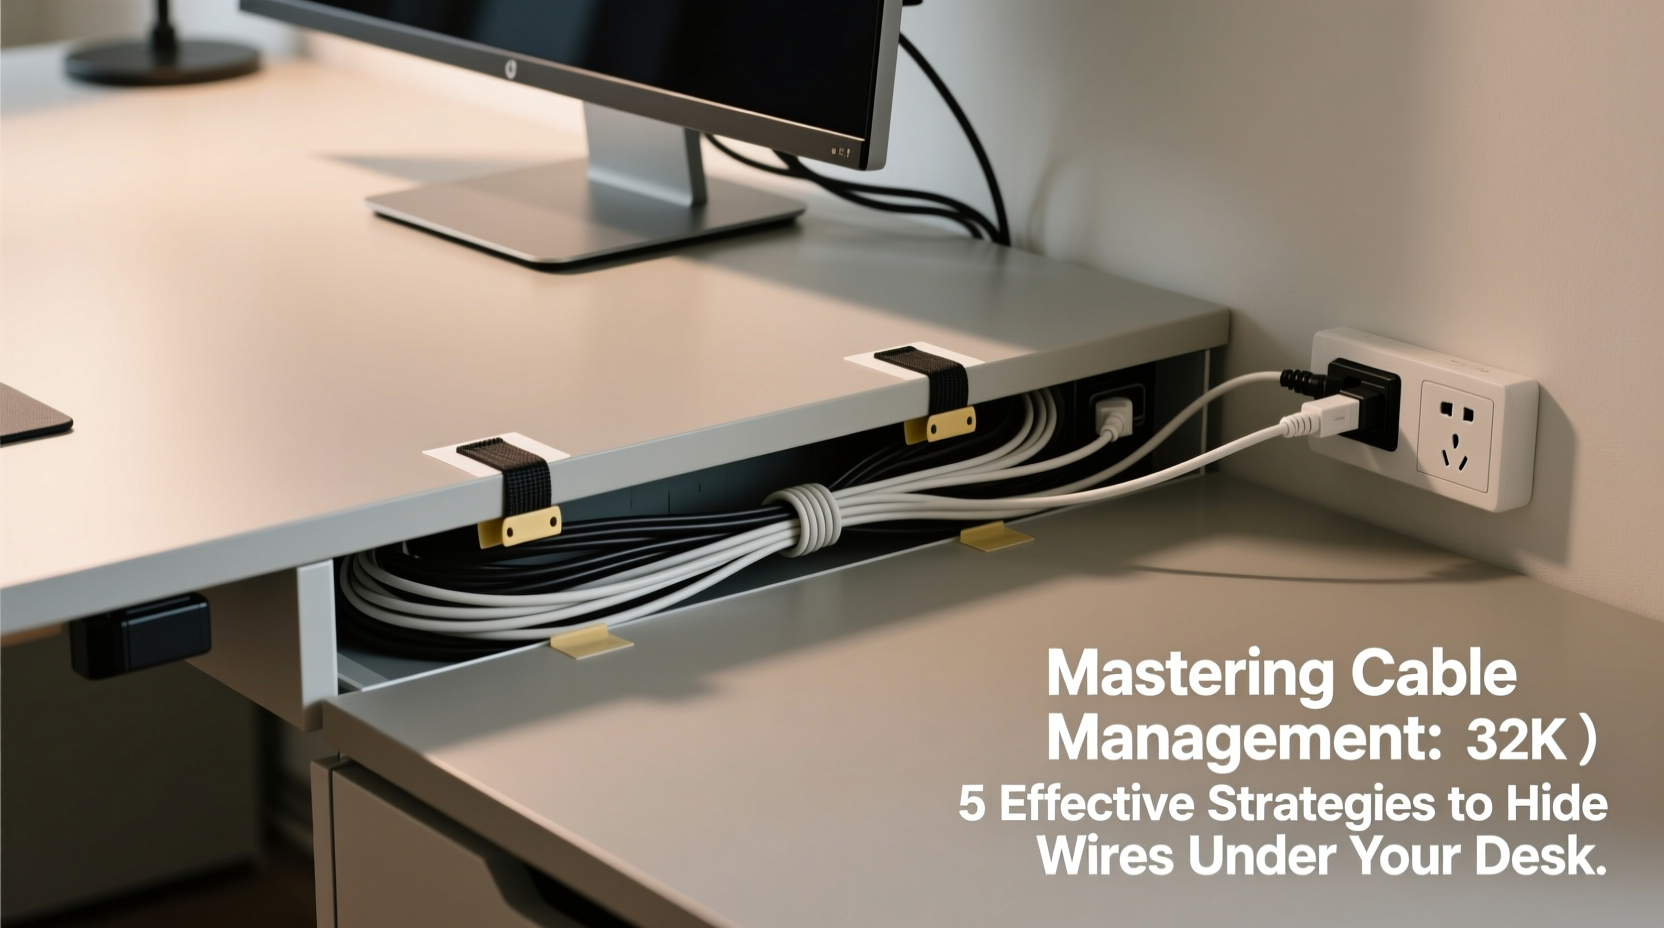
Decide whether you’ll run cables along the back, side, or through grommet holes. Stick to one primary path to maintain consistency. - Secure with Appropriate Fasteners
Use adhesive cable clips, under-desk trays, or raceways to hold bundles in place. Never overtighten zip ties; leave room for heat expansion. - Connect and Test
Reconnect all devices and verify functionality. Check monitors, audio, network, and peripherals. Make adjustments as needed before finalizing. - Install Concealment Solutions
Add cable sleeves, fabric wraps, or enclosed raceways to hide grouped wires. Choose finishes that match your desk or wall color. - Create a Maintenance Plan
Schedule a quarterly check to inspect for wear, re-tighten loose fasteners, and update labels if new devices are added.
Choosing the Right Tools for the Job
Not all cable organizers are created equal. The best solution depends on your desk type, number of devices, and aesthetic preferences.
| Solution | Best For | Pros | Cons |
|---|---|---|---|
| Velcro Cable Ties | Daily reconfiguration, temporary setups | Reusable, gentle on cables, easy to adjust | Less rigid structure than zip ties |
| Adhesive Clips | Flat surfaces, light-to-medium loads | Inexpensive, no tools required, low profile | May lose adhesion over time on some materials |
| Under-Desk Cable Tray | Heavy cable loads, permanent desks | Full concealment, supports weight, professional look | Requires drilling or strong mounting |
| Cable Raceway (Plastic Duct) | Wall-to-desk routing, fixed installations | Encloses multiple cables, paintable exterior | Visible unless painted; installation takes time |
| Braided Sleeves | Decorative bundling, exposed sections | Flexible, breathable, modern appearance | Doesn’t secure to surface—needs additional anchors |
Designing for Accessibility and Future Expansion
A common mistake in cable management is optimizing solely for current needs. Technology evolves, and so will your setup. Smart cable organization anticipates change.
When planning your layout, reserve space for at least two additional cables per major device zone. Leave slack—about 12–18 inches—in strategic locations like behind monitors or near power strips. This “service loop” allows for easy unplugging and repositioning without strain.
Consider using a modular power strip with USB ports and surge protection mounted underneath the desk. Position it so outlets face outward or downward, making plug-in changes easier without reaching blindly behind furniture.
“Good cable management isn’t about eliminating cables—it’s about creating a system where every wire has a purpose and a place.” — Jordan Lee, Industrial Designer & Workspace Consultant
Also, think about accessibility for maintenance. If you need to unplug a single device, you shouldn’t have to dismantle half your setup. That’s why removable fasteners like Velcro or snap-on raceways outperform permanent solutions like glued-down zip ties.
Real Example: Transforming a Home Office Setup
Take Sarah, a freelance graphic designer who upgraded her basement workspace last year. Her L-shaped desk housed two monitors, a desktop PC, a drawing tablet, external hard drives, a printer, and multiple chargers. Initially, she draped everything behind the desk, securing only with a few zip ties. Within months, dust accumulated, cables tangled, and she accidentally pulled out her monitor during cleaning—damaging the port.
She decided to redesign her under-desk layout using a systematic approach:
- Purchased an under-desk cable management tray (18” x 6”) with mounting brackets.
- Labeled each cable with waterproof printed tags.
- Grouped related devices: one bundle for dual monitors (power + HDMI), another for PC peripherals.
- Used braided nylon sleeves for visible sections leading to the desk surface.
- Installed a vertical raceway along the leg of the desk to route cables from floor-level outlets.
- Mounted a slim power strip with USB-C ports underneath, angled for easy access.
The result? A completely hidden infrastructure that still allowed her to swap devices, troubleshoot connections, and clean effortlessly. Most importantly, her workflow improved—she spent less time untangling cords and more time designing.
Checklist: Achieve a Wire-Free Look Under Your Desk
Use this actionable checklist to ensure no step is missed:
- ☐ Unplug and remove all cables from under the desk
- ☐ Sort and label each cable by function and device
- ☐ Discard obsolete or damaged cords
- ☐ Measure required lengths and trim excess (if applicable)
- ☐ Group cables into functional bundles
- ☐ Choose appropriate fasteners and concealment tools
- ☐ Install under-desk tray, clips, or raceway
- ☐ Route cables along designated paths—avoid sharp bends
- ☐ Secure bundles with Velcro or reusable ties
- ☐ Reconnect and test all devices
- ☐ Conceal with sleeves or enclosed ducts
- ☐ Document the layout (optional but helpful for future reference)
- ☐ Schedule a maintenance reminder for 3 months ahead
Frequently Asked Questions
Can I manage cables without drilling or modifying my desk?
Absolutely. Adhesive-backed clips, under-desk trays with strong tape mounts, and freestanding cable sleeves require no permanent alterations. Many modern solutions use industrial-strength adhesives that hold securely on wood, metal, and laminate surfaces.
How do I prevent cables from slipping out of clips?
Ensure the clip width matches the cable diameter. Overfilling causes slippage. For heavier cables like power bricks, use U-shaped clips or cradle-style holders. Also, position clips where natural tension holds the cable in place—such as after a bend or turn.
Is wireless charging a viable alternative to reduce cable clutter?
Wireless charging eliminates one cord per device, but it doesn’t replace all cables. Most wireless pads still require a power connection, and laptops, monitors, and desktops remain wired. However, integrating Qi chargers into your desk surface or using multi-device charging stations can significantly reduce visible tangles.
Conclusion: Build a System, Not Just a Solution
Hiding wires under your desk isn’t a one-time cleanup task—it’s the foundation of a well-designed digital lifestyle. Once implemented, proper cable management saves time, reduces stress, and protects your investment in technology. The strategies outlined here go beyond quick fixes; they establish a repeatable system that adapts as your needs evolve.
Start today with a single step: unplug and assess. From there, build methodically. Choose quality tools, respect cable physics, and prioritize access over invisibility. A truly effective setup isn’t just hidden—it’s intuitive.


 浙公网安备
33010002000092号
浙公网安备
33010002000092号 浙B2-20120091-4
Comments
No comments yet. Why don't you start the discussion?