
Cake decorating is both an art and a science—a blend of precision, creativity, and patience that transforms simple baked layers into edible masterpieces. Whether you're preparing a birthday treat for your child or designing a wedding centerpiece, the right techniques can elevate your cakes from ordinary to extraordinary. This guide walks through essential tools, foundational methods, advanced tips, and practical workflows suitable for every skill level.
Essential Tools and Ingredients for Success
Before applying frosting or piping intricate designs, ensure you have the right equipment. The quality of your tools directly impacts the final result. A few key items form the foundation of any decorator’s toolkit:
- Offset spatulas (small and large)
- Piping bags and couplers
- Assorted piping tips (round, star, leaf, petal)
- Cake turntable
- Bench scraper or icing smoother
- Sifting tool for powdered sugar and cocoa
- Food coloring gels (avoid liquid for better consistency control)
- Stabilized whipped cream or buttercream base
Choosing the Right Frosting
The type of frosting you use determines texture, stability, and visual appeal. Here’s a comparison of common options:
| Frosting Type | Best For | Pros | Cons |
|---|---|---|---|
| Buttercream (American) | Beginners, bold colors | Easy to make, highly customizable | Sweet taste, melts in heat |
| Swiss Meringue Buttercream | Smooth finishes, elegant designs | Less sweet, silky texture | Requires egg whites and more technique |
| Royal Icing | Detailed work, cookies, structured decorations | Dries hard, ideal for fine lines | Not creamy; limited use on full cakes |
| Ganache | Drip cakes, glossy finish | Rich flavor, professional look | Needs precise temperature control |
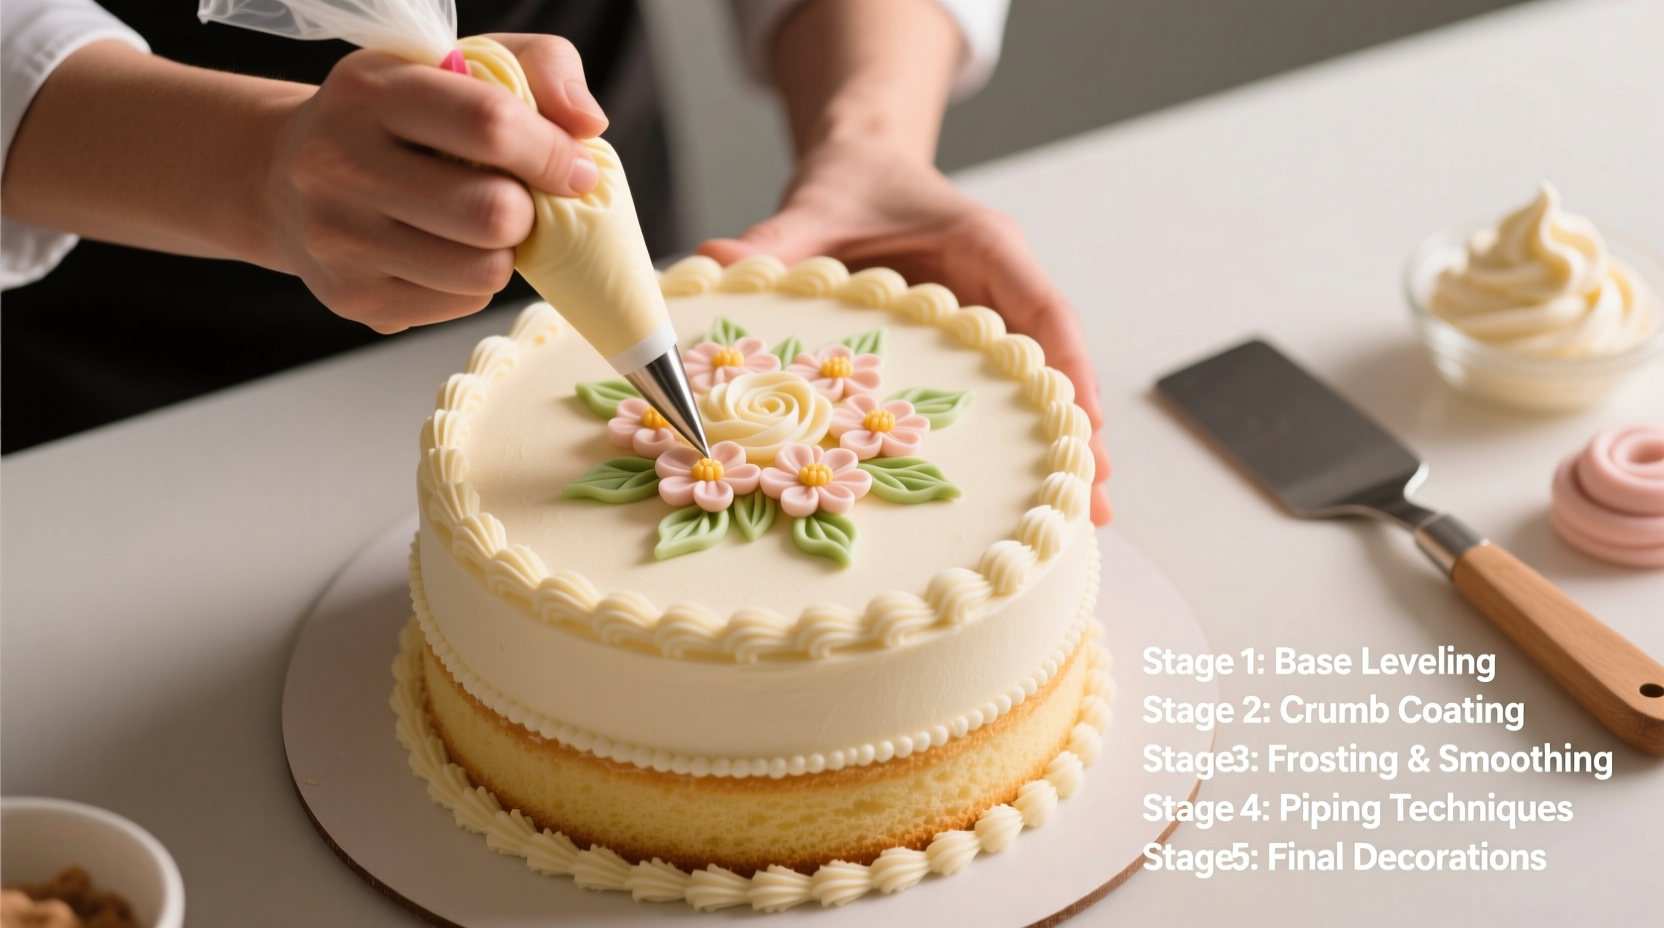
Step-by-Step Cake Decorating Process
Follow this universal workflow regardless of experience level. Master each stage before advancing to complex designs.
- Level and Stack: Use a serrated knife or cake leveler to trim domed tops. Apply a thin layer of frosting between layers (a \"crumb coat\") to seal in crumbs.
- Chill the Cake: Refrigerate for 20–30 minutes after stacking to stabilize structure.
- Apply Crumb Coat: Spread a thin, even layer of frosting over the entire cake. Smooth with a bench scraper while rotating the turntable.
- Final Chill: Freeze for 15 minutes to set the crumb coat before the final layer.
- Final Frosting Layer: Apply generous frosting and smooth again using long, even strokes. Rotate as you go.
- Decorate: Begin piping borders, rosettes, or other elements. Work from top to bottom for cleaner results.
“Patience is the most underrated ingredient in cake decorating. Rushing leads to smudges, air bubbles, and frustration.” — Lila Nguyen, Pastry Chef & Instructor at Boston Culinary Arts Studio
Techniques for Every Skill Level
Beginner: Simple Piping and Textures
Start with basic shapes. Use a star tip to pipe rosettes, swirls, or drop flowers. Practice consistent pressure on the piping bag—squeeze steadily from the top, not the middle. Create textured sides by dragging the edge of a spoon or comb scraper vertically along the frosting.
Intermediate: Borders, Drips, and Color Blending
Create modern drip effects using tempered chocolate ganache. Pour slowly around the edge so it cascades naturally. For ombré frosting, divide buttercream into portions, tint each differently, then layer them in the piping bag for a gradient effect when squeezed.
To achieve clean borders, use a small round tip (#3 or #5) and practice continuous shells or dots along the base and top edges.
Advanced: Fondant Sculpting and Airbrushing
Fondant allows for sharp edges, geometric patterns, and 3D figures. Roll it evenly with a non-stick mat and smoothing ball. Drape over a crumb-coated cake, then gently press out air pockets. Use edible glue for attaching pieces.
Airbrushing adds depth and realism. Start with light layers, masking areas you want to protect. Use food-safe colors diluted with alcohol or propylene glycol for best spray performance.
Mini Case Study: From Kitchen Novice to Local Cake Artist
Sophie Ramirez, a home baker from Portland, began decorating cakes for her daughter’s birthdays using boxed mixes and store-bought frosting. After struggling with messy layers and collapsing tiers, she invested in a turntable and watched online tutorials focused on crumb coats and buttercream consistency.
Within six months, Sophie mastered smooth finishes and basic piping. She practiced daily on parchment paper, then moved to dummy cakes. By year’s end, she launched a small business offering custom celebration cakes, now earning supplemental income through local orders and pop-up markets.
Her breakthrough came from mastering temperature control: chilling cakes before frosting and working in a cool kitchen prevented melting and slippage—common pitfalls for beginners.
Common Mistakes and How to Avoid Them
Even experienced bakers encounter setbacks. Recognizing these issues early improves outcomes:
- Crumb-heavy frosting: Always apply a crumb coat and chill before final layering.
- Lopsided layers: Level cakes with a hot knife or cake leveler before stacking.
- Grainy buttercream: Ensure butter is soft but not melted, and sift all powdered sugar.
- Collapsed tiers: Use dowels or bubble tea straws for support in multi-tiered cakes.
- Faded colors: Gel colors deepen over time. Apply tints hours in advance if aiming for bright reds or blacks.
Checklist: Pre-Decoration Readiness
Run through this list before starting:
- ✅ Cakes are fully cooled and leveled
- ✅ Crumbs sealed with a thin frosting layer
- ✅ Cake chilled for at least 20 minutes
- ✅ Frosting consistency tested (should peak and hold shape)
- ✅ Piping bags filled and air expelled
- ✅ Turntable and scrapers clean and ready
- ✅ Workspace cool and free of humidity
FAQ
How do I prevent my cake from sliding off the plate?
Use a non-slip base like a silicone mat or a dab of frosting under the cake board. For heavy or tiered cakes, secure the base with a bit of royal icing or edible glue.
Can I decorate a cake the day before serving?
Yes—most buttercream-decorated cakes keep well refrigerated for up to two days. Bring to room temperature before serving for optimal texture and flavor. Avoid leaving whipped cream or mousse-filled cakes unrefrigerated for more than two hours.
Why does my frosting pull away from the cake edges?
This usually happens if the cake is too cold or the frosting is too firm. Let the cake sit at room temperature for 10–15 minutes before final smoothing. Alternatively, lightly warm your scraper under hot water, dry it, and glide it over the surface for a seamless finish.
Conclusion
Cake decorating grows easier with repetition and attention to detail. What begins as shaky piping and uneven layers evolves into confident, creative expression. The techniques outlined here build progressively—each mastered step unlocks new possibilities. Whether you’re crafting your first birthday cake or refining advanced fondant work, consistency and care yield beautiful results.


 浙公网安备
33010002000092号
浙公网安备
33010002000092号 浙B2-20120091-4
Comments
No comments yet. Why don't you start the discussion?