
Travel photography demands more than just a good eye—it requires preparedness, mobility, and the ability to adapt quickly. One of the most overlooked aspects of seamless shooting on the go is how your gear is stored and accessed. A cluttered or poorly organized camera bag can slow you down, damage equipment, and even cause you to miss critical shots. Whether you're trekking through city streets or hiking remote trails, mastering camera bag organization isn’t optional—it’s essential.
Assess Your Gear Before Packing
The foundation of effective organization begins before you even open your bag. Take inventory of what you’re bringing. Ask yourself: Is each item necessary? Will it serve a purpose during this trip? Overpacking leads to weight, disarray, and increased risk of damage. Limit your kit to essentials—camera body, one or two lenses, batteries, memory cards, cleaning tools, and perhaps a small tripod or filter.
A minimalist approach not only reduces strain but also makes retrieval intuitive. When every slot has a purpose, you eliminate guesswork under pressure.
Create Zones for Quick Access
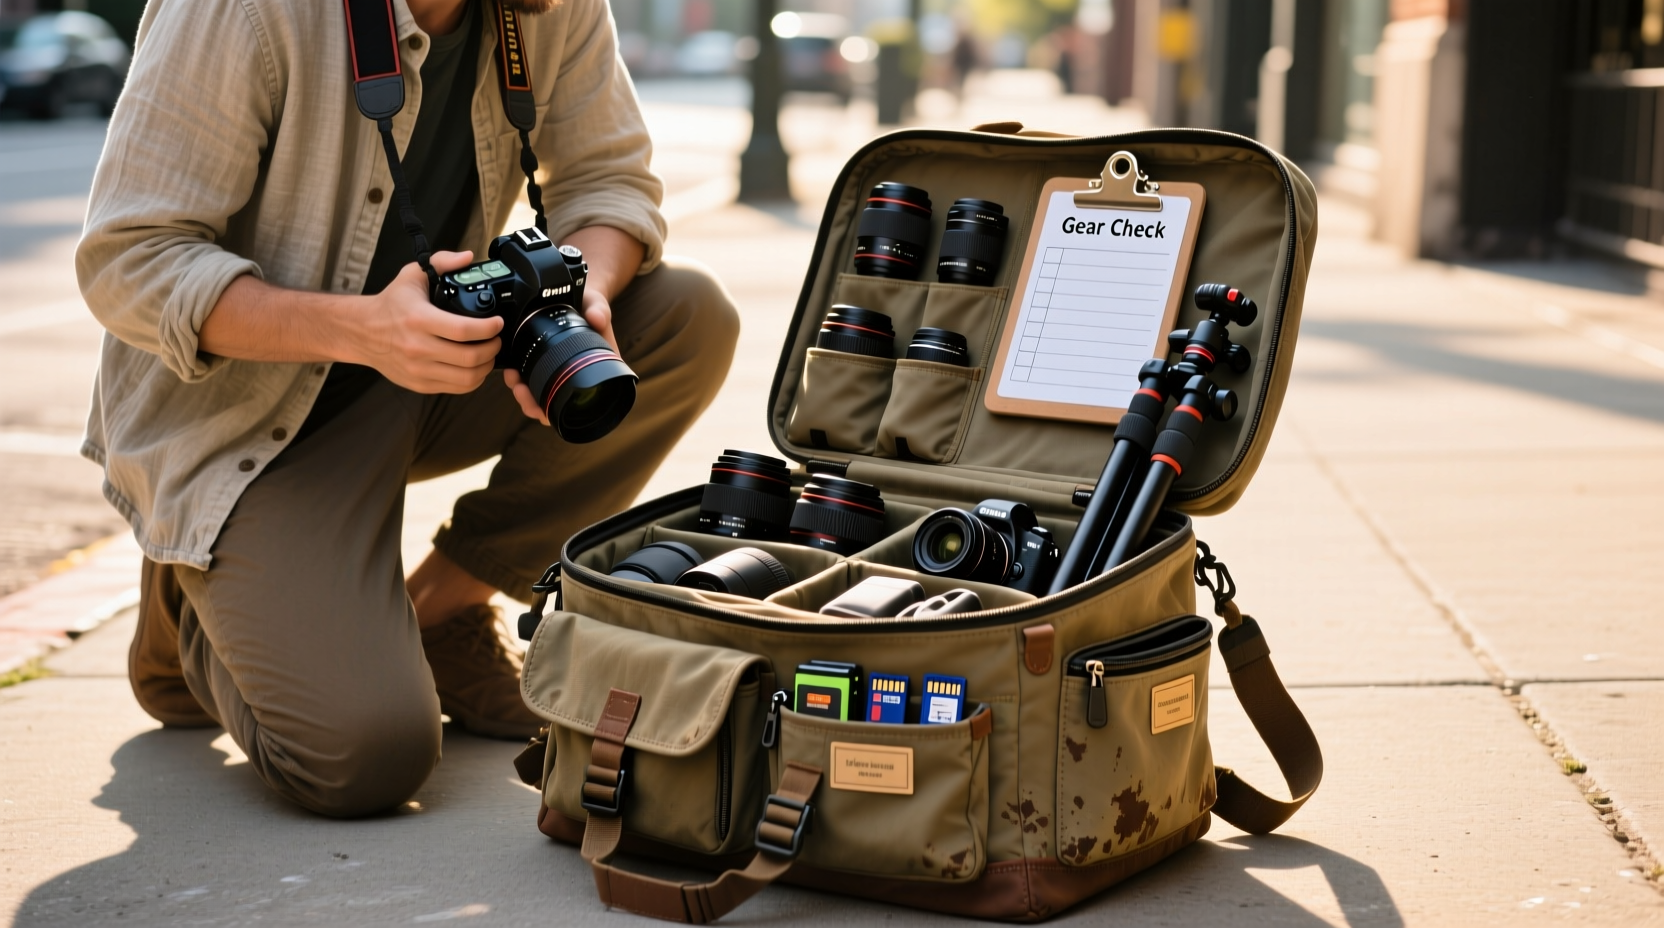
Think of your camera bag like a command center. Divide it into functional zones based on frequency of use and sensitivity of items. The goal is to place frequently used gear where it's easiest to reach—typically in the main compartment or front pockets—while securing fragile or rarely used accessories deeper inside.
- Main Compartment: Reserved for primary camera bodies and attached lenses. Use padded dividers to create snug, custom-fit sections.
- Front Pockets: Ideal for spare batteries, memory cards, lens caps, and filters. Keep these sorted with small pouches or cardholders.
- Side Pockets: Perfect for water bottles, lens cloths, or compact tripods.
- Top Zippered Section: Store personal items like passports, receipts, or a phone here to keep them secure yet accessible.
Customization is key. Most modern bags come with removable dividers—use them to tailor internal layout to your specific setup. Once configured, stick to the layout across trips so muscle memory kicks in when you need speed.
Step-by-Step: Organizing Your Bag in 5 Minutes
Follow this efficient routine before every departure to maintain consistency and readiness.
- Empty and inspect: Remove all contents and check for dust, moisture, or wear on padding.
- Wipe down compartments: Use a dry microfiber cloth to remove debris from interior surfaces.
- Lay out gear: Place all intended equipment on a clean surface to assess what you truly need.
- Insert main items first: Position cameras and lenses in the central zone using adjustable dividers for stability.
- Fill secondary spaces: Load batteries, cards, and cables into labeled pouches and assign them fixed locations.
This process takes less than five minutes but ensures that your bag remains optimized, balanced, and ready for action.
Do’s and Don’ts of Camera Bag Storage
| Do | Don't |
|---|---|
| Use silica gel packs to absorb moisture | Store in damp basements or hot cars |
| Label small pouches (e.g., “CF Cards,” “AA Batteries”) | Mix lens caps loose in a pocket |
| Pack heavier items close to your back for balance | Overstuff the bag beyond its designed capacity |
| Carry a foldable rain cover for weather protection | Leave the bag open while walking through crowds |
Real-World Example: Street Photography in Tokyo
Photographer Lena Cho travels frequently for urban documentary work. During a recent assignment in Tokyo, she relied on a compact sling bag with three main zones: one for her mirrorless camera with a 35mm lens attached, a zippered mesh sleeve for four memory cards (sorted by format), and a magnetic front flap holding extra batteries and a lens pen.
While navigating crowded Shibuya Crossing at dusk, she spotted a fleeting moment—a couple sharing an umbrella under neon lights. Because her camera was secured but instantly accessible with a single strap release, she had it in hand within seconds. No fumbling, no delay. The shot became the cover image of her latest zine.
“My bag setup is muscle memory now,” she says. “I don’t think about where things are—I just reach.”
“Efficiency isn’t about having the most gear; it’s about accessing the right tool at the exact moment it matters.” — Marcus Tran, Travel Photographer & Workshop Leader
Essential Accessories for Smarter Organization
Beyond the bag itself, several small tools dramatically improve order and protection:
- Modular Pouches: Brands like Peak Design and Ruggard offer stackable, magnetic or Velcro-attachable cases for filters, cables, or SD cards.
- Memory Card Wallets: Slim, RFID-safe holders keep cards scratch-free and labeled by date or project.
- Power Bank with Pass-Through Charging: Allows simultaneous device charging and battery replenishment without unpacking everything.
- Microfiber Wrap: A simple cloth roll with elastic loops holds lens pens, wipes, and USB cables without bulk.
Invest in quality over quantity. One well-designed accessory often replaces three cheap, inefficient ones.
Checklist: Pre-Departure Bag Readiness
Before closing the zipper, run through this final verification:
- ✅ All batteries fully charged and stored in designated slots
- ✅ Memory cards formatted and backed up (with spares available)
- ✅ Lens filters and caps securely placed
- ✅ Cleaning kit (blower, cloth, pen) easily reachable
- ✅ Rain cover attached or packed externally
- ✅ Weight evenly distributed and within comfort limits
- ✅ Zippers double-checked and straps adjusted
Frequently Asked Questions
How do I prevent my lenses from scratching inside the bag?
Always use lens caps and rear covers. For added protection, consider padded lens sleeves—even if your bag has dividers. Avoid placing hard objects like keys or flash units directly against glass elements.
Should I carry a second camera body in my bag or leave it at the hotel?
If you're covering dynamic environments—sports, wildlife, or fast-paced events—carrying a second body minimizes lens changes and increases reliability. Otherwise, one body with a versatile zoom may suffice. Evaluate risk versus reward based on your shooting needs.
Is it safe to carry my camera bag as carry-on luggage?
Yes, and it’s highly recommended. Airlines frequently mishandle checked baggage, and camera equipment is sensitive to pressure and temperature shifts. Keep your gear with you, ideally in a TSA-friendly bag that opens flat for security screening.
Final Thoughts: Make Organization a Habit
Great travel photography hinges on preparation as much as inspiration. An organized camera bag doesn’t just protect your investment—it empowers creativity by removing friction between idea and execution. When your gear is logically arranged, you move faster, react quicker, and stay focused on the scene in front of you.
Start today: empty your bag, reassess what stays, and rebuild it with intention. Refine the system over time until every item has a home and every movement feels natural. That’s when your equipment fades into the background—and your vision takes center stage.


 浙公网安备
33010002000092号
浙公网安备
33010002000092号 浙B2-20120091-4
Comments
No comments yet. Why don't you start the discussion?