
Drawing clothing patterns is the foundation of fashion design. It transforms abstract ideas into wearable garments by providing precise blueprints for cutting and sewing fabric. For aspiring designers and home sewers, mastering pattern drawing unlocks creative freedom and technical precision. While it may seem complex at first, breaking the process into manageable steps makes it accessible—even for complete beginners. This guide walks you through the fundamentals, tools, and techniques needed to confidently draft your first patterns.
Understanding the Basics of Pattern Making
Clothing pattern drawing involves creating flat templates that represent each piece of a garment. These templates are used to cut fabric before assembly. Unlike sketching fashion illustrations, pattern drawing is technical and dimensional, requiring accuracy in measurements and proportions.
Patterns are typically made from paper or cardboard and include seam allowances, grain lines, notches, and labeling. They must account for fabric behavior—such as drape, stretch, and shrinkage—and body movement. A well-drafted pattern ensures a good fit and smooth construction.
There are two primary methods: flat pattern making (drafting directly on paper using measurements) and draping (shaping fabric on a mannequin). This guide focuses on flat pattern making, which is ideal for beginners due to its structured, repeatable nature.
“Pattern making is where creativity meets engineering. The best designs fail without accurate patterns.” — Lena Torres, Fashion Design Instructor at London College of Fashion
Essential Tools and Materials
Before starting, gather the necessary tools. Precision is critical, so invest in quality supplies:
- Pattern paper (or tracing paper/butter muslin)
- Ruler (clear grid ruler and L-square recommended)
- French curve and hip curve rulers
- Tape measure (flexible, 150 cm)
- Pencil, eraser, and fine-tip marker
- Tracing wheel and dressmaker’s carbon paper
- Scissors dedicated to paper only
- Push pins or pattern weights
- Measuring tape and tailor’s chalk
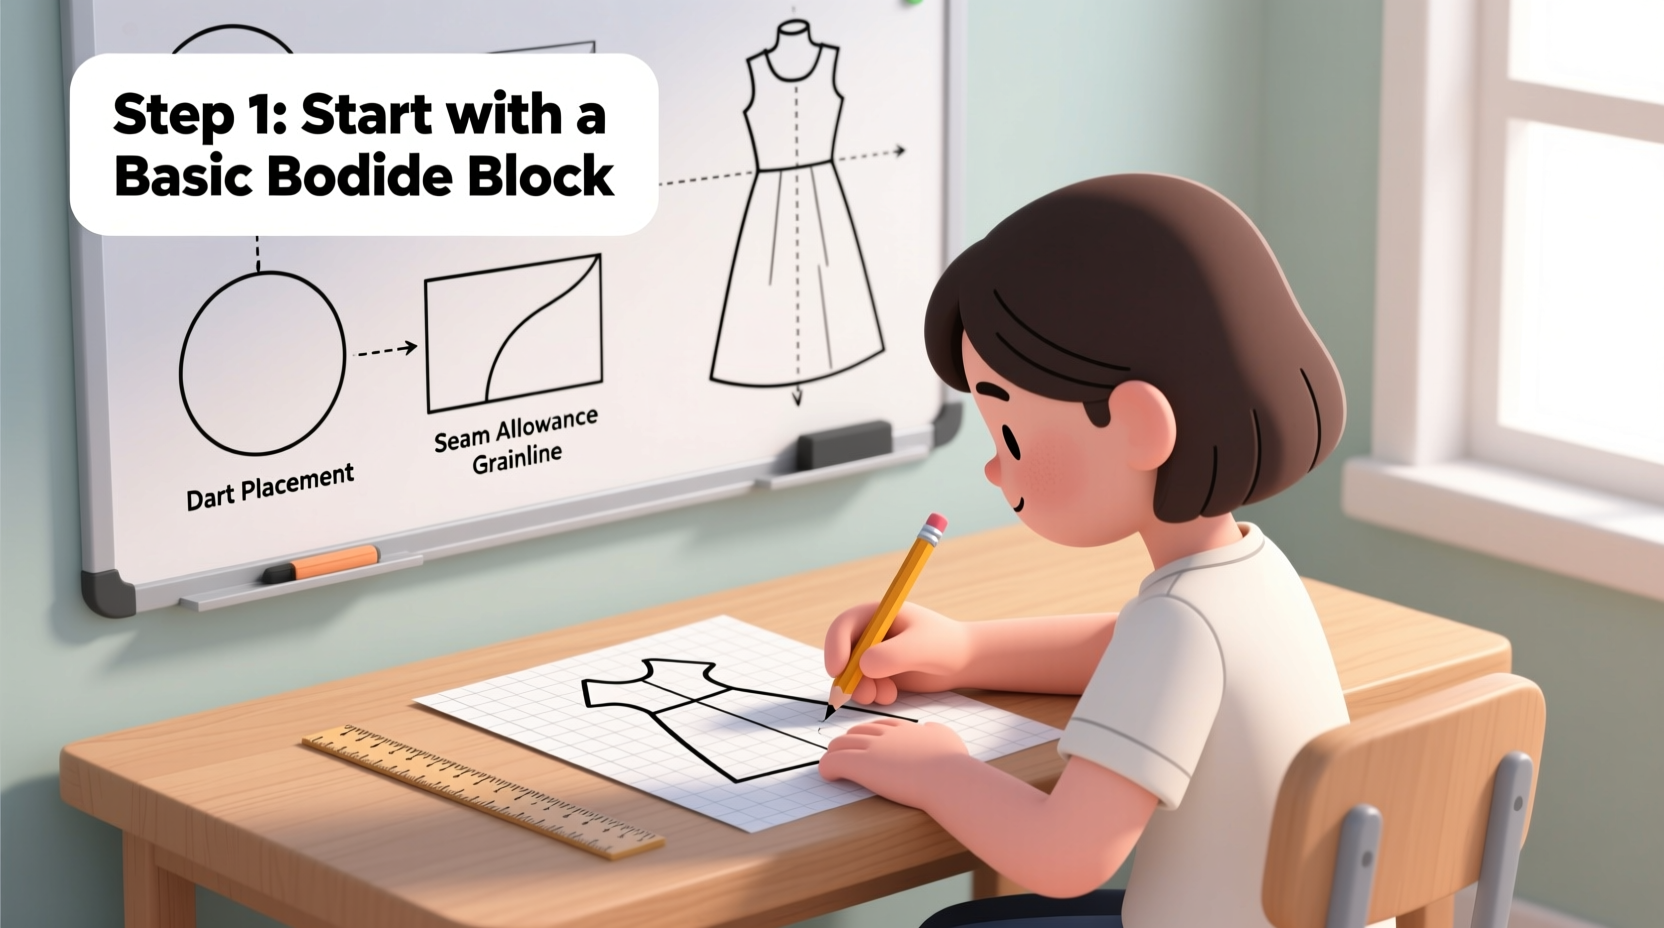
Step-by-Step Guide to Drawing Your First Pattern
Follow this structured approach to draft a basic fitted bodice—a foundational block used in many garments like dresses, blouses, and jackets.
- Take accurate body measurements: Measure bust, waist, high bust, shoulder width, armhole depth, back length, and front length. Use a flexible tape measure and wear fitted clothing.
- Select a base size: Compare your measurements to a standard sizing chart. Choose the closest match as your starting point.
- Draw the center front and center back lines: On pattern paper, draw two vertical lines spaced apart based on your half-bust measurement plus ease (typically 2–3 inches).
- Add horizontal reference lines: Mark the neckline, shoulder, bust line, and waistline using your body measurements. Ensure right angles with an L-square.
- Plot key points: Mark shoulder tip, bust apex, and waist positions. Connect these with construction lines.
- Shape the neckline and shoulders: Draft a gentle curve for the neck, then draw shoulder lines sloping slightly downward.
- Create the armhole: Use a French curve to connect the shoulder end to the armhole depth point, curving smoothly around the bust apex.
- Add darts: Include bust and waist darts to shape the fabric over curves. Standard dart width is 1–1.5 inches at the fullest point.
- Include seam allowances: Add ⅝ inch (1.5 cm) around all edges unless specified otherwise.
- Label and mark: Write the pattern name, size, date, grain line, notches, and folding instructions.
Once completed, cut out the pattern and transfer it onto fabric using a tracing wheel and carbon paper. Test the fit with a muslin mock-up before cutting your final material.
Common Mistakes and How to Avoid Them
Even experienced designers make errors during pattern drafting. Recognizing these early prevents wasted time and fabric.
| Mistake | Consequence | Solution |
|---|---|---|
| Inaccurate measurements | Poor fit, gaping, or tightness | Double-check all body measurements; have someone assist if possible |
| Ignoring ease allowance | Garment too tight to move in | Add 2–4 inches of wearing ease depending on style and fabric |
| Uneven curves | Distorted seams and puckering | Use French curves; blend lines smoothly with light pencil first |
| Forgetting grain lines | Distortion when worn or washed | Always mark grain line parallel to center front/back |
| Skipping test fitting | Uncomfortable or flawed final garment | Always make a toile (mock-up) in cheap fabric first |
Real Example: From Sketch to Wearable Top
Sophie, a beginner designer, wanted to create a simple sleeveless top with a rounded neckline. She started by sketching her idea, then measured her bust, waist, and torso length. Using a basic bodice block, she altered the shoulder width and lowered the armholes slightly for a relaxed fit. She added 2 inches of ease for comfort and drafted a curved hemline.
After cutting her pattern, Sophie made a test version in cotton voile. During the fitting, she noticed the back sat higher than the front. By comparing the muslin to her body, she realized the back neck curve was too shallow. She adjusted the pattern by deepening the back neckline by ½ inch and retested. The second fit was perfect.
This iterative process—draft, test, adjust—is central to successful pattern making. Sophie’s attention to detail ensured her final silk version looked professional and fit flawlessly.
Checklist: Preparing Your First Pattern
Use this checklist before cutting fabric:
- ☑ All body measurements recorded accurately
- ☑ Base size selected from sizing chart
- ☑ Grain line clearly marked on pattern
- ☑ Seam allowances added consistently
- ☑ Notches and darts properly indicated
- ☑ Labels include name, size, date, and orientation
- ☑ Test mock-up completed and fit verified
- ☑ Final adjustments transferred to master pattern
Frequently Asked Questions
Can I draw patterns without a mannequin?
Absolutely. Flat pattern drafting relies on measurements and geometry, not a dress form. However, having a basic dress form can help visualize fit during later stages.
What’s the difference between a block and a style pattern?
A block (or sloper) is a basic, fitted template with minimal design details—used as a starting point. A style pattern is derived from a block but includes design elements like collars, sleeves, gathers, or flares.
How do I scale a pattern up or down?
Use the “slash and spread” method: cut the pattern into sections and shift them outward (to enlarge) or inward (to reduce), redistributing the change evenly across key areas like side seams and darts.
Developing Confidence Through Practice
Like any skill, pattern drawing improves with repetition. Start with simple blocks—bodice, skirt, sleeve—then experiment with modifications. Redraw the same pattern multiple times to build muscle memory and spatial awareness. Over time, you’ll develop an intuitive sense of proportion and balance.
Join online communities or local sewing groups to exchange feedback. Many designers share free blocks and tutorials, offering valuable learning opportunities. Don’t rush perfection; even professionals revise patterns several times before finalizing.
Conclusion
Mastering clothes pattern drawing opens a world of creative possibilities. With clear steps, the right tools, and consistent practice, anyone can learn to translate vision into reality. Begin with foundational blocks, embrace mistakes as part of the process, and always test your work. Each pattern you draft brings you closer to designing garments that fit beautifully and express your unique style.


 浙公网安备
33010002000092号
浙公网安备
33010002000092号 浙B2-20120091-4
Comments
No comments yet. Why don't you start the discussion?