
The art of origami has captivated people across cultures for centuries, blending precision, patience, and creativity into a single folded sheet of paper. Among the most recognized and meaningful models is the traditional Japanese crane. Revered as a symbol of peace, longevity, and hope, the crane holds deep cultural significance—especially in Japan, where it’s associated with healing and good fortune. Folding one may seem intricate at first glance, but with clear instructions and a bit of practice, anyone can master it. This guide walks you through every fold, offering practical tips, historical context, and expert insights to help you create a beautiful crane even if you’ve never folded paper before.
The Significance of the Origami Crane
In Japanese tradition, the crane is believed to live for a thousand years, earning it the title \"the bird of happiness.\" The story of Sadako Sasaki, a young girl who folded over a thousand cranes while battling leukemia after the Hiroshima bombing, cemented the crane’s role as a global symbol of peace and resilience. Today, thousands of paper cranes are displayed at memorials, schools, and cultural centers worldwide.
Folding a crane isn’t just an artistic exercise—it’s a meditative act that encourages focus and mindfulness. As Akira Yoshizawa, widely regarded as the father of modern origami, once said:
“Origami is not merely about folding paper; it is about expressing emotion through geometry.” — Akira Yoshizawa
This sentiment rings especially true with the crane, a model whose elegance emerges from simplicity.
Materials and Preparation
You don’t need specialized tools to begin. All you require is a single square sheet of paper. Traditional origami paper (called *kami*) is ideal because it’s thin, crisp, and often colored on one side, making it easier to track folds. However, any square paper will work—even cut-down printer paper or decorative scrapbook sheets.
Avoid thick cardstock or textured paper at first, as they resist clean folding. Also, ensure your workspace is flat and well-lit. Having a ruler or bone folder can help crease edges sharply, but fingers work perfectly fine.
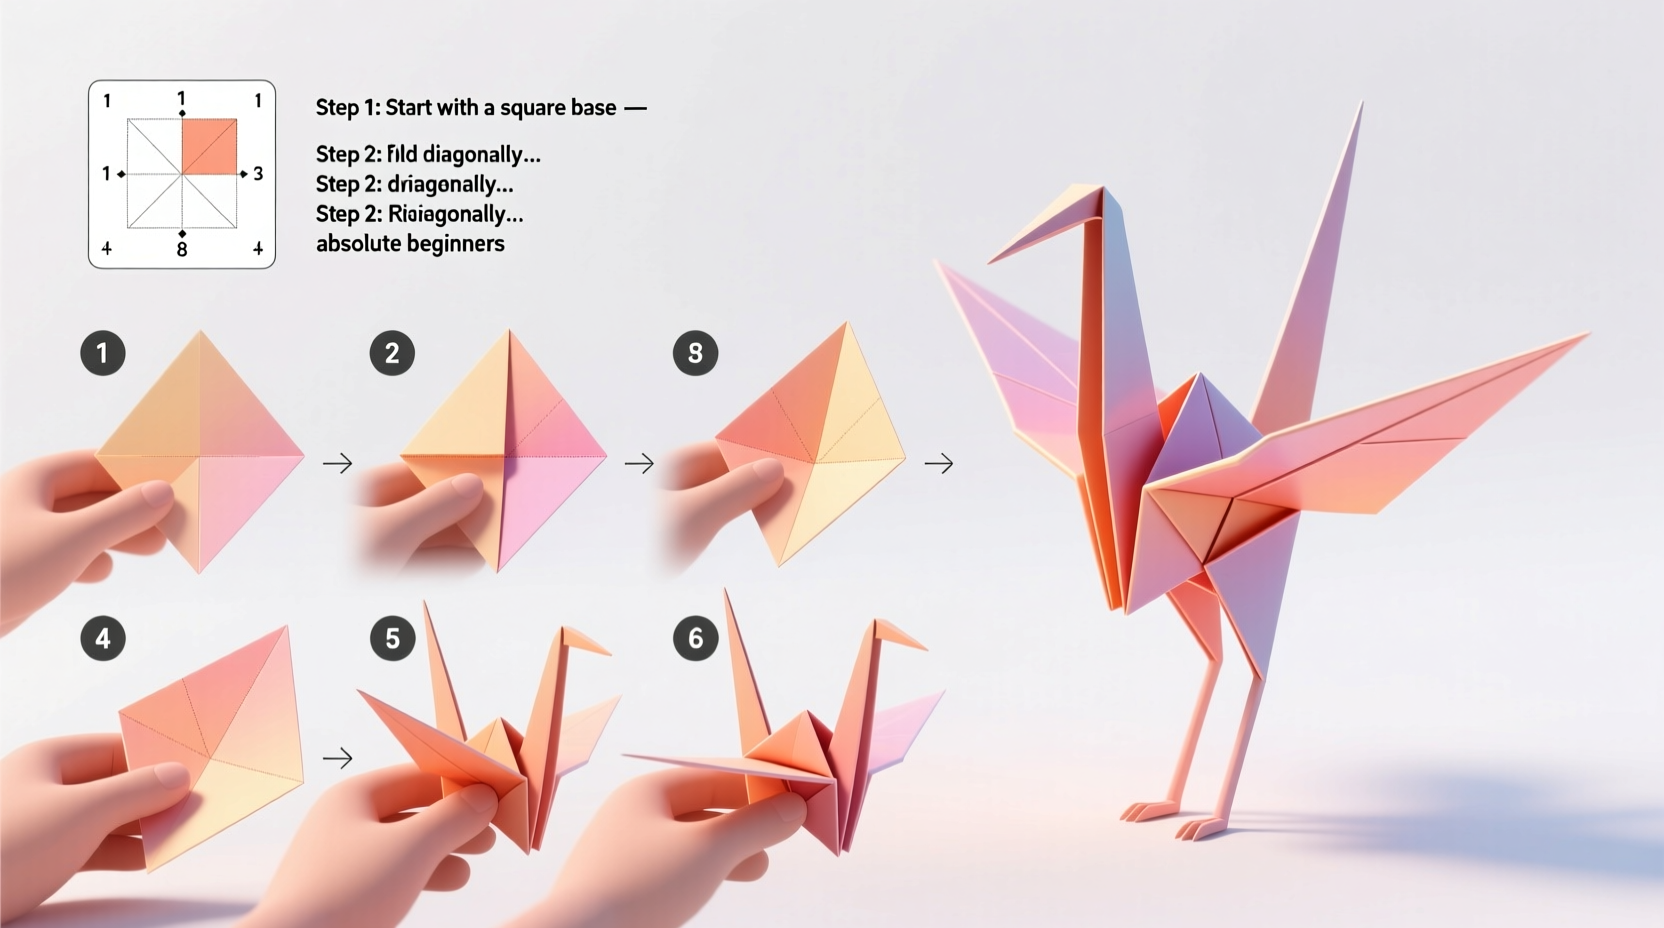
Step-by-Step Guide to Folding Your First Crane
Follow these twelve steps carefully. Work slowly, and don’t rush the creases. Precision in early folds ensures a balanced final model.
- Start with a square sheet, colored side down if using kami paper. Fold diagonally in half to form a triangle. Unfold, then repeat the diagonal fold in the opposite direction. You should now have two intersecting diagonal creases.
- Fold horizontally and vertically through the center, creating a plus sign (+) of creases. Unfold after each. These guide lines will help in the next steps.
- Bring all four corners toward the center point. Press firmly along the edges. You’ll now have a smaller square known as a “preliminary base.”
- Flip the model over. Fold the top two corners to the center line, forming a kite shape. Repeat on both sides so the model looks symmetrical.
- Lift the bottom flap upward, opening the pocket slightly. Flatten it down along the existing crease to form a long, narrow diamond. This is called a “squash fold.” Repeat on the backside.
- Rotate the model so the open end points downward. Fold the right and left edges of the top layer toward the center line. Repeat on the reverse side.
- Select one long arm (it will be narrower than the others). Gently pull it outward while pressing the inner layers flat. Use a squash fold again to widen the tip, forming the head. Crease well.
- On the opposite arm, do the same but extend it slightly longer—this will become the tail. Again, use a squash fold for a clean finish.
- Fold down the tip of the head to create the beak. A small reverse fold works best here: make a crease near the tip, then tuck it inward.
- Shape the wings by gently pulling them downward and outward. Apply light pressure to round the curve naturally.
- Open the body slightly by puffing air through the small hole at the bottom. This gives the crane a three-dimensional form.
- Adjust all parts symmetrically. Make sure the head, tail, and wings are balanced. Smooth out any uneven creases.
With practice, this sequence becomes intuitive. Most beginners complete their first crane in 10–15 minutes. By the fifth attempt, time typically drops to under five.
Common Mistakes and How to Avoid Them
Even experienced folders encounter issues. Recognizing and correcting errors early improves results dramatically.
| Issue | Causes | Solutions |
|---|---|---|
| Crane won’t stand upright | Uneven base folds or loose creases | Reinforce bottom folds; ensure symmetry in the preliminary base |
| Wings droop or tear | Pulling too hard or using fragile paper | Use sturdier paper; apply gentle pressure when shaping |
| Head and tail are misaligned | Asymmetric squash folds | Compare both sides during folding; use mirror-like precision |
| Model looks flat | Skipping the inflation step | Blow gently into the base to expand the body |
Checklist for Success
- ✅ Use square paper (6x6 inches recommended)
- ✅ Work on a flat, clean surface
- ✅ Make sharp, deliberate creases
- ✅ Follow each step in order—don’t skip ahead
- ✅ Check symmetry at every major stage
- ✅ Practice the preliminary base until consistent
- ✅ Be patient—your first crane might not be perfect
A Beginner’s Journey: Real Example
Sophie, a high school student with no prior origami experience, decided to learn crane folding for a school project on Japanese culture. Her first attempt ended in frustration—her paper tore during a squash fold, and the wings wouldn’t stay in place. Instead of giving up, she watched a slow-motion tutorial, used larger paper, and focused only on mastering the preliminary base for her second try. By her fourth crane, she was folding confidently and even taught two classmates. Within a week, she completed a string of 100 cranes to hang in her classroom, inspired by Sadako’s legacy. Her teacher noted how the process improved Sophie’s concentration and attention to detail across other subjects.
Frequently Asked Questions
Can I use rectangular paper?
No. Rectangular paper distorts the proportions needed for proper folding. Always use a perfect square. If necessary, trim standard paper to create a square.
How long does it take to learn?
Most beginners fold a recognizable crane within 30 minutes of starting. Mastery—producing neat, balanced models consistently—takes about 5–10 attempts over a few days.
What if my crane doesn’t inflate?
This usually happens if the bottom point is sealed too tightly. Ensure the central flaps aren’t glued or overly pressed together. Gently insert a fingertip to loosen the opening before blowing air in.
Final Thoughts and Encouragement
Mastering crane origami is more than learning a paper-folding technique—it’s embracing a tradition that values patience, precision, and symbolism. Each fold brings you closer to a centuries-old craft that continues to inspire artists, educators, and peace advocates around the world. Whether you’re folding for relaxation, cultural appreciation, or personal challenge, the crane offers a rewarding entry point into the broader world of origami.


 浙公网安备
33010002000092号
浙公网安备
33010002000092号 浙B2-20120091-4
Comments
No comments yet. Why don't you start the discussion?