
Personalized dog tags have evolved from military essentials to meaningful keepsakes—ideal for pet owners, veterans, fitness enthusiasts, or as thoughtful handmade gifts. With the Cricut Explore 2, you can transform blank metal blanks into engraved works of art using precise cutting and engraving capabilities. This guide walks you through the entire process, from design to finishing touches, ensuring professional-quality results every time.
Selecting the Right Materials and Tools
The foundation of a successful engraving project lies in choosing compatible materials and tools. Not all metals respond the same way to the Cricut’s rotary tool, so selecting the right combination is crucial.
- Metal Blanks: Use soft aluminum or anodized aluminum dog tag blanks. These are ideal for the Cricut Engraving Tip due to their malleability and clean finish.
- Cricut Explore 2 Machine: Ensure firmware is updated and the machine supports the Engraving Tip (compatible with Cricut Design Space).
- Engraving Tip and Housing: The Cricut Engraving Tip fits into the Fine Point housing and allows shallow, controlled etching on metal.
- StrongGrip Mat: Essential for holding metal securely during engraving.
- Weeding Tools & Microfiber Cloth: For post-engraving cleanup and debris removal.
Designing Your Custom Dog Tag in Cricut Design Space
Design precision directly impacts engraving clarity. Use Cricut Design Space to create legible, well-proportioned text and graphics tailored to the small surface area of a dog tag.
- Open Cricut Design Space and start a new project.
- Create a circle shape matching your dog tag size (typically 1” to 1.5” diameter). This acts as a visual guide.
- Add text using fonts that remain readable at small sizes—avoid overly decorative or thin typefaces.
- Center-align all elements and maintain at least a 1/8” margin from edges to prevent cutoff.
- Use the “Attach” function to lock text and shapes together, ensuring they engrave as a single unit.
- If desired, include simple icons like hearts, paw prints, or stars—vector images work best.
| Font Type | Recommended? | Reason |
|---|---|---|
| Arial Bold | Yes | Highly legible at small sizes |
| Script Fonts | No | Poor readability when engraved |
| Impact | Yes | Thick strokes hold detail well |
| Fancy Decorative | Limited | Only suitable for large designs |
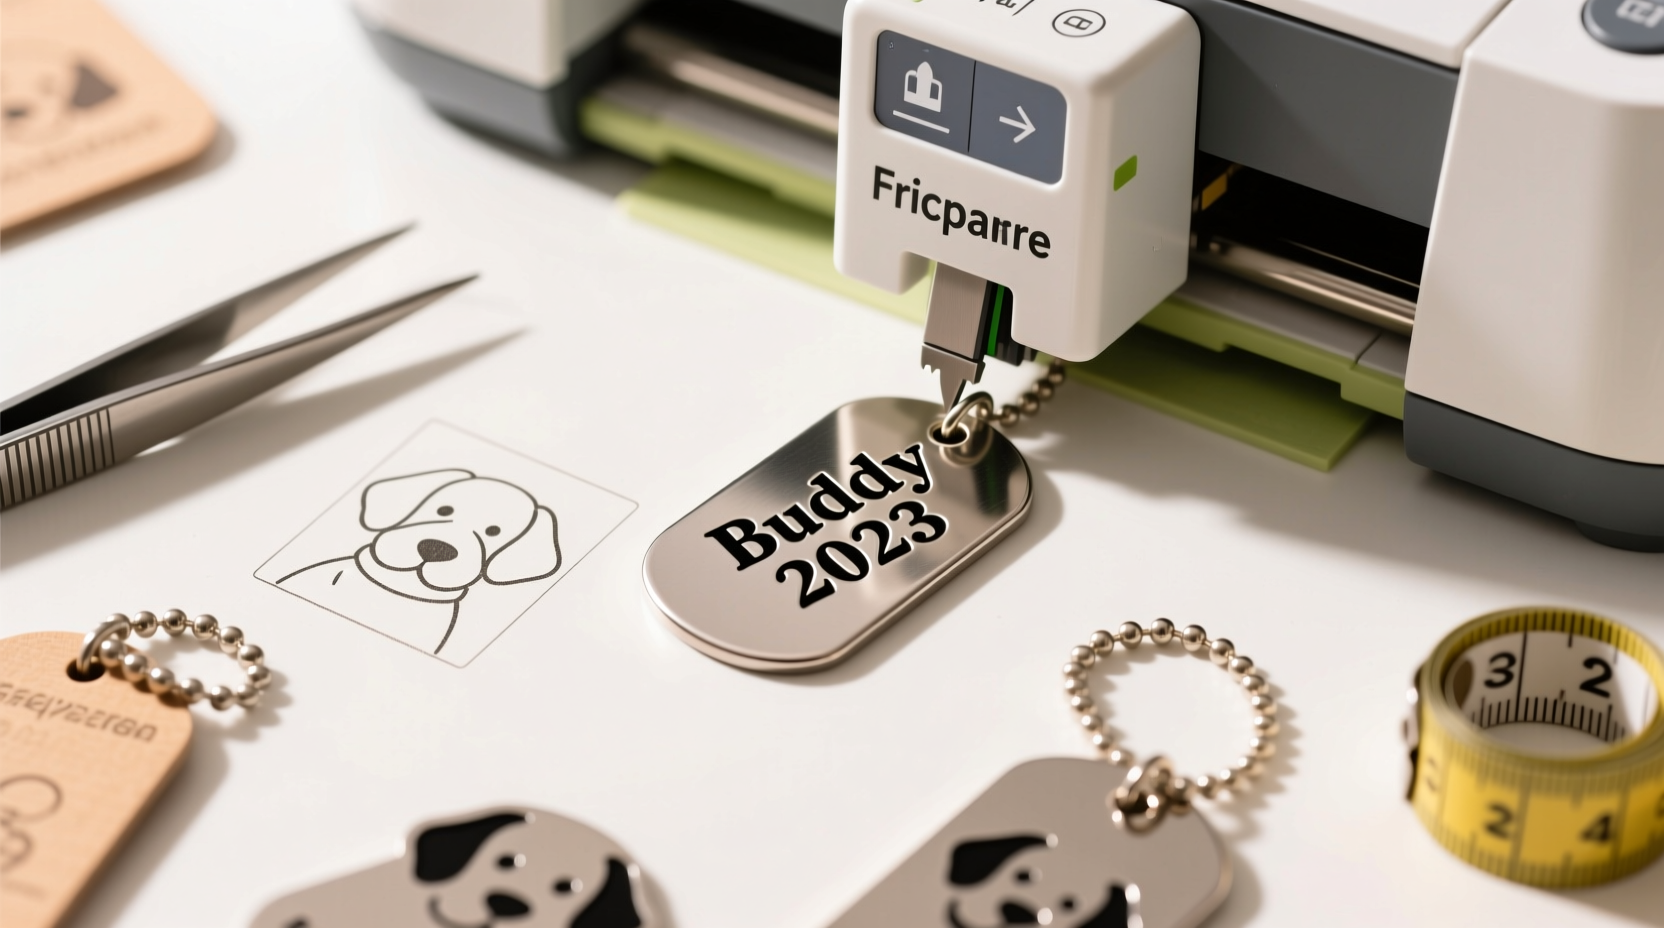
Step-by-Step Engraving Process with Cricut Explore 2
Follow this sequence to achieve crisp, consistent engravings without damaging your machine or material.
- Prepare the Metal Blank: Wipe the surface with a microfiber cloth to remove oils or dust.
- Secure to StrongGrip Mat: Place the blank in the center of the mat. Press firmly to ensure no lifting during engraving.
- Load Engraving Tool: Insert the Engraving Tip into the Fine Point housing and place it in Clamp B.
- Select Material Settings: In Design Space, choose “Custom” under material type. Set to “Metal – Soft (Aluminum)” or manually configure:
- Cut Pressure: 180–220
- Speed: 6–8
- Number of Passes: 1–2
- Perform Test Engrave: Run a test on a scrap piece to verify depth and clarity.
- Start Engraving: Load the mat into the machine and begin. The Cricut will precisely trace your design using the Engraving Tip.
- Inspect and Clean: After completion, remove the tag and inspect the engraving. Use a soft brush or cloth to clear any fine metal shavings.
“Precision in alignment and consistent pressure are what separate amateur attempts from professional-looking engraved tags.” — Jordan Lee, Craft Tech Specialist
Tips for Enhancing Legibility and Durability
Engraved text can be subtle. To make your message stand out and last longer, consider these enhancement techniques.
- Use Paint or Ink Fill: Acrylic paint or enamel markers can be applied to deepen visibility. Allow to dry, then gently buff the surface.
- Apply Clear Coat: A light spray of clear lacquer protects against oxidation and wear, especially for outdoor use.
- Avoid Over-Engraving: Multiple passes can damage the tip or distort the design. Stick to one or two passes max.
- Store Tags Properly: Keep finished tags in anti-tarnish pouches if not used immediately.
Mini Case Study: Personalized Pet Memorial Tags
Sarah, a pet lover from Portland, wanted to create memorial dog tags for grieving clients at her pet cremation service. Using her Cricut Explore 2, she designed simple yet touching engravings with pet names, dates, and small heart icons. She used anodized aluminum blanks and filled the engravings with black ink for elegance. Clients reported feeling deeply comforted by the tangible keepsake. Sarah now includes a complimentary engraved tag with every service, enhancing her brand’s emotional connection.
Checklist: Before You Start Engraving
- ✓ Confirm Cricut Explore 2 firmware is up to date
- ✓ Install the Engraving Tip correctly in Clamp B
- ✓ Use a StrongGrip mat and secure the metal blank firmly
- ✓ Design text within safe margins in Cricut Design Space
- ✓ Perform a test engrave on a spare blank
- ✓ Clean the metal surface before loading
- ✓ Have cleaning tools ready for post-engraving
Frequently Asked Questions
Can I engrave stainless steel dog tags with the Cricut Explore 2?
No. The Cricut Engraving Tip is designed for soft metals like aluminum. Stainless steel is too hard and may damage the tool. Stick to anodized or soft aluminum blanks for best results.
How long does it take to engrave one dog tag?
Typically 2–4 minutes, depending on design complexity and number of passes. Simple text-only designs complete faster than those with intricate borders or icons.
Can I reuse the StrongGrip mat after engraving metal?
Yes, but inspect the mat afterward. Metal shavings can reduce stickiness. Clean with a lint roller and store flat to maintain adhesion.
Conclusion: Turn Skill Into Meaningful Gifts
Creating personalized dog tags with your Cricut Explore 2 blends craftsmanship with sentiment. Whether honoring a veteran, remembering a beloved pet, or crafting unique accessories, the ability to engrave with precision opens a world of gifting possibilities. With the right materials, careful design, and attention to detail, each tag becomes more than metal—it becomes a lasting message.


 浙公网安备
33010002000092号
浙公网安备
33010002000092号 浙B2-20120091-4
Comments
No comments yet. Why don't you start the discussion?