
Thinning scissors are a cornerstone tool in professional dog grooming, designed to remove bulk without creating harsh lines or visible cutting patterns. When used correctly, they create soft, blended finishes that mimic natural fur growth. Yet many pet owners and novice groomers struggle with these tools, often over-thinning, creating uneven textures, or damaging the coat. Mastering dog thinning scissors requires understanding their design, proper technique, and timing. This guide breaks down essential practices to help you achieve polished, natural-looking results every time.
Understanding Thinning Scissors: Function and Design
Unlike straight-blade grooming shears, thinning scissors feature one solid blade and one toothed blade. The teeth selectively cut only a portion of the hair—typically 30% to 70%, depending on tooth count—allowing for controlled reduction in volume while preserving length and flow. They come in various configurations:
- Standard thinning shears: Ideal for general bulk removal on medium to thick coats.
- Blending shears: Higher tooth count (40–60 teeth) for seamless transitions between clipped and unclipped areas.
- Texturizing shears: Fewer, wider-spaced teeth for dramatic texture in show dogs or sculpted styles.
The pivot tension, finger rest placement, and blade curvature all affect control. A well-balanced pair reduces hand fatigue and improves precision during extended use.
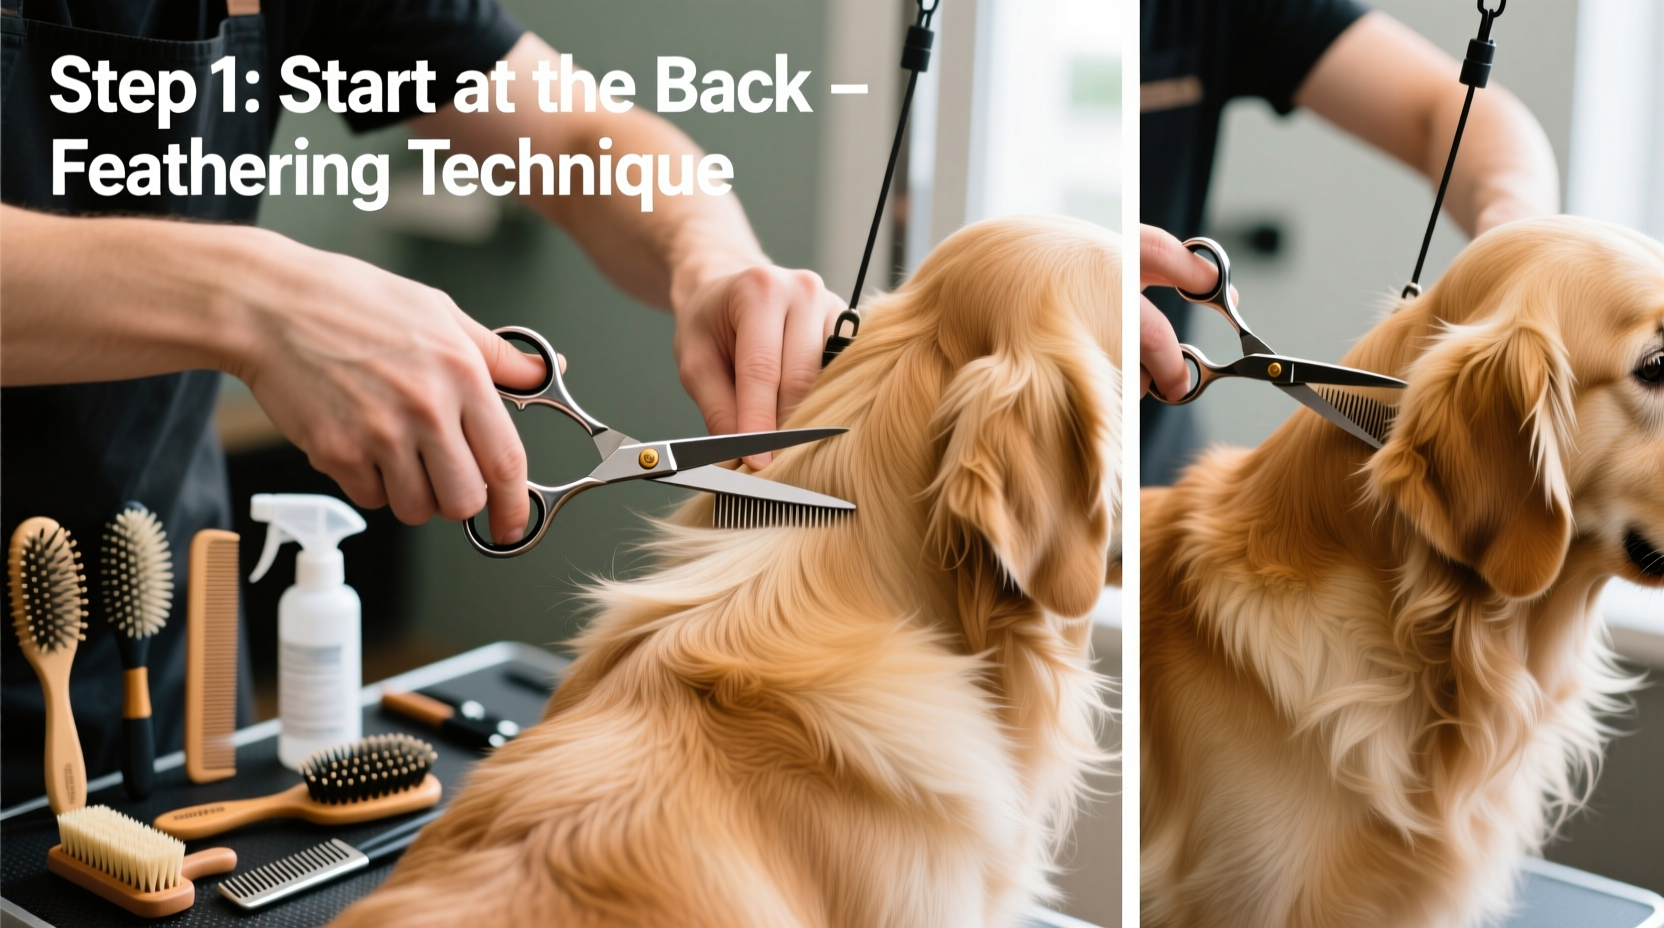
Essential Techniques for Natural Blending
Effective thinning isn’t about removing as much hair as possible—it’s about strategic reduction. The goal is to maintain movement and layering while eliminating fluffiness or unnatural spikes. Follow these core techniques:
- Point Cutting: Hold the shears vertically and insert only the tip into the coat. Open the blades slightly and close them upward in a stabbing motion. This method softens ends and removes weight without altering overall length.
- Slide Cutting: With the shears partially open, glide them along the top layer of fur at a shallow angle. Use this for smoothing wavy or frizzy textures, especially around the legs and tail.
- Feathering: On dense areas like the chest or behind the ears, gently pull the hair taut and make light, overlapping strokes to blend abrupt edges after clipping.
Always work in small sections, lifting the coat with your non-dominant hand to expose underlying layers. Avoid pressing too hard—let the teeth do the work.
“Thinning scissors are not for shaping; they’re for refining. Shape with clippers or straight shears first, then refine with thinning shears.” — Carla Mendez, Certified Master Groomer (NDGSA)
Step-by-Step Guide to Using Thinning Scissors Safely and Effectively
Follow this sequence to ensure consistent, damage-free results:
- Prepare the Coat: Bathe, dry thoroughly, and detangle completely. Wet or matted hair increases resistance and can lead to pulling or accidental overcutting.
- Select the Right Shear: Use blending shears (50+ teeth) for everyday maintenance. Reserve lower-tooth-count texturizers for specific styling needs.
- Section the Hair: Clip or part off areas you don’t want to touch. Work from back to front, starting along the rump and moving toward the shoulders.
- Assess Density: Run your fingers through the coat. Focus thinning on areas where the fur stands upright or appears puffy—common spots include the base of the tail, neck ruff, and thigh feathering.
- Make Controlled Passes: Apply one light stroke per area. Step back and evaluate before repeating. Multiple heavy passes increase the risk of bald patches or an uneven appearance.
- Blend Transitions: After clipping near the face, ears, or sanitary areas, use slide cuts to merge short and long zones seamlessly.
- Final Check: Run your hands over the entire body. Look for any “holes” or overly flat sections. Touch up sparingly if needed.
Do’s and Don’ts: Common Mistakes and How to Avoid Them
| Do’s | Don’ts |
|---|---|
| Use on clean, dry, tangle-free hair | Use on wet or matted fur |
| Lift the coat with your fingers for better access | Press the blades flat against the skin |
| Work in small, overlapping sections | Make repeated passes over the same spot |
| Hold shears at a 15–30° angle for blending | Use vertical chopping motions aggressively |
| Sharpen regularly to maintain clean cuts | Continue using dull shears that crush rather than cut |
Dull blades tug at hair instead of slicing cleanly, causing discomfort and breakage. Invest in professional sharpening every 3–6 months, depending on usage frequency.
Real-World Example: Transforming a Poodle Mix’s Coat
Sophia, a home groomer in Colorado, adopted a shaggy Cockapoo with thick, curly fur prone to matting. After basic clipping, the dog’s rear end looked boxy and stiff. Using standard shears would have shortened the coat too much, sacrificing its signature fluff. Instead, Sophia switched to 52-tooth blending shears. She worked in quarter-inch sections along the hindquarters, using point cutting to soften the outline and slide cutting to reduce puffiness. Within 15 minutes, the transition from clipped undercarriage to longer upper coat became nearly invisible. The dog’s movement regained its bounce, and the finish looked professionally groomed—not barbered.
This case illustrates how thinning scissors preserve breed character while improving manageability. The key was restraint: Sophia made no more than two passes per zone and stepped back frequently to assess balance.
Frequently Asked Questions
Can I use human thinning shears on my dog?
No. Human thinning shears are shorter, less durable, and designed for finer hair. Dog-specific models have stronger blades, ergonomic handles for extended use, and tooth patterns suited to coarser or denser coats. Using inappropriate tools risks poor results and potential injury.
How often should I thin my dog’s coat?
Frequency depends on breed and coat type. Fast-growing double-coated breeds (e.g., Huskies, Golden Retrievers) may need thinning every 4–6 weeks during shedding season. Low-shedding breeds (e.g., Poodles, Bichons) benefit from light thinning every 6–8 weeks as part of routine grooming. Overuse can weaken follicles and reduce coat density over time.
Are thinning scissors safe for puppies?
Yes, but with caution. Use high-tooth-count blending shears (50+) and limit use to minor touch-ups. Puppies have softer, more delicate skin and emerging coat patterns. Avoid aggressive thinning until the adult coat fully comes in, typically by 12–18 months.
Maintaining Your Tools for Long-Term Success
Like any precision instrument, thinning scissors require care. After each use:
- Wipe blades with a microfiber cloth to remove hair and oils.
- Clean with a mild disinfectant spray (avoid soaking).
- Check tension—loose pivots cause inconsistent cutting; overly tight ones strain the hand.
- Store in a protective case away from moisture and impact.
Regular maintenance ensures longevity and performance. A well-cared-for pair can last years, even with weekly use.
Conclusion: Elevate Your Grooming Game with Confidence
Mastering dog thinning scissors transforms grooming from basic maintenance into an art form. With the right tools, technique, and patience, you can achieve results that look effortless—soft contours, natural movement, and a healthy shine. Whether you're grooming at home or building skills for professional work, remember that subtlety wins. Less is often more when it comes to thinning. Practice on small zones, observe changes closely, and let the dog’s natural beauty guide your hand.


 浙公网安备
33010002000092号
浙公网安备
33010002000092号 浙B2-20120091-4
Comments
No comments yet. Why don't you start the discussion?