
Drawing dolphins can be both a joyful and challenging experience. Their sleek forms, dynamic postures, and expressive features make them a favorite subject among animal artists. However, capturing their essence on paper requires more than just copying an image. It demands understanding anatomy, motion, and light. Whether you're a beginner or refining your skills, mastering dolphin drawing lies in breaking down the process into manageable, repeatable techniques. With focused practice and attention to detail, you can create artwork that feels alive—fluid, graceful, and full of personality.
Understanding Dolphin Anatomy for Accurate Drawing
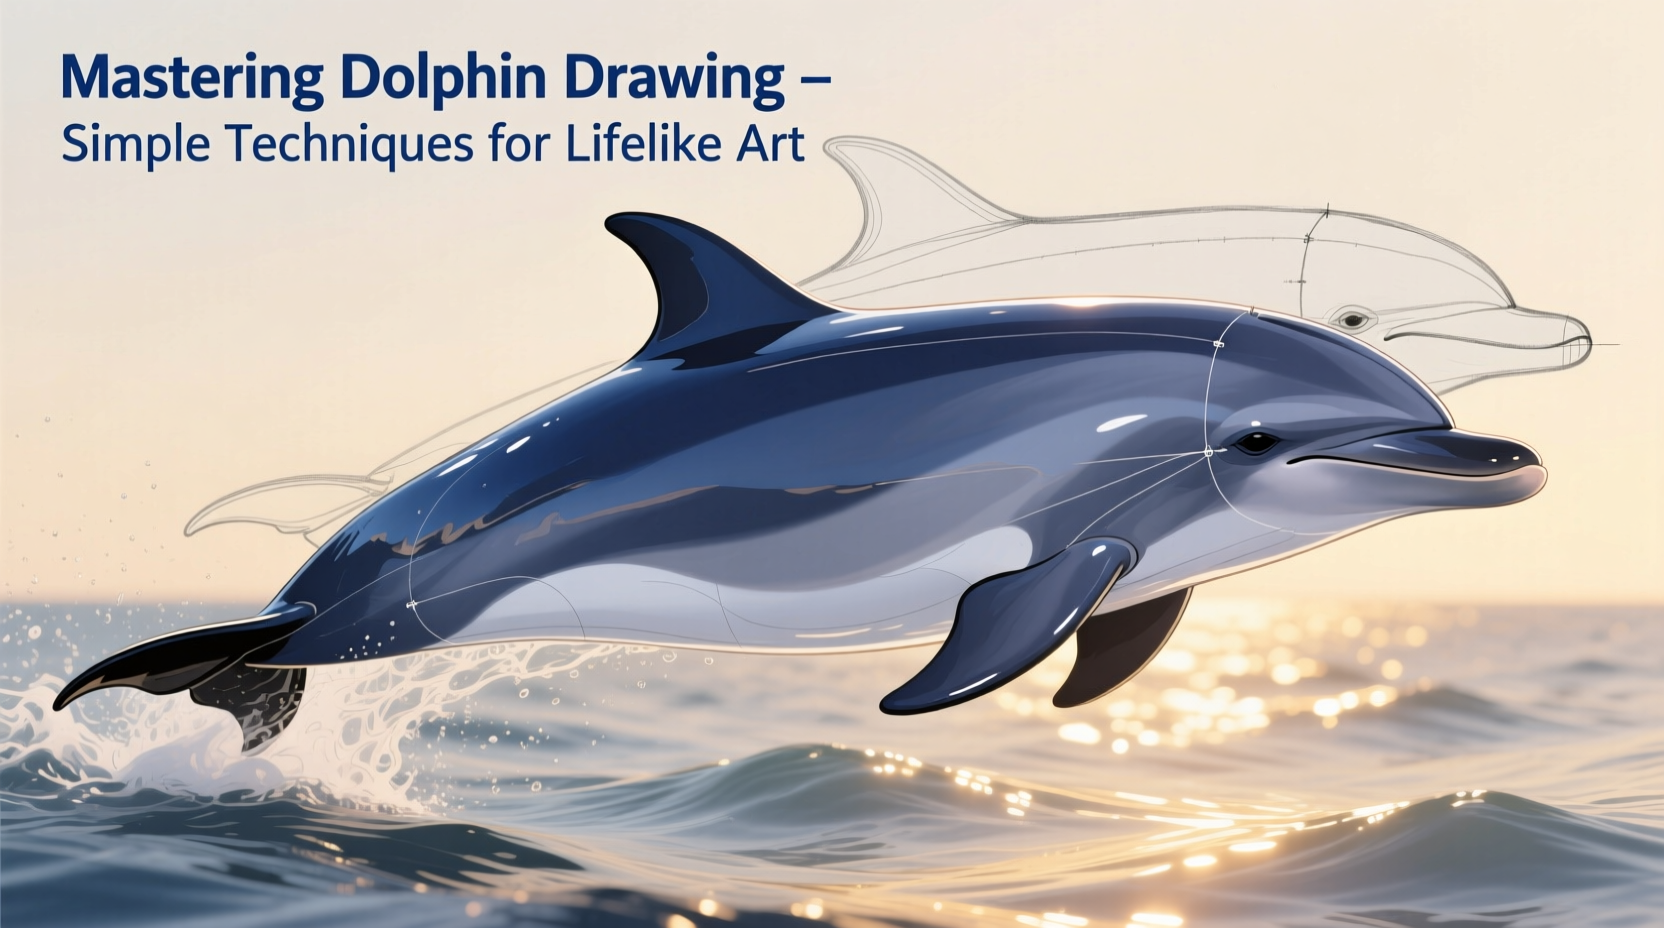
To draw a dolphin convincingly, you must first understand its structure. Dolphins are marine mammals with streamlined bodies built for speed and agility. Their form is not random; every curve serves a purpose. The head blends smoothly into the body, the dorsal fin provides stability, and the flukes (tail fins) generate powerful propulsion.
The key anatomical zones to observe are:
- Rosette (beak): Varies by species but generally tapers forward from the melon (forehead).
- Melon: The rounded forehead area that houses echolocation organs—often bulbous and smooth.
- Dorsal fin: Located mid-back, typically curved and flexible.
- Pectoral flippers: Positioned low on the body, used for steering.
- Flukes: Horizontal tail fins that move up and down, unlike fish.
Beginners often misplace the dorsal fin too far forward or draw flukes vertically like a shark’s. Studying reference photos from multiple angles helps correct these errors. Focus on how the spine curves through the body—from the crown of the head to the tip of the tail—and use this as a guide when sketching.
Step-by-Step Guide to Drawing a Lifelike Dolphin
Creating a realistic dolphin drawing involves building the image in stages. Rushing to details too early leads to proportion issues. Follow this timeline to develop a strong foundation:
- Define the pose: Decide if the dolphin is leaping, swimming level, or diving. Lightly sketch a gesture line showing the direction of movement.
- Build basic shapes: Use ovals and cylinders to represent the head, torso, and tail. Keep lines loose and adjustable.
- Refine major forms: Connect the shapes smoothly. Adjust the melon, define the rostrum, and position the dorsal fin and flippers accurately.
- Add contours: Trace over your draft with cleaner lines, emphasizing the smooth transitions between body parts.
- Detail key features: Define the eye placement (just behind the flipper), refine the mouth line, and shape the flukes with gentle curves.
- Apply shading: Observe where light hits the body. Shade along the underside and under fins to create dimension.
This method ensures structural accuracy before aesthetics. Even a simple pencil sketch benefits from this disciplined approach.
Shading and Texture Techniques for Realism
A flat outline lacks depth. To make your dolphin appear three-dimensional, you need to master value—the range from light to dark. Dolphins have naturally glossy skin due to a layer of mucus, which affects how light reflects off their bodies.
Start by identifying a single light source. Typically, overhead lighting creates highlights along the back and shadows beneath the jaw, belly, and fins. Use a soft graphite pencil (2B–6B) to build gradual gradients. Avoid harsh lines; instead, blend with a tortillon or tissue for a wet, reflective look.
For texture, remember that dolphin skin isn’t scaly—it’s smooth but may show subtle creases near joints or muscle folds. Use fine horizontal strokes sparingly to suggest surface variation without overworking the piece.
| Area | Lighting Behavior | Shading Tip |
|---|---|---|
| Back and dorsal ridge | Highest reflection point | Leave white or lightly shade |
| Belly and underside | Deep shadow | Use heavy gradation |
| Eye and mouth region | Natural recess—darker | Add soft contour lines |
| Flippers and flukes | Thin edges catch light | Outline with precision, shade underneath |
Common Mistakes and How to Avoid Them
Even experienced artists fall into traps when drawing dolphins. Awareness of frequent errors allows you to preempt them.
- Incorrect proportions: Heads too small, tails too short. Use comparative measurement—e.g., the head should be about 1/4 of the total body length.
- Stiff poses: Dolphins are fluid creatures. If your sketch looks rigid, adjust the spine curve slightly to suggest motion.
- Over-detailing early: Adding scales or wrinkles before the base form is solid leads to imbalance.
- Ignoring perspective: A leaping dolphin viewed from below needs foreshortening—the head appears larger, the tail narrower.
“Observation is the artist’s greatest tool. Spend time watching dolphins in motion—on film or in person—before you pick up a pencil.” — Dr. Lena Torres, Marine Biologist & Scientific Illustrator
Mini Case Study: From Sketch to Finished Art
Jamie, an amateur artist, struggled with making her dolphin drawings look natural. Her early attempts were stiff and lacked realism. She decided to follow a structured process: first studying anatomy diagrams, then tracing high-resolution photos to internalize proportions, and finally attempting freehand sketches.
She began each session by drawing five quick gesture lines to explore different poses. After selecting one, she built the form using basic shapes. Over three weeks, she practiced daily, focusing on one element per day—lighting on Monday, fins on Tuesday, etc. By week four, her final piece—a dolphin mid-leap with water spray—was praised by her art group for its sense of motion and depth.
Her breakthrough came not from talent, but consistency and targeted practice.
Essential Checklist for Lifelike Dolphin Art
Before finishing your drawing, run through this checklist to ensure quality:
- ✅ Spine line follows a natural, flowing curve
- ✅ Head-to-body ratio is accurate (approx. 1:4)
- ✅ Dorsal fin placed behind midpoint of body
- ✅ Flukes are horizontal and tapered
- ✅ Shading follows a consistent light source
- ✅ Eye is correctly positioned (above pectoral flipper)
- ✅ Highlights preserved on top surfaces for wet effect
Frequently Asked Questions
Can I draw a realistic dolphin without prior experience?
Yes. While experience helps, anyone can learn with patience and practice. Start with simplified shapes and progress gradually. Use references, follow step-by-step methods, and don’t rush the process.
What tools work best for dolphin drawings?
A standard graphite pencil (HB to 6B), eraser, and smooth paper are sufficient. For digital artists, a tablet with pressure-sensitive brushes mimics traditional shading well. Colored pencils or pastels add realism when used over a solid grayscale base.
How do I capture movement in a still drawing?
Imbue motion through posture and implied trajectory. A curved spine, angled flippers, and spray lines above the head suggest momentum. Avoid symmetrical poses—they tend to look static.
Final Thoughts and Call to Action
Drawing lifelike dolphins isn’t about perfection on the first try—it’s about learning to see like an artist. Every stroke improves your eye-hand coordination and deepens your appreciation for marine life. The techniques outlined here—understanding anatomy, building forms progressively, mastering light and shadow—are transferable to many other subjects. But dolphins, with their intelligence and grace, offer a uniquely rewarding challenge.


 浙公网安备
33010002000092号
浙公网安备
33010002000092号 浙B2-20120091-4
Comments
No comments yet. Why don't you start the discussion?