
Navigating large datasets in Microsoft Excel can quickly become overwhelming, especially when column and row headers disappear as you scroll down or across. Losing sight of what each column represents disrupts workflow, increases errors, and reduces efficiency. Fortunately, Excel offers powerful tools—Freeze Panes and View Locking—that keep headers visible at all times. Mastering these features transforms chaotic spreadsheets into organized, user-friendly workspaces.
This guide walks through the mechanics of freezing panes, locking specific rows and columns, and applying best practices to enhance data readability. Whether managing financial reports, project timelines, or inventory lists, learning how to lock and freeze headers is a fundamental skill that pays dividends in accuracy and productivity.
Understanding Freeze Panes: The Foundation of Navigation
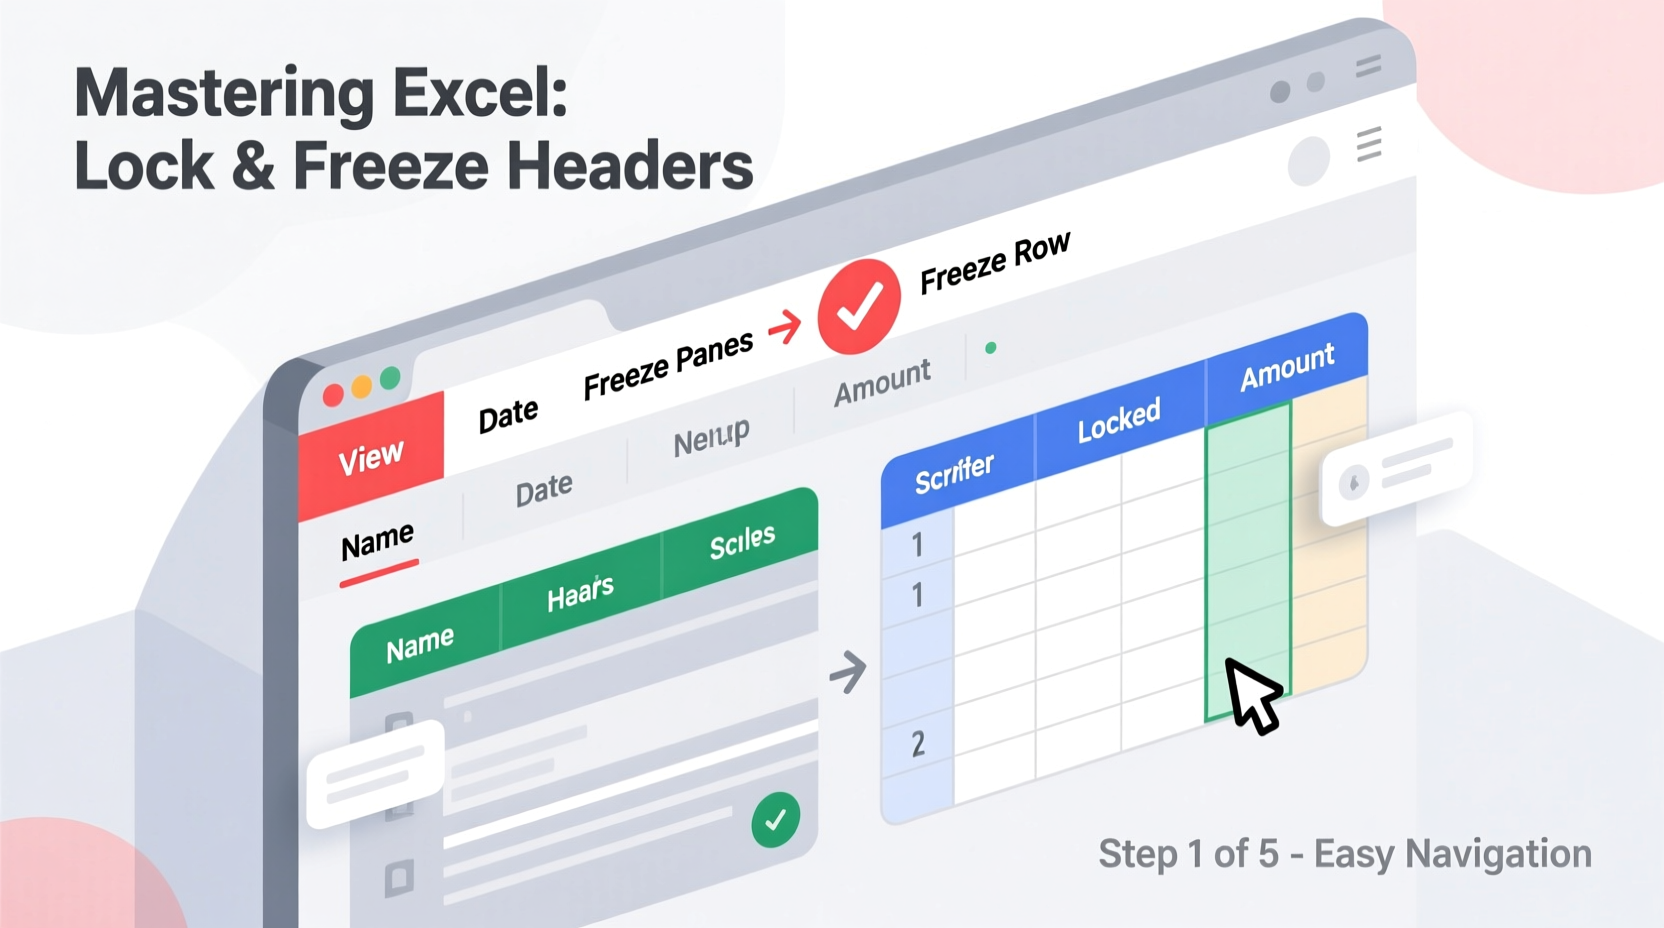
The \"Freeze Panes\" feature in Excel allows users to lock specific rows or columns in place while scrolling through the rest of the worksheet. This means that even as you navigate deep into thousands of rows or across dozens of columns, your header labels remain visible, providing constant context.
There are three primary options under the Freeze Panes command:
- Freeze Top Row – Keeps the first row (typically headers) visible when scrolling vertically.
- Freeze First Column – Locks the leftmost column (often containing identifiers like names or IDs) during horizontal scrolling.
- Freeze Panes – Allows custom selection of which rows and/or columns to freeze based on the active cell.
These tools are accessible from the “View” tab in the Excel ribbon, under the “Window” group. Their simplicity belies their impact—once applied, they dramatically improve usability, especially in shared workbooks where multiple users analyze the same data.
Step-by-Step Guide to Freezing Headers and Columns
Follow this structured process to effectively lock headers and side labels in any Excel workbook.
- Select the correct starting point. If you want to freeze Row 1 and Column A, click cell B2. This tells Excel to freeze everything above and to the left of B2.
- Navigate to the View tab. In the Ribbon, go to “View” → “Freeze Panes” dropdown.
- Choose “Freeze Panes.” After selecting the anchor cell, choose this option to apply the freeze.
- Test the result. Scroll down and right to confirm that the desired rows and columns remain fixed.
- To unfreeze later, return to “Freeze Panes” and select “Unfreeze Panes.”
For simpler use cases:
- To freeze only the top row: Go to “View” → “Freeze Top Row.”
- To freeze only the first column: Use “Freeze First Column.”
This functionality works identically across Windows, Mac, and Excel Online, making it universally applicable regardless of platform.
Best Practices for Effective Header Locking
While freezing panes is straightforward, applying it strategically ensures maximum benefit without confusion.
| Scenario | Action | Why It Matters |
|---|---|---|
| Single header row at top | Use “Freeze Top Row” | Maintains visibility of field names when reviewing long records. |
| Multi-row header (e.g., title + subheader) | Select row below headers, then “Freeze Panes” | Preserves formatting and explanatory text above data. |
| Side identifier column (e.g., employee names) | Click inside Column B, then “Freeze First Column” | Keeps reference points visible during wide-sheet navigation. |
| Both top rows and left columns need locking | Select intersection cell, use “Freeze Panes” | Enables dual-axis navigation in complex matrices. |
“Freezing key headers isn’t just about convenience—it’s a critical component of error prevention in data analysis.” — David Lin, Senior Data Analyst at FinTrack Solutions
Real-World Application: A Sales Report Case Study
Consider a regional sales manager reviewing a quarterly performance sheet. The file contains 15 product categories across columns (A to O), with 300+ rows of daily sales figures per region. Without frozen headers, every time the manager scrolls past Row 20, they lose track of which column corresponds to “Units Sold,” “Revenue,” or “Region Code.”
By freezing Row 1 (which holds category labels) and Column A (containing dates), the manager maintains full context throughout analysis. They can quickly compare metrics across regions and days without repeatedly scrolling back to the top or left edge. This small adjustment saves an estimated 15–20 minutes per report review and significantly reduces misinterpretation risks.
In team environments, such consistency also improves collaboration. When others open the same file, they immediately understand the structure, reducing training time and improving decision speed.
Tips and Common Pitfalls to Avoid
Even experienced users make mistakes when setting up frozen panes. Here’s how to avoid them.
- Pitfall: Freezing too much. Avoid freezing multiple rows unless necessary. Over-freezing clutters the screen and limits usable space.
- Solution: Use sparingly. Only lock essential headers and identifiers.
- Pitfall: Forgetting to unfreeze. When sharing files, consider whether recipients need the same view.
- Solution: Unfreeze before distribution if not needed, or document the setup.
- Pitfall: Merging cells near freeze points. Merged cells can cause unexpected behavior in scrolling layouts.
- Solution: Keep header rows unmerged or test thoroughly after freezing.
Checklist: Setting Up Frozen Headers Like a Pro
Before finalizing your spreadsheet layout, run through this checklist:
- ✅ Identify which rows and columns contain critical labels.
- ✅ Ensure no filters or sorts will disrupt the header structure.
- ✅ Position the cursor correctly—one cell below and to the right of the area to freeze.
- ✅ Apply “Freeze Panes” from the View tab.
- ✅ Scroll extensively to verify stability and visibility.
- ✅ Save the workbook to preserve the view settings.
- ✅ Document the setup if sharing with others.
Frequently Asked Questions
Can I freeze non-adjacent rows or columns?
No, Excel only allows freezing contiguous blocks starting from the top or left edge. You cannot selectively freeze Row 3 and Row 5 while leaving Row 4 scrollable. Workarounds include splitting the window or restructuring the sheet layout.
Does freezing affect printing?
No. Freeze Panes only affects on-screen display during navigation. To repeat headers on printed pages, use Page Layout → Print Titles → Rows to repeat at top.
Why does my freeze seem broken after sorting data?
Freezing locks position, not content. If you sort data, the original header remains frozen in place, but the data beneath may shift. As long as headers aren’t moved, the freeze functions correctly. Always sort within table ranges to maintain integrity.
Take Control of Your Spreadsheets Today
Locking and freezing headers in Excel is more than a visual tweak—it's a foundational practice for professional data handling. With just a few clicks, you eliminate guesswork, reduce cognitive load, and streamline navigation across expansive datasets. These techniques scale effortlessly from simple budgets to enterprise-level dashboards.
Now that you’ve mastered this essential skill, apply it proactively to every new workbook. Encourage your team members to adopt the same standards. Consistent formatting and smart viewing setups create smoother workflows, fewer errors, and better-informed decisions.


 浙公网安备
33010002000092号
浙公网安备
33010002000092号 浙B2-20120091-4
Comments
No comments yet. Why don't you start the discussion?