
Navigating large datasets in Excel can quickly become disorienting. As you scroll down hundreds or even thousands of rows, critical headers disappear from view, making it difficult to interpret the data below. This is where Excel’s Freeze Panes feature becomes indispensable. When used correctly, it locks specific rows or columns in place, ensuring that reference points remain visible no matter how far you scroll. Whether you're managing financial reports, inventory lists, or project timelines, mastering freeze panes enhances readability, reduces errors, and improves workflow efficiency.
Understanding Freeze Panes: Why It Matters
Freeze Panes is more than just a convenience—it's a productivity tool. Without frozen headers, users often lose track of which column corresponds to which data field, especially in wide or deep spreadsheets. This increases the risk of misreading values, applying formulas incorrectly, or exporting flawed reports.
Excel offers three variations of this feature:
- Freeze Top Row – Keeps the first row visible at all times.
- Freeze First Column – Locks the leftmost column as you scroll horizontally.
- Freeze Panes (Custom) – Allows freezing any combination of rows and columns based on your current cell selection.
The flexibility of custom freezing makes it ideal for complex tables with multi-level headers or side labels that need constant visibility.
Step-by-Step Guide to Freezing Rows and Columns
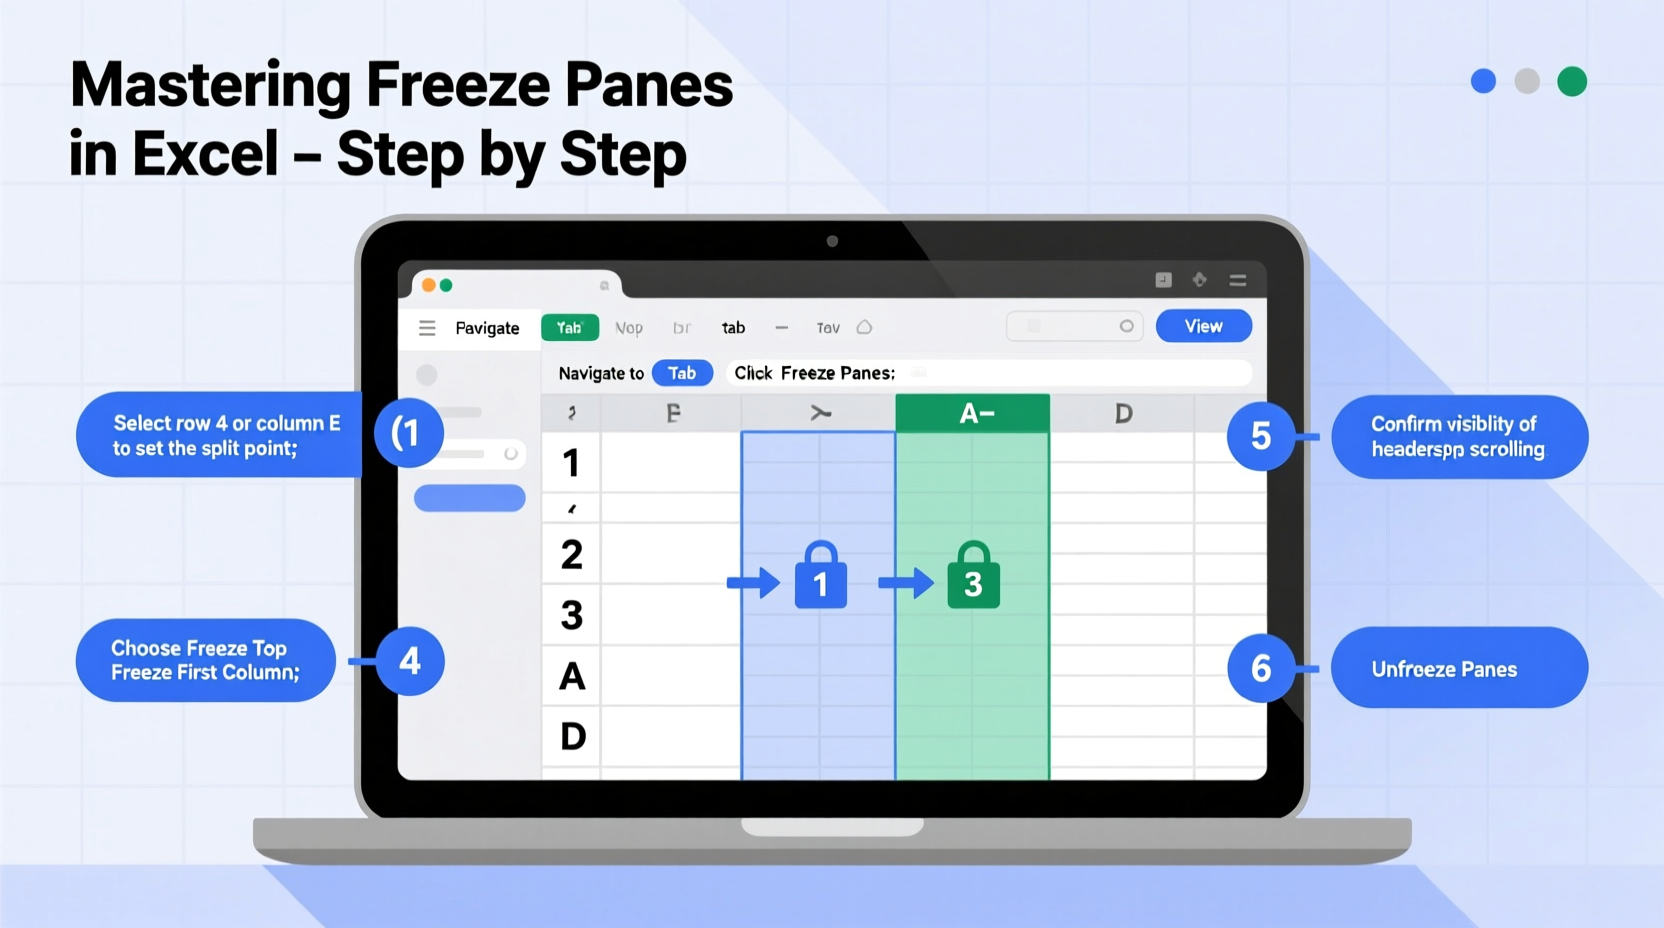
Follow these clear steps to apply freeze panes effectively in any version of Microsoft Excel (Windows or Mac):
- Open your Excel worksheet containing the data you want to navigate.
- Select the cell directly below the last row you want to freeze. For example, if you want to freeze the top two rows, click on any cell in row 3.
- If you’re also freezing columns, ensure your selected cell is to the right of the last column you wish to lock. To freeze the first two columns, select a cell in column C or beyond.
- Navigate to the View tab in the ribbon menu.
- Click “Freeze Panes” in the Window group.
- Choose “Freeze Panes” from the dropdown menu. A solid gray line will appear, indicating the split point.
To unfreeze later, return to the same menu and select “Unfreeze Panes.”
Special Cases: Freezing Only the Top Row or First Column
If you only need to freeze the header row or the first column (e.g., row labels), use the dedicated options:
- Freeze Top Row: Click “Freeze Top Row” under the Freeze Panes dropdown. Ideal for single-row headers.
- Freeze First Column: Select this option when working with tall tables where row identifiers must stay visible during horizontal scrolling.
Real-World Example: Managing a Sales Report
Imagine you're analyzing a quarterly sales report with 500 rows and 15 columns. The top row contains headers like “Region,” “Sales Rep,” “Product,” “Units Sold,” and “Revenue.” The first column lists dates. As you scroll down to review Q4 performance, you lose sight of both the headers and the date labels.
By freezing row 1 and column A, you maintain full context. Even when viewing row 480, you can instantly identify which number represents units versus revenue, and confirm the exact date without scrolling back up or sideways.
This small adjustment saves time, reduces cognitive load, and supports accurate decision-making—especially when sharing files with team members who may not be as familiar with the dataset structure.
Best Practices and Common Pitfalls
While Freeze Panes is straightforward, misuse can lead to confusion. Here are key do’s and don’ts:
| Do’s | Don’ts |
|---|---|
| Plan your layout before freezing—ensure headers are clearly labeled. | Don’t freeze too many rows or columns; it wastes screen space and limits visibility of actual data. |
| Use Freeze Panes consistently across related workbooks for team alignment. | Don’t forget to unfreeze when printing or adjusting page layout—frozen areas may affect print preview. |
| Test scrolling in both directions after applying freeze to verify functionality. | Don’t assume others have the same settings; always communicate if freeze panes are active in shared files. |
“Proper use of freeze panes transforms an overwhelming spreadsheet into a navigable dashboard. It’s one of the most underutilized yet powerful tools for data clarity.” — David Lin, Data Analyst & Excel Trainer
Tips for Advanced Users
For those working with segmented data or multiple sections within a single sheet, consider splitting the window instead of freezing. Splitting creates resizable panes that allow independent scrolling, useful for comparing distant parts of a worksheet.
To split:
- Go to the View tab.
- Click Split.
- Drag the split bar to your desired location.
You can also combine freeze and split features strategically. For instance, freeze the top row and then split vertically to lock a category column while browsing dynamic metrics.
Frequently Asked Questions
Can I freeze non-adjacent rows or columns?
No. Excel only allows freezing contiguous blocks starting from the top or left edge. You cannot freeze row 3 without also freezing rows 1 and 2, for example. If you need isolated visibility, consider duplicating headers periodically or using Table formatting with \"Repeat as Header Row\" in Print Settings.
Why isn’t my Freeze Panes option working?
This usually happens because you’re in Page Layout view, editing a cell, or have a table filter active. Switch to Normal view, exit edit mode, and try again. Also, ensure you're not in a protected worksheet—if the sheet is locked, freezing may be disabled.
Does freezing affect file size or performance?
No. Freeze Panes is a display setting only. It doesn't increase file size or slow down Excel. The feature works purely on the interface level and has no impact on calculation speed or memory usage.
Final Checklist: Mastering Freeze Panes
Before finalizing your spreadsheet setup, run through this checklist:
- ✅ Identify which rows and columns contain essential reference information.
- ✅ Position your cursor correctly before applying Freeze Panes.
- ✅ Test vertical and horizontal scrolling to confirm visibility.
- ✅ Consider whether “Freeze Top Row” or “Freeze First Column” suffices for simplicity.
- ✅ Communicate freeze status to collaborators when sharing files.
- ✅ Unfreeze before adjusting print settings or exporting to PDF.
Conclusion: Take Control of Your Data Navigation
Freeze Panes is a deceptively simple tool with profound implications for data usability. By anchoring critical information in place, you eliminate guesswork and streamline analysis. Whether you're a finance professional, project manager, educator, or student, this feature belongs in your core Excel toolkit.
Now that you understand how to implement and optimize freeze panes, apply it to your current projects. Revisit older spreadsheets and enhance their navigation. Share this knowledge with colleagues—small improvements like this compound into major gains in accuracy and efficiency over time.


 浙公网安备
33010002000092号
浙公网安备
33010002000092号 浙B2-20120091-4
Comments
No comments yet. Why don't you start the discussion?