
Frozen puff pastry is one of the most versatile tools in a home baker’s pantry. It offers the elegance of laminated dough without the hours of folding and chilling. While many recipes focus on filled pastries like turnovers or tarts, there's significant value in mastering puff pastry on its own. Baking it simply—without any filling—can yield crisp, buttery treats ideal for snacking, serving with dips, or using as a base for creative toppings. The key lies in understanding how to handle, shape, and bake it properly to achieve consistent, professional-quality results.
The Science Behind Puff Pastry Success
Puff pastry rises due to layers of butter trapped between thin sheets of dough. When heated, the water in the butter turns to steam, forcing the layers apart and creating that signature flakiness. Frozen puff pastry already contains these delicate layers, but improper handling can ruin the structure before it even hits the oven.
Thawing is critical. Rushing this step by microwaving or leaving it at room temperature too long causes the butter to soften unevenly, leading to poor rise and greasy patches. Always thaw in the refrigerator for 4 to 6 hours, or overnight. This slow process preserves the integrity of the layers.
“Temperature control is everything with puff pastry. Cold butter, cold hands, and a hot oven—that’s the golden rule.” — Chef Lydia Chen, Pastry Instructor at Boston Culinary Institute
Essential Tools and Prep Work
Before you begin, gather the right tools to ensure precision and ease:
- A sharp paring knife or pizza cutter
- A silicone baking mat or parchment paper
- A fork for docking (pricking holes)
- A pastry brush for egg wash
- A ruler or straight edge for clean cuts
Work on a lightly floured surface to prevent sticking, but avoid excess flour, which can dry out the dough. Roll gently if needed—most store-bought puff pastry comes pre-rolled, but minor adjustments are sometimes necessary. Always roll in the direction of the folds (usually indicated by packaging) to maintain layer alignment.
Do’s and Don’ts When Handling Frozen Puff Pastry
| Do’s | Don’ts |
|---|---|
| Thaw in the refrigerator slowly | Leave pastry out at room temperature for more than 30 minutes before use |
| Cut with a sharp knife in one motion | Press down heavily when cutting—this seals layers and prevents rise |
| Brush with egg wash for shine and color | Use water or milk instead—these don’t provide the same browning effect |
| Bake on a preheated baking sheet | Place pastry on a cold tray—this delays steam development |
| Chill shaped pastry for 15 minutes before baking | Skip chilling after shaping—warm dough collapses in the oven |
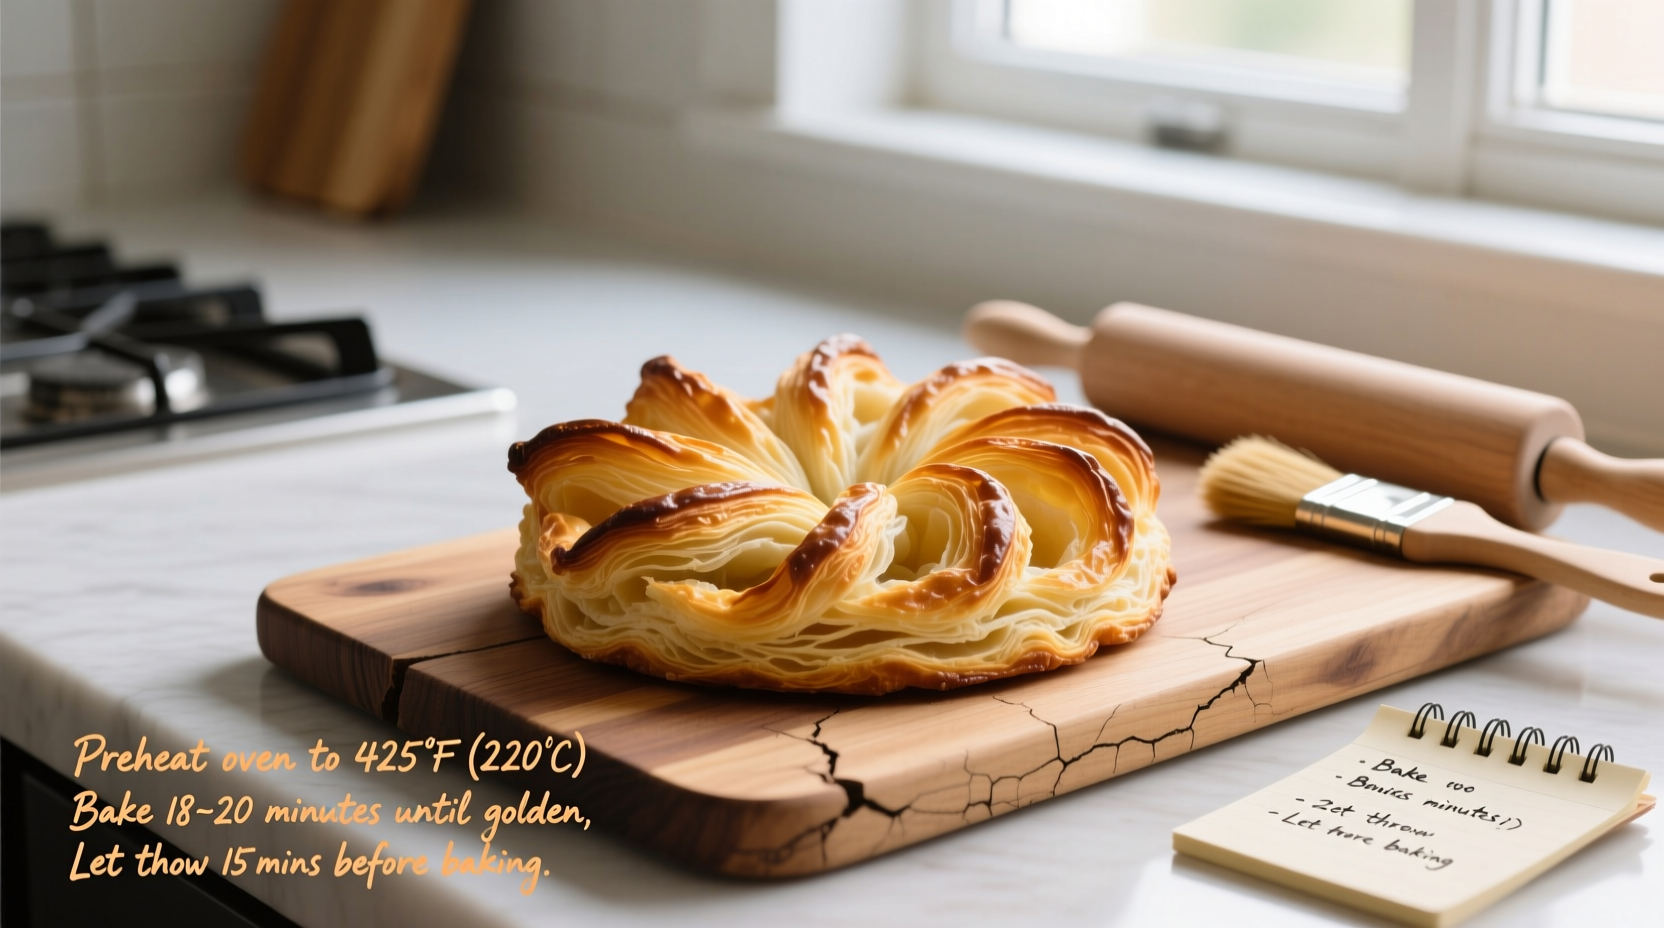
Step-by-Step Guide to Baking Perfect Plain Puff Pastry
Follow this detailed timeline to produce evenly baked, golden, and airy puff pastry squares, twists, or rounds—no filling required.
- Thaw Properly: Remove pastry from freezer and place in refrigerator for 4–6 hours until pliable but still cool.
- Preheat Oven: Set oven to 400°F (200°C). Use convection if available—it promotes even rising.
- Prepare Baking Sheet: Line with parchment or a silicone mat. For extra lift, preheat the tray in the oven.
- Unwrap and Shape: Gently unfold pastry. Cut into desired shapes using a sharp knife. Avoid dragging the blade.
- Dock if Needed: For flat crisps (like cheese straws), prick dough with a fork to prevent excessive puffing.
- Apply Egg Wash: Lightly brush with beaten egg (1 egg + 1 tsp water) for a glossy finish. Sprinkle with salt, herbs, or seeds if desired.
- Chill Before Baking: Refrigerate cut pieces for 15 minutes to re-solidify the butter.
- Bake: Place in oven and bake 15–20 minutes, until deeply golden and puffed. Do not open the oven during the first 12 minutes.
- Cool on Wire Rack: Transfer immediately to a rack to prevent sogginess from trapped steam.
Real-World Example: From Fail to Flaky
Sarah, a home baker in Portland, used to struggle with flat, greasy puff pastry. She’d cut stars for a cheese board appetizer, but they spread sideways instead of rising. After reading about chilling before baking, she adjusted her method. She started refrigerating her cut shapes for 15 minutes post-shaping. She also began preheating her baking sheet. The difference was immediate: taller, crisper results with distinct layers. Now, her unfilled puff pastry stars are a staple at gatherings, often served with honey or jam for dipping.
Her experience highlights a common oversight: treating puff pastry like cookie dough. Unlike cookies, puff pastry benefits from cold handling and aggressive heat. Small changes make a dramatic impact.
Variations and Flavor Enhancements
Baking puff pastry without filling doesn’t mean it has to be plain. Simple additions elevate it into a gourmet snack or elegant accompaniment.
- Herb & Sea Salt: Brush with olive oil, sprinkle with rosemary and flaky salt before baking.
- Cheese Twists: Cut strips, twist, and sprinkle with grated Parmesan and black pepper.
- Sweet Cinnamon Crisps: After baking, dust with cinnamon sugar while still warm.
- Sesame Spirals: Brush with egg wash and coat generously with sesame seeds before shaping.
These variations keep preparation simple while maximizing flavor. The beauty of unfilled puff pastry is its adaptability—it becomes a canvas for both sweet and savory expressions.
Frequently Asked Questions
Can I bake puff pastry directly from frozen?
No. Baking straight from frozen risks uneven cooking—the outside may burn while the inside remains doughy. Always thaw in the refrigerator first to ensure consistent layer separation and rise.
Why did my puff pastry turn out soggy on the bottom?
This usually happens when the baking sheet wasn’t hot enough or the pastry released moisture onto a cold surface. Preheating the tray or using a baking stone helps conduct heat quickly, sealing the bottom layer and preventing sogginess.
How do I store leftover baked puff pastry?
Store cooled pastries in an airtight container at room temperature for up to 2 days. They won’t stay as crisp as fresh, but you can revive them by reheating in a 350°F oven for 3–5 minutes.
Checklist for Foolproof Results
Use this quick-reference checklist before baking:
- ✅ Thawed slowly in the fridge
- ✅ Oven fully preheated to 400°F
- ✅ Baking sheet lined and preheated (optional but recommended)
- ✅ Shapes cut cleanly with sharp tool
- ✅ Egg wash applied evenly
- ✅ Chilled for 15 minutes before baking
- ✅ Placed with adequate spacing on tray
- ✅ Not opened during first 12 minutes of baking
- ✅ Cooled on wire rack immediately after baking
Final Thoughts
Mastering frozen puff pastry without filling unlocks a world of effortless elegance in baking. Whether you're preparing last-minute hors d'oeuvres or crafting a beautiful charcuterie board accent, well-baked puff pastry speaks volumes about your attention to detail. The techniques are simple—controlled thawing, precise cutting, proper chilling, and confident baking—but their impact is profound. With practice, you’ll develop an instinct for timing and texture, turning a humble frozen sheet into something truly impressive.


 浙公网安备
33010002000092号
浙公网安备
33010002000092号 浙B2-20120091-4
Comments
No comments yet. Why don't you start the discussion?