
Gel nails no longer require a trip to the salon. With the right tools, technique, and attention to detail, you can achieve durable, glossy results from your own home. The key lies in understanding each stage of the process—preparation, application, curing, and maintenance. Done correctly, your manicure can last two to three weeks without chipping or fading. This guide walks you through every essential step, common pitfalls to avoid, and professional insights that elevate your DIY experience.
Essential Tools and Products You’ll Need
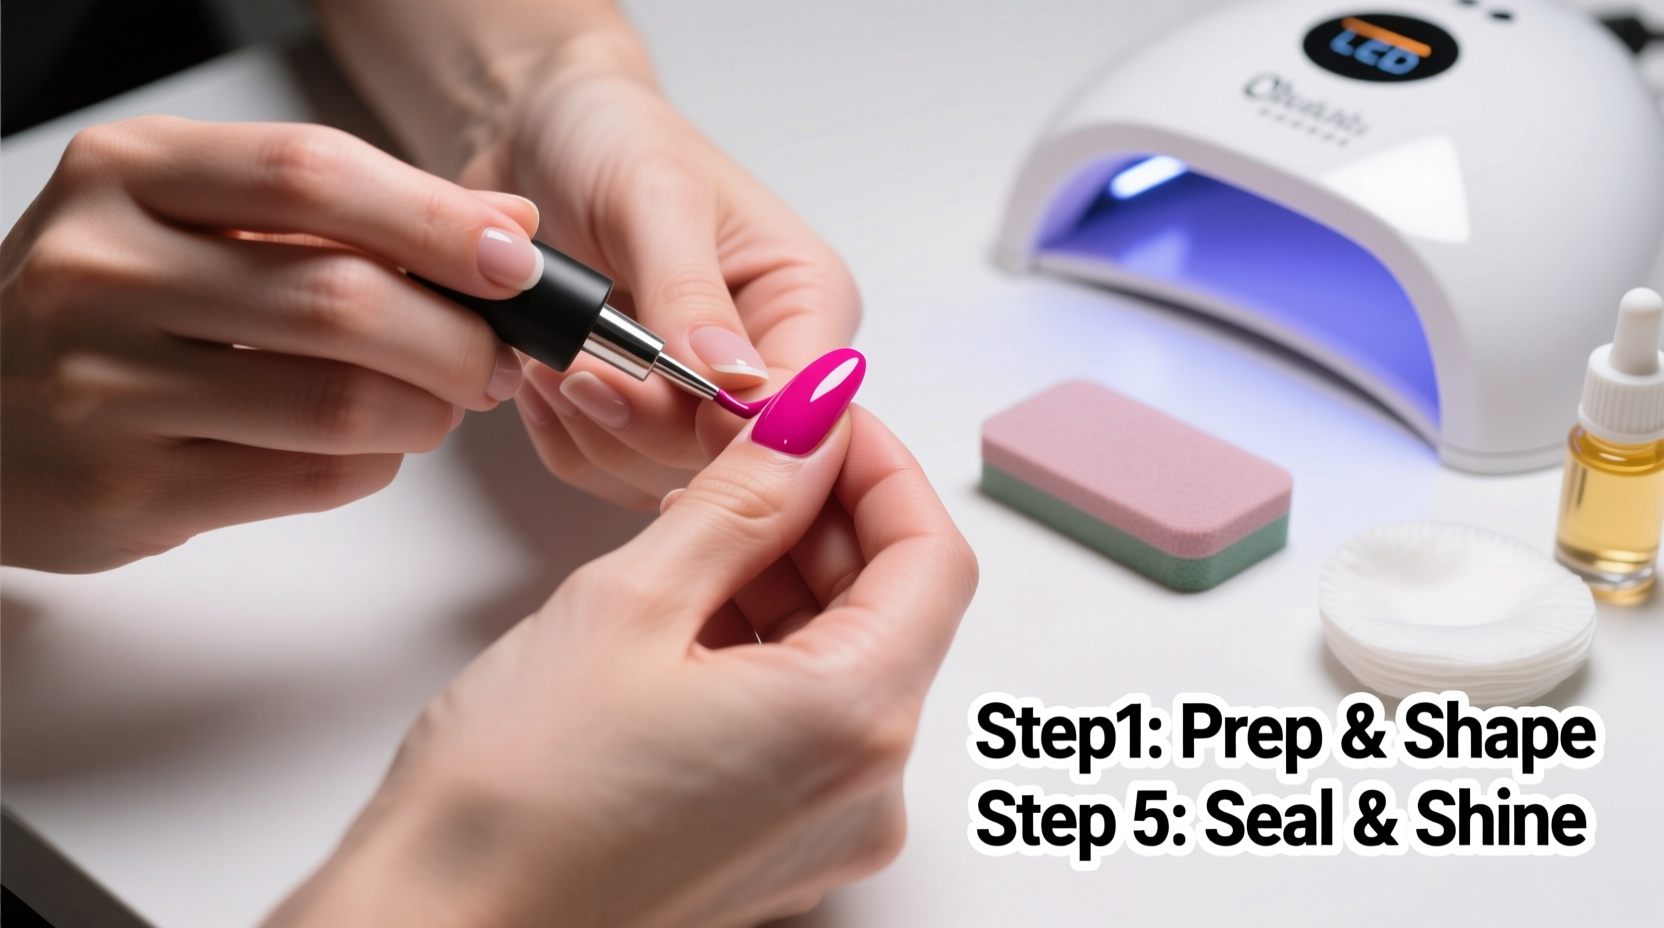
Before applying any polish, ensure you have a complete setup. Unlike regular nail polish, gel requires specific equipment for proper adhesion and longevity. Investing in quality tools pays off in both finish and wear time.
- Gel base coat
- Gel color(s) of choice
- Gel top coat (preferably high-shine and non-wipe)
- UV/LED nail lamp (36W or higher recommended)
- Nail prep kit: buffer, file, cuticle pusher, alcohol wipes
- Cleaner solution (isopropyl alcohol or dedicated gel cleanser)
- Nail dehydrator and primer (optional but beneficial for oily nails)
- Nail forms or tips (if extending length)
- Dotting tools, striping brushes, or other design accessories (for art)
The Step-by-Step Application Process
Success begins long before the first coat of color. Proper nail preparation ensures strong adhesion and prevents lifting. Follow this timeline for consistent, professional-grade results.
- Remove old product: Gently buff away any existing polish or residue. Avoid aggressive filing that thins the nail plate.
- Shape and smooth: Use a 180-grit file to shape nails into your preferred style—almond, square, or oval. Then lightly buff the surface using a block buffer to create micro-abrasions for better grip.
- Push back cuticles: Soften cuticles with oil or warm water, then gently push them back with a wooden stick. Do not cut unless experienced—over-cutting increases infection risk.
- Cleanse and dehydrate: Wipe each nail with isopropyl alcohol or a dedicated nail dehydrator. This removes oils and moisture that interfere with bonding.
- Apply base coat: Apply a thin, even layer of gel base coat, sealing the free edge by brushing along the tip. Cure under the lamp according to manufacturer instructions (usually 30–60 seconds).
- Apply first color coat: Use thin layers—thick application causes uneven curing and bubbling. Cure after each coat.
- Add second color coat if needed: Most colors achieve full opacity in two coats. Reapply and cure again.
- Seal with top coat: Apply a high-quality gel top coat, making sure to cap the free edge. Cure thoroughly.
- Final clean-up: Wipe the sticky inhibition layer with alcohol-soaked pad, unless using a non-wipe formula.
Avoiding Common Mistakes: Do’s and Don’ts
Even small errors can compromise wear time. Refer to this table to sidestep frequent issues encountered during at-home gel application.
| Do’s | Don’ts |
|---|---|
| Use thin, even coats of gel | Apply thick layers that trap uncured gel underneath |
| Cap the free edge on every coat | Leave the nail tip exposed, which causes early chipping |
| Keep nails dry and oil-free before starting | Apply lotion right before the manicure without cleaning it off |
| Cure each layer fully per the lamp’s requirements | Rush curing times or open the lamp mid-cycle |
| Wipe the sticky layer after final cure | Leave residue that attracts dust and dulls shine |
“The number one reason for gel lift? Contamination of the nail surface. Even invisible oils from fingertips can break the bond.” — Lana Reyes, Master Nail Technician & Educator
Maintenance and Longevity Tips
Once applied, your job isn’t over. Daily habits determine how well your gel manicure holds up. Here’s how to extend its life beyond two weeks.
- Wear gloves when doing dishes or cleaning to protect against harsh chemicals.
- Moisturize cuticles daily—but apply cream *after* washing hands and drying completely.
- Reinforce the free edge with a quick top-up of top coat every 7–10 days (re-cure after application).
- Avoid using nails as tools (e.g., opening cans or scratching surfaces).
- If a chip occurs early, fix it immediately with a tiny drop of matching gel and re-cure to prevent peeling.
Mini Case Study: Sarah’s Home Gel Journey
Sarah, a remote worker from Portland, started doing her own gels after monthly salon visits became unsustainable. Her first attempts lifted within five days due to skipping the dehydration step. After researching proper prep and investing in a stronger LED lamp, she adjusted her routine. Now, she achieves nearly identical results to her salon visits—her latest set lasted 18 days with only minor tip wear. “I realized I was rushing the prep,” she says. “Taking ten extra minutes made all the difference.”
Removal Without Damage
Never peel or pick off gel polish—it strips layers of the natural nail and causes thinning. Safe removal is crucial for ongoing nail health.
- File down the shiny top layer with a 100/180 grit buffer to break the seal.
- Soak cotton pads in acetone and place one on each nail.
- Wrap each fingertip in aluminum foil and wait 10–15 minutes.
- Gently push off softened gel with a cuticle stick—do not scrape.
- If gel remains, rewrap and soak another 5 minutes.
- Moisturize hands and nails thoroughly afterward.
Frequently Asked Questions
Can I mix different gel brands?
While possible, mixing brands increases the risk of improper curing or lifting. For best results, stick to one system—base, color, and top coat from the same line.
Why does my gel wrinkle or bubble during curing?
This usually happens when layers are too thick or the lamp bulb is old. Thin coats and checking your lamp’s lifespan (replace bulbs every 6–12 months) resolve most cases.
How often should I take breaks between gel manicures?
Nails don’t need mandatory breaks if applied and removed correctly. However, allowing 3–5 days of bare-nail recovery every few months helps maintain strength and hydration.
Final Checklist Before Starting
Run through this quick checklist to ensure readiness before every session:
- ✅ Nails are clean, dry, and free of oils or lotions
- ✅ Cuticles are pushed back and tidy
- ✅ All tools are sanitized and within reach
- ✅ Lamp is plugged in and functioning properly
- ✅ Workspace is well-lit and clutter-free
- ✅ Ventilation is adequate (gels emit fumes during curing)
Conclusion
Mastering gel nails at home combines precision, patience, and practice. By following structured steps, avoiding common mistakes, and maintaining your results, you can enjoy flawless, long-lasting manicures without recurring salon costs. Whether you’re aiming for classic nudes or intricate designs, consistency in prep and execution delivers professional outcomes. Start with simple applications, refine your technique over time, and soon you’ll wonder why you ever paid for basic services.


 浙公网安备
33010002000092号
浙公网安备
33010002000092号 浙B2-20120091-4
Comments
No comments yet. Why don't you start the discussion?