
Finding information about an unknown object, person, or location from a single image used to require guesswork and endless keyword searches. Today, Google Reverse Image Search turns that process on its head—literally. By uploading or linking to an image, you can discover where it came from, how it’s being used, and even identify similar visuals across the web. This powerful tool is invaluable for researchers, marketers, photographers, and everyday users who want answers without words.
Despite its usefulness, many people only scratch the surface of what reverse image search can do. With the right techniques, you can trace image origins, detect fake profiles, compare product prices, and protect your own content from unauthorized use. This guide walks through every practical application, offering real-world strategies and expert-backed methods to get the most from Google’s visual search engine.
How Google Reverse Image Search Works
Google Reverse Image Search uses computer vision algorithms to analyze the visual content of an image—its shapes, colors, textures, and composition—and match it against billions of indexed images online. Unlike text-based searches, which rely on keywords, reverse image search interprets pixels. When you submit an image, Google generates a unique digital fingerprint (a hash) and compares it to others in its database.
The results include web pages where the image appears, visually similar images, and sometimes related articles or products. Google may also recognize landmarks, artwork, or objects and provide direct information about them. The system improves continuously as machine learning models grow more sophisticated at identifying context and detail.
“Reverse image search has become a cornerstone of digital verification. It allows users to confirm authenticity and track visual misinformation.” — Dr. Alan Torres, Digital Forensics Researcher at MIT Media Lab
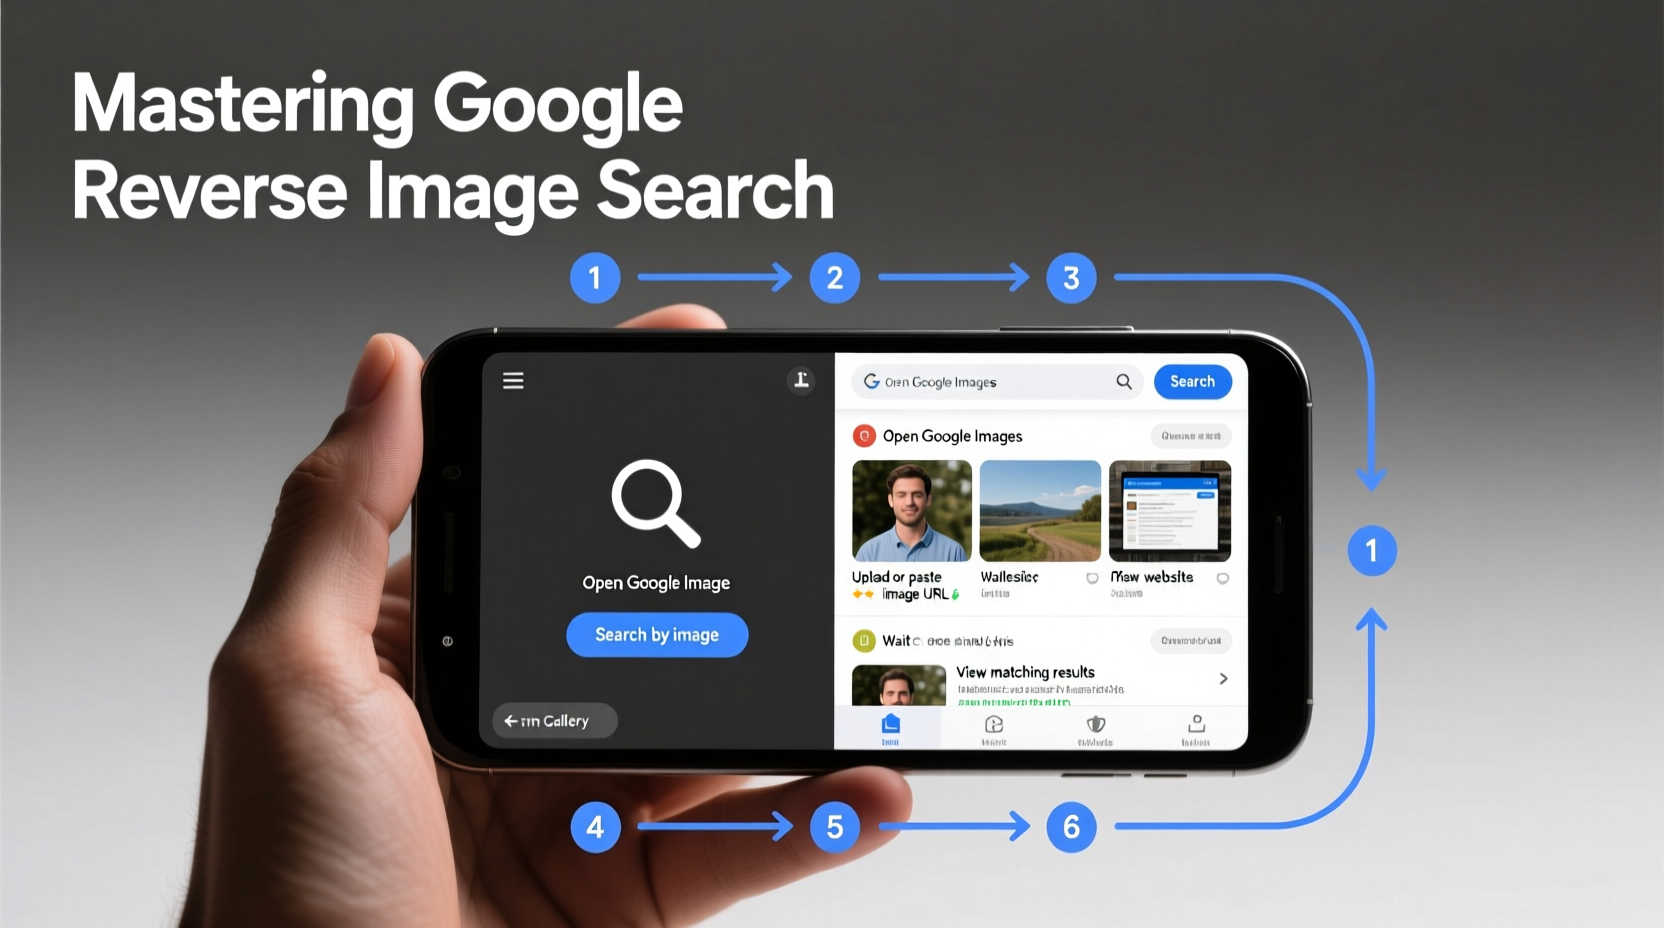
Step-by-Step: How to Perform a Reverse Image Search
Whether you're using a desktop or mobile device, performing a reverse image search is straightforward. Follow these steps for maximum accuracy and insight.
- Open Google Images: Go to images.google.com in your browser.
- Click the camera icon: Located in the search bar, this opens the upload options.
- Upload your image: Choose either “Upload an image” to select a file from your device or “Paste image URL” if the image is already online.
- Review the results: Google will display matches sorted by relevance, including exact duplicates, cropped versions, and similar visuals.
- Analyze the findings: Click through top links to see where the image originated, how it's used, and whether it appears elsewhere under different contexts.
Mobile Users: Reverse Search via Google Lens
On smartphones, Google Lens streamlines the process. Long-press any image in your gallery or within Chrome, then tap “Search with Google Lens.” The app extracts key elements and performs a contextual search, often returning shopping links, text transcriptions, or identification details for plants, animals, or landmarks.
Practical Applications of Reverse Image Search
Reverse image search isn’t just for curiosity—it serves real, impactful purposes across multiple domains.
- Verify authenticity: Check if a profile photo on social media or dating apps is stolen by running a reverse search.
- Find higher resolution versions: Locate original sources of low-quality images for presentations or reports.
- Track content theft: If you’re a photographer or blogger, use it to find unauthorized copies of your work.
- Compare product prices: Upload a product image to see where it’s sold and at what price.
- Identify unknown objects: Snap a photo of a plant, insect, or gadget and let Google suggest what it is.
Mini Case Study: Exposing a Fake Job Scam
Sophie, a job seeker, received an offer from a company claiming to be based in Toronto. The HR representative sent a professional headshot. Suspicious, Sophie uploaded the photo to Google Images. Within seconds, she found the same image linked to multiple fake profiles across LinkedIn clones and scam forums. One result traced it back to a stock photo site labeled “Businessman – Royalty-Free Image Pack.” Armed with this evidence, she avoided sharing personal information and reported the fraud.
Do’s and Don’ts: Best Practices Table
| Do’s | Don’ts |
|---|---|
| Use full-size images when possible | Don’t expect 100% accuracy with heavily edited or abstract visuals |
| Crop to focus on the main subject | Don’t assume the first result is always correct |
| Check timestamps on source pages | Don’t share sensitive personal images publicly during searches |
| Combine with text keywords for refinement | Don’t rely solely on reverse search for legal evidence without corroboration |
Advanced Tips for Power Users
Go beyond basic uploads with these pro-level tactics.
To refine results further, combine reverse search with keyword filters. After uploading an image, add descriptive terms to the search bar—like “vintage car,” “Paris,” or “for sale”—to narrow down matches. You can also filter by size, color, type (photo, clip art), and time range using Google’s tools.
For investigative research, save and organize reverse search results using browser bookmarks or tools like Notion or Airtable. Note discrepancies in captions, dates, or locations to spot manipulation or misinformation.
Checklist: Reverse Image Search Workflow
- ✅ Obtain the highest quality version of the image
- ✅ Crop to highlight the key element (person, object, scene)
- ✅ Upload via Google Images or paste URL
- ✅ Review “Pages that contain this image” and “Visually similar images”
- ✅ Cross-reference top results for consistency
- ✅ Use additional keywords to refine ambiguous matches
- ✅ Document sources and timestamps for credibility
Frequently Asked Questions
Can I reverse search screenshots?
Yes, but results depend on clarity. Screenshots with watermarks, UI overlays, or low resolution may not return accurate matches. Cropping to the core image improves success rates.
Is reverse image search private?
When you upload an image directly to Google Images, it is temporarily stored to process the query but not saved permanently or associated with your account. However, avoid uploading sensitive or private photos to minimize risk.
Why doesn’t my image return any results?
This usually means the image hasn’t been indexed before. It could be new, altered significantly, or hosted behind paywalls or private sites. Try searching a similar known image or refining with keywords.
Conclusion: Take Control of Visual Information
In an era where images spread faster than facts, knowing how to reverse search gives you a critical advantage. Whether you're protecting your identity, researching content, or simply satisfying curiosity, this skill empowers you to trace digital footprints and separate truth from deception. The tools are free, accessible, and constantly improving—your only limit is knowing how to use them effectively.


 浙公网安备
33010002000092号
浙公网安备
33010002000092号 浙B2-20120091-4
Comments
No comments yet. Why don't you start the discussion?