
Finding information online has evolved far beyond text-based queries. When you see an unfamiliar object, a striking piece of art, or a mystery product, typing descriptive words can be limiting. This is where Google Reverse Image Search becomes invaluable. Instead of describing what you’re looking for, you let the image do the talking. Whether you're verifying authenticity, tracking down sources, or identifying unknown elements in a photo, reverse image search transforms visual data into actionable insights.
This guide breaks down the entire process—from uploading your first image to interpreting results—so you can harness the full power of visual search. No more guessing games. With the right approach, a single picture can open doors to rich context, related content, and even solutions to long-standing questions.
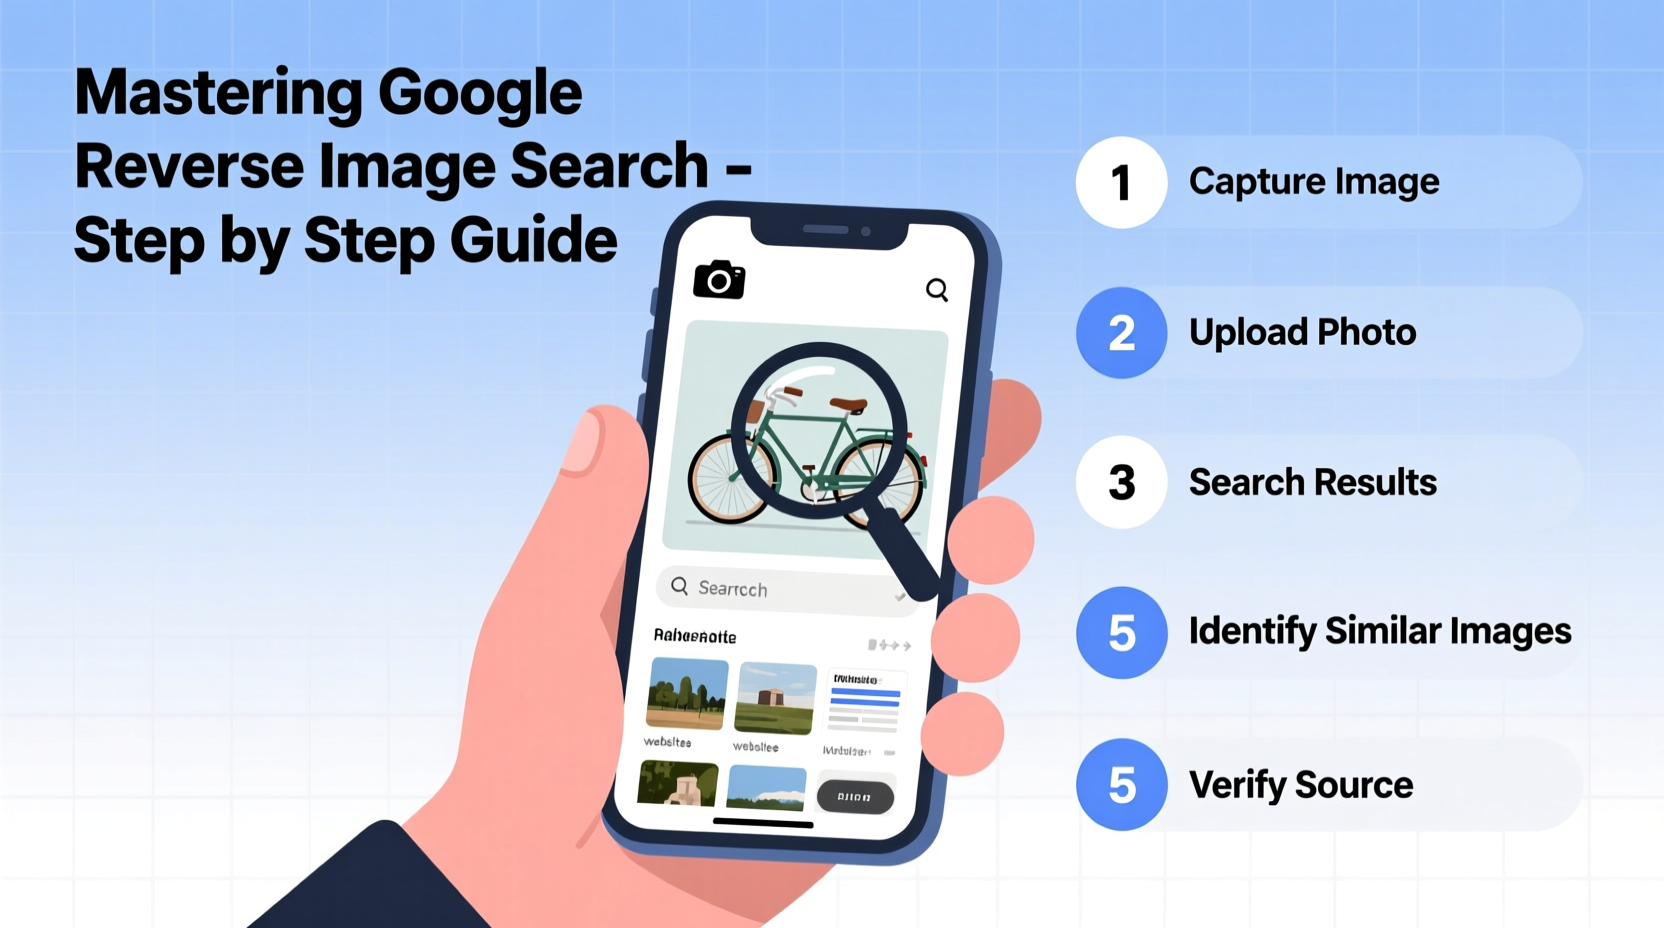
How Google Reverse Image Search Works
Google Reverse Image Search uses computer vision algorithms to analyze the visual content of an image. It identifies unique patterns, shapes, colors, and textures to create a digital fingerprint. This fingerprint is then matched against billions of indexed images across the web. The result? A list of visually similar images, websites where the image appears, and contextual information such as titles, descriptions, and associated pages.
The technology doesn’t rely on filenames or alt text alone—it interprets the image itself. That means even if an image has been resized, cropped, or slightly edited, Google can often still recognize it. This makes the tool powerful for detecting plagiarism, tracing the origin of viral content, or identifying people, places, and objects without prior knowledge.
“Reverse image search is one of the most underutilized tools in digital literacy. It empowers users to verify claims, explore visual data, and conduct research without relying solely on text.” — Dr. Lena Patel, Digital Information Researcher at Stanford University
Step-by-Step: Performing a Reverse Image Search
Conducting a reverse image search is simple once you know the correct method. Follow these steps based on your device and browser setup.
- Open Google Images: Go to images.google.com in your preferred browser.
- Click the camera icon: Located in the search bar, this symbol opens the image upload panel.
- Upload your image: You can either paste an image URL or upload a file from your device.
- Review the results: Google displays matching or similar images, along with links to where they appear online.
On mobile devices, the process is nearly identical. In the Google app or Chrome browser, tap the search bar, then the camera icon, and choose “Upload an image” or “Search from Gallery.”
Alternative Methods Across Devices
If you're already viewing an image online, you can skip the upload step. Right-click (or long-press on mobile) and select “Search Image with Google” directly. This context menu option triggers an instant reverse search, saving time and improving workflow efficiency.
For Chrome users, extensions like “Search by Image” enhance functionality by adding one-click search options to any image on a webpage. These tools integrate seamlessly with Google’s engine and support drag-and-drop uploads.
Practical Applications and Real-World Uses
Reverse image search isn’t just a novelty—it has tangible applications across personal, professional, and academic domains.
- Identify unknown plants or animals: Snap a photo of a flower during a hike and trace its species.
- Verify product authenticity: Compare listings across marketplaces to spot counterfeit goods.
- Track image usage: Photographers and artists can find unauthorized copies of their work.
- Research artwork or design: Discover the artist behind a mural or the inspiration behind a logo.
- Combat misinformation: Confirm whether a viral photo is being used out of context.
Mini Case Study: Uncovering a Misattributed Photo
A blogger once shared a dramatic war photograph, claiming it was taken during the 2022 Ukraine conflict. Suspicious readers performed a reverse image search and discovered the photo originated from a 2015 Syrian refugee camp. The original photographer confirmed it had been mislabeled. Within hours, the post was corrected. This example shows how reverse image search serves as a frontline defense against misinformation, enabling individuals to fact-check visuals independently.
Do’s and Don’ts: Best Practices Table
| Do’s | Don’ts |
|---|---|
| Use clear, focused images with distinct features | Submit blurry or pixelated images |
| Crop to the main subject to improve relevance | Include large backgrounds that distract from the core object |
| Check multiple result pages for deeper insights | Assume the first result is always accurate |
| Use reverse search to verify social media content | Share unverified images as factual evidence |
| Combine with keyword searches for richer context | Rely solely on image results without cross-referencing |
Advanced Tips for Better Results
While basic searches yield useful outcomes, refining your technique unlocks deeper insights.
Try modifying the search after initial results. Click “Visually similar images” to expand your scope. You might discover variations, earlier versions, or higher-quality originals. If the image contains text, use Google Lens to extract and search those words separately.
For researchers, combining reverse image search with site-specific queries (e.g., site:.edu or site:.gov) filters results to authoritative domains. This is especially useful when validating educational or scientific imagery.
Checklist: Optimizing Your Reverse Image Search
- ✅ Ensure the image is saved locally or accessible via URL
- ✅ Crop to the most relevant section if possible
- ✅ Use a desktop browser for advanced filtering options
- ✅ Review both “Pages that include the image” and “Visually similar” sections
- ✅ Cross-check top results with external sources
- ✅ Save or bookmark useful findings for future reference
Frequently Asked Questions
Can Google Reverse Image Search identify people?
It can sometimes locate public profiles or news articles featuring the person, but it does not perform facial recognition in the way law enforcement or dedicated biometric systems do. Privacy protections limit direct identification unless the image is widely published online.
Is it legal to reverse search any image?
Yes, as long as you’re using publicly available images and not violating copyright or privacy laws. Avoid using private or sensitive photos of others without consent. The tool is intended for research, verification, and discovery—not surveillance.
Why are my search results irrelevant?
Poor image quality, excessive background noise, or overly common visual elements (like generic landscapes) can dilute accuracy. Try refining the image or using additional keywords alongside the visual search to narrow results.
Conclusion: Turn Images Into Insights
Google Reverse Image Search transforms passive observation into active investigation. What once required expert knowledge or manual detective work can now be accomplished in seconds. From verifying facts to exploring creative influences, the ability to search with pictures is a fundamental skill in the digital age.
Mastery comes not just from knowing how to upload an image, but from understanding how to interpret results, refine queries, and apply findings responsibly. Whether you're a journalist, student, shopper, or curious individual, this tool puts vast visual intelligence at your fingertips.


 浙公网安备
33010002000092号
浙公网安备
33010002000092号 浙B2-20120091-4
Comments
No comments yet. Why don't you start the discussion?