
Images are everywhere—on social media, websites, and messaging apps. But what if you come across a photo and have no idea where it came from, who took it, or whether it’s authentic? That’s where Google Reverse Image Search comes in. This powerful tool lets you upload an image or provide its URL to find related results, trace its origin, verify its authenticity, and uncover valuable context. Whether you’re researching, fact-checking, or simply curious, mastering this feature can save time and reveal insights text-based searches often miss.
Why Reverse Image Search Matters
In an age of digital misinformation and viral content, being able to verify the source and history of an image is crucial. Journalists use it to confirm photo authenticity before publishing. Researchers track visual trends across platforms. Shoppers identify products from screenshots. Artists protect their work from unauthorized use. The applications are vast and growing.
Google’s reverse image search leverages advanced computer vision algorithms to analyze visual patterns, colors, shapes, and metadata (when available) to match your query against billions of indexed images online. It doesn’t just look for exact duplicates—it finds visually similar results, different sizes, cropped versions, and even edited variations.
“Reverse image search has become a cornerstone of digital literacy. It empowers users to question what they see and validate claims independently.” — Dr. Lena Patel, Digital Forensics Researcher at MIT
Step-by-Step Guide to Using Google Reverse Image Search
Using Google’s tool is straightforward, but knowing the nuances ensures better results. Follow these steps based on your device and the type of image you're working with.
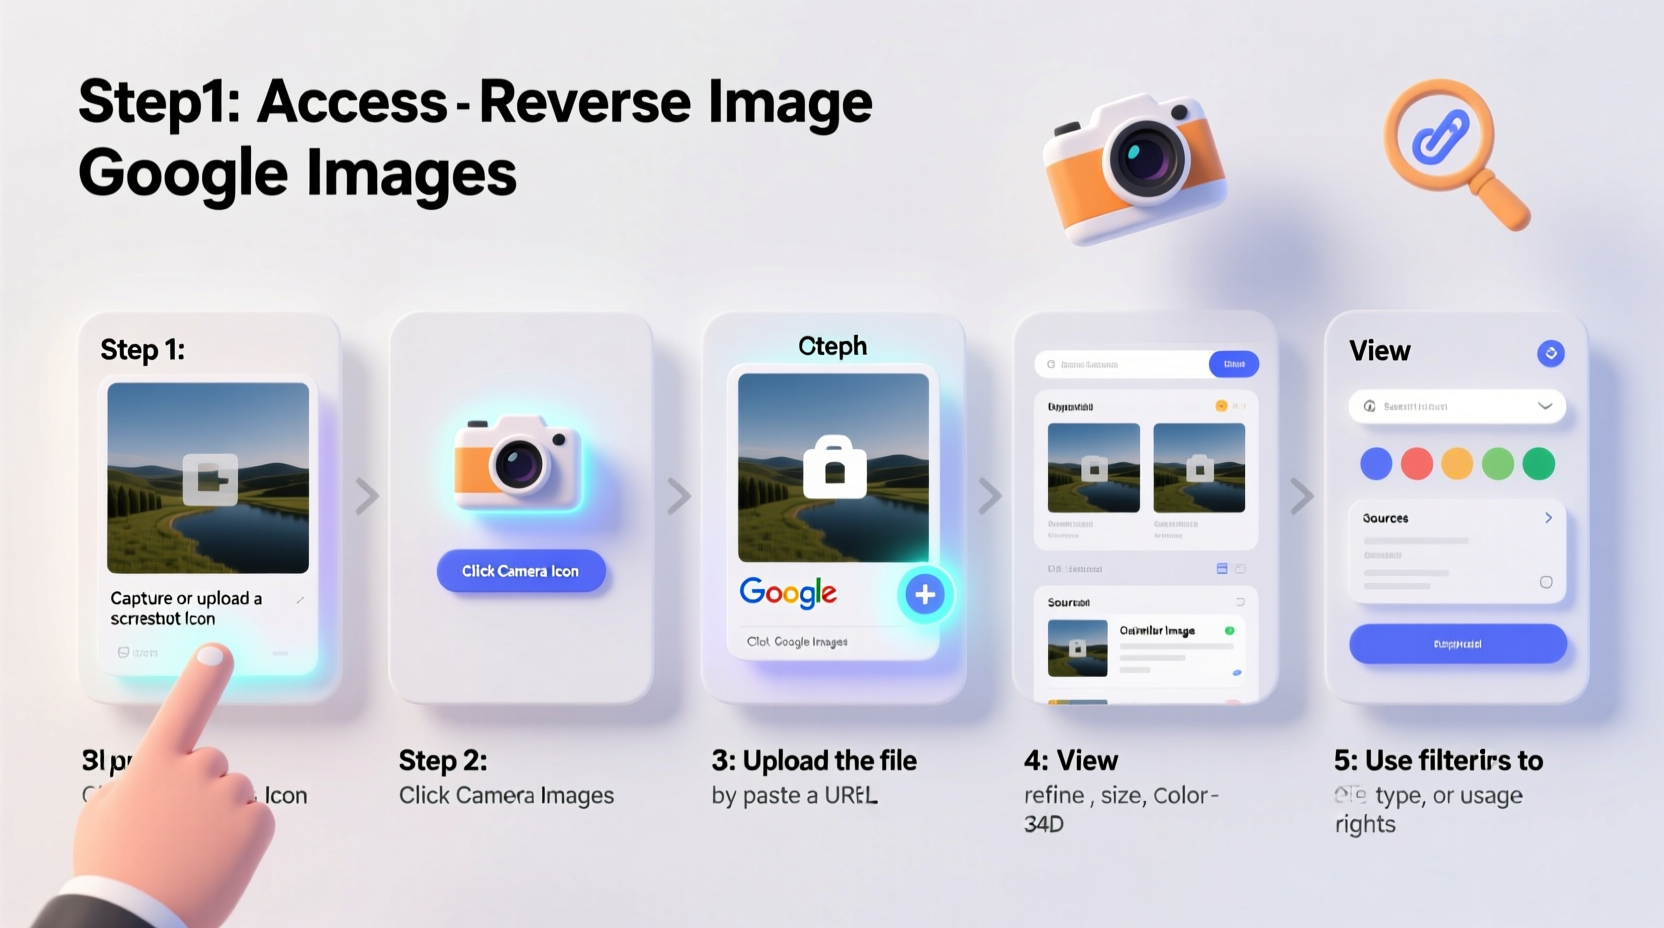
On Desktop: Upload or Paste Image URL
- Go to images.google.com.
- Click the camera icon in the search bar.
- Choose one of two options:
- Upload an image: Select a file from your computer.
- Paste image URL: Insert the web address of an image hosted online.
- Click “Search” and review the results.
The results page shows visually similar images, websites where the image appears, and sometimes additional details like titles, descriptions, or purchase links.
On Mobile: Use Chrome Browser or Google Lens
While the full desktop experience isn’t available directly in the Google app, mobile users can still perform reverse searches effectively:
- Open the Chrome browser on your Android or iOS device.
- Navigate to the webpage containing the image.
- Tap and hold the image until a menu appears.
- Select “Search Image with Google Lens”.
- Review the findings in the sidebar or new tab.
Advanced Techniques for Better Results
Basic searches return surface-level matches. To dig deeper, apply these expert strategies.
Refine with Keywords
After running a reverse image search, add descriptive keywords to the search bar to narrow results. For example, if searching for a painting, include terms like “artist,” “museum,” or “oil on canvas.” This helps filter out irrelevant matches and prioritize authoritative sources.
Analyze Metadata When Possible
Some images contain embedded EXIF data—information about the camera model, location, timestamp, and software used. While Google doesn’t display this directly, tools like Jeffrey’s Exif Viewer can extract it. Combine that data with reverse search results to build a timeline or geographic trail.
Use Cropped Sections Strategically
If the original image is cluttered or contains multiple subjects, crop it to focus on a specific detail—a face, logo, landmark, or object. A targeted search often yields more accurate results than a broad one.
Check Multiple Engines
While Google leads in general indexing, specialized tools offer unique advantages:
| Tool | Best For | Limitation |
|---|---|---|
| Google Images | Broad web coverage, fast results | Limited filtering options |
| TinEye | Finding earliest known use of an image | Smaller database than Google |
| Yandex.Images | Facial recognition, Russian/Eastern European content | Less effective for English-language sites |
| Bing Visual Search | E-commerce product matching | Narrower index |
Real-World Application: A Case Study
A freelance journalist received a shocking photo on social media showing alleged environmental damage near a protected wetland. The image had been shared widely with claims it was taken last month. Before reporting, she ran a reverse image search using Google.
The results revealed the same photo appeared on a travel blog three years earlier, captioned as a scenic view after rainfall. Further investigation showed the “damage” was actually natural sediment patterns. By tracing the image’s history, she avoided spreading misinformation and instead published a piece on how visuals can be misinterpreted without proper context.
This case underscores a critical truth: seeing isn’t always believing. Verification is essential.
Common Mistakes to Avoid
- Assuming the first result is correct: Always cross-reference multiple sources.
- Ignoring low-resolution matches: Even blurry or small thumbnails can lead to original sources.
- Overlooking cropped or edited versions: Manipulated images may not match exactly—look for partial similarities.
- Using screenshots unnecessarily: Screenshots add borders and reduce quality. Use the original image when possible.
Checklist: Mastering Reverse Image Search in Practice
Follow this checklist every time you need to investigate an image:
- ✅ Save or copy the original image (avoid screenshots if possible).
- ✅ Try both upload and URL methods on Google Images.
- ✅ Use Google Lens on mobile for quick lookups.
- ✅ Crop the image to isolate key elements if needed.
- ✅ Add relevant keywords to refine results.
- ✅ Check TinEye or Yandex for alternative matches.
- ✅ Look for timestamps, captions, or contextual clues in result pages.
- ✅ Verify ownership or licensing through reverse search + metadata tools.
Frequently Asked Questions
Can I reverse search a screenshot?
Yes, but accuracy may suffer due to added UI elements, compression, or resolution loss. For best results, extract the image from the source website instead of taking a screenshot.
Is reverse image search private?
When you upload an image to Google, it processes the file temporarily to generate results. Google states that uploaded images are not stored permanently or used to personalize ads. However, avoid uploading sensitive or personal photos unless necessary.
Why do some images return no results?
An image may be too new, highly edited, or never indexed by search engines. It might also lack distinguishing visual features. In such cases, try alternative platforms like TinEye or Yandex, which sometimes index content Google misses.
Conclusion: Take Control of What You See Online
Visual content shapes opinions, drives decisions, and spreads faster than ever. With Google Reverse Image Search, you gain the ability to trace origins, verify facts, and separate truth from manipulation. It’s not just a tool—it’s a skill that strengthens digital resilience.
Whether you’re protecting your own creative work, researching a news story, or shopping for furniture seen in a friend’s photo, this technique unlocks answers hidden in plain sight. The next time you encounter an intriguing or suspicious image, don’t guess. Investigate.


 浙公网安备
33010002000092号
浙公网安备
33010002000092号 浙B2-20120091-4
Comments
No comments yet. Why don't you start the discussion?