
Finding information about an unknown object, person, or location from a single image used to be nearly impossible. Today, Google Reverse Image Search turns that challenge into a simple process. Whether you’re verifying the source of a viral photo, identifying a plant in your garden, or tracking down higher-resolution versions of artwork, reverse image search is one of the most powerful tools available—free and accessible to anyone with internet access.
This guide walks through every aspect of using Google’s reverse image search effectively. From uploading images on desktop and mobile to interpreting results and avoiding common pitfalls, you’ll gain practical skills to make the most of visual search technology.
How Google Reverse Image Search Works
Unlike traditional text-based searches, reverse image search analyzes the visual data within an image to find similar or identical content across the web. Google uses advanced algorithms, including computer vision and machine learning, to detect shapes, colors, textures, and patterns. It then matches these visual fingerprints against billions of indexed images.
The system doesn’t rely on file names or surrounding text (though those can help), which makes it especially useful when metadata is missing or misleading. Instead, it creates a digital signature of the image and compares it to others in its database.
“Reverse image search has become essential for fact-checkers, researchers, and marketers. It reveals context that text alone cannot.” — Dr. Alan Reyes, Digital Forensics Researcher at MIT Media Lab
Understanding how this process works helps set realistic expectations. For example, heavily edited or cropped images may return fewer accurate matches, while high-quality originals typically yield better results.
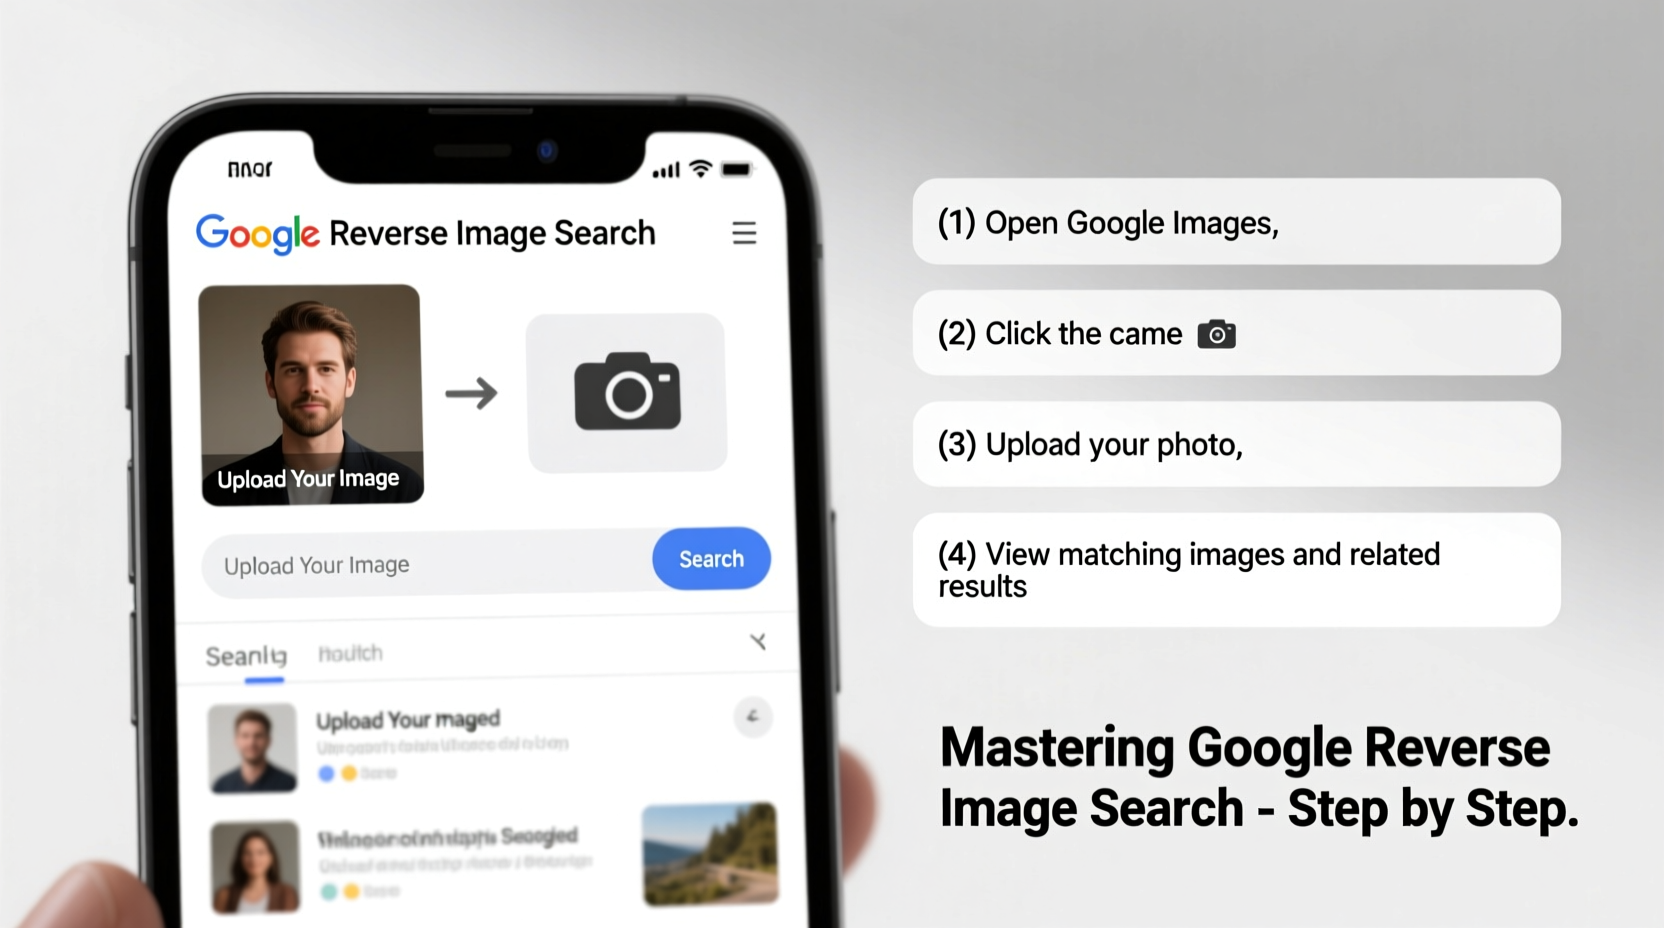
Step-by-Step Guide: How to Use Reverse Image Search
Using Google Reverse Image Search is straightforward once you know the methods. Here’s how to do it across different platforms.
On Desktop (Chrome, Firefox, Edge)
- Navigate to Google Images.
- Click the camera icon in the search bar to open the “Search by image” panel.
- Upload an image from your device or paste an image URL.
- Wait for Google to analyze and display results.
- Review thumbnails and links where the image appears.
On Mobile (Android & iOS)
- Open the Google app or Chrome browser.
- Go to Google Images and tap the camera icon.
- Choose “Upload an image” or “Take a photo.”
- Select a saved photo or snap a new one.
- Analyze results showing matching or related images.
Note: On some devices, long-pressing an image in Chrome brings up a “Search image with Google Lens” option—this integrates reverse search with AI-powered identification.
Real-World Applications and Case Study
Reverse image search isn’t just for curiosity—it solves real problems. Consider this scenario:
Case Study: Unmasking a Fake Product Review
Sophia runs a small e-commerce site selling handmade jewelry. She noticed a competitor’s listing featured stunning lifestyle photos showing models wearing their pieces at exotic beaches. The reviews claimed the photos were customer-submitted.
Suspicious of stock imagery, Sophia downloaded one photo and ran it through Google Reverse Image Search. Within seconds, she found the same image on a royalty-free stock photo website, credited to a professional photographer in Bali. The timestamp predating the product launch confirmed her suspicion: the business was using fake user-generated content.
She reported the violation to the platform, leading to the removal of misleading listings. This case highlights how reverse image search empowers ethical competition and protects consumers.
Do’s and Don’ts: Best Practices Table
| Do’s | Don’ts |
|---|---|
| Use high-resolution images for best accuracy | Expect perfect results with blurry or heavily filtered photos |
| Crop to focus on the main subject before uploading | Assume all results are original sources—check dates and domains |
| Verify multiple results before drawing conclusions | Upload sensitive personal images (e.g., ID cards, private moments) |
| Use reverse search to check image licensing rights | Ignore regional variations—some images appear differently across countries |
Advanced Tips for Better Results
Most users perform basic searches, but mastering reverse image search means leveraging subtle techniques for deeper insights.
- Refine with keywords: After uploading an image, add descriptive terms like “car model 2023” or “painting style impressionism” to narrow results.
- Check timestamps: Look at cached pages or archive.org links to determine when an image first appeared online.
- Compare visually similar results: Click “Visually similar images” to explore variations—useful for spotting manipulated content.
- Trace social media origins: If an image appears on Pinterest or Tumblr, follow links backward to find earlier posts.
FAQ: Common Questions Answered
Can Google identify people in photos using reverse search?
Google does not automatically identify individuals unless they are public figures and the image is widely published. For privacy reasons, facial recognition is limited in consumer-facing tools. Law enforcement and specialized software use separate systems for biometric matching.
Why do some images return no results?
This often happens if the image is new, highly edited, or not indexed by Google. Try cropping to the central subject or adjusting brightness before re-uploading. Also, ensure the image hasn’t been blocked by robots.txt on the source site.
Is reverse image search safe and private?
Uploaded images are processed temporarily and not stored permanently by Google. However, avoid uploading private documents, passwords, or sensitive personal content. Publicly shared images may become discoverable if posted elsewhere.
Conclusion: Take Control of Visual Information
In an age where misinformation spreads faster than facts, knowing how to verify what you see is a critical skill. Google Reverse Image Search puts investigative power in everyone’s hands—not just journalists or detectives. With practice, you can uncover the origin of memes, authenticate travel photos, protect intellectual property, and even solve everyday mysteries like identifying unknown plants or fashion items.
The key lies in consistent application and thoughtful interpretation of results. Technology provides the tool; your judgment determines its value.


 浙公网安备
33010002000092号
浙公网安备
33010002000092号 浙B2-20120091-4
Comments
No comments yet. Why don't you start the discussion?