
Braiding your natural hair before installing a wig is more than just a styling choice—it’s a foundational step in achieving a secure, comfortable, and long-lasting fit. For beginners, the process may seem intimidating, but with the right techniques and consistent practice, anyone can master the art of braiding for wig installation. Properly braided hair not only protects your strands but also creates a smooth, stable base that prevents slippage and enhances the wig’s natural appearance.
This guide walks you through essential braiding methods, tools, and best practices tailored specifically for securing wigs. Whether you're using a lace front, full lace, or synthetic unit, these steps will help you achieve a flawless finish while safeguarding your edges and scalp health.
Why Braiding Is Essential for Wig Installation
Braiding serves multiple purposes beyond neatness. When preparing your hair for a wig, the goal is to lay it flat against the scalp, reduce bulk, and minimize friction. Loose or unsecured hair can cause discomfort, uneven surfaces under the cap, and even damage to your natural hair over time.
- Protects natural hair: Keeps strands tucked away from manipulation and environmental stressors.
- Provides a stable foundation: Ensures the wig sits evenly without shifting.
- Preserves edges: Reduces tension on delicate front hairs when done correctly.
- Extends wear time: A well-braided base allows for longer, more comfortable wear between adjustments.
“Braiding isn’t just about aesthetics—it’s structural support for your wig. Think of it like building a house: if the foundation isn’t solid, everything else will shift.” — Tasha Reynolds, Licensed Cosmetologist & Wig Stylist
Essential Tools and Materials You’ll Need
Before beginning, gather the right supplies. Using quality tools ensures efficiency and reduces strain on your hair and hands.
| Tool/Item | Purpose | Recommended Type |
|---|---|---|
| Rat-tail comb | Parting and sectioning hair precisely | Smooth, durable plastic or metal |
| Edge control or gel | Smoothing edges and flyaways | Alcohol-free, flexible hold formula |
| Bobby pins or hair clips | Holding sections during braiding | Small, matte-finish clips to avoid shine |
| Water spray bottle | Misting hair for manageability | Fine mist setting |
| Thread or hair wefts (optional) | Adding density or creating cornrows | Matching color to natural hair |
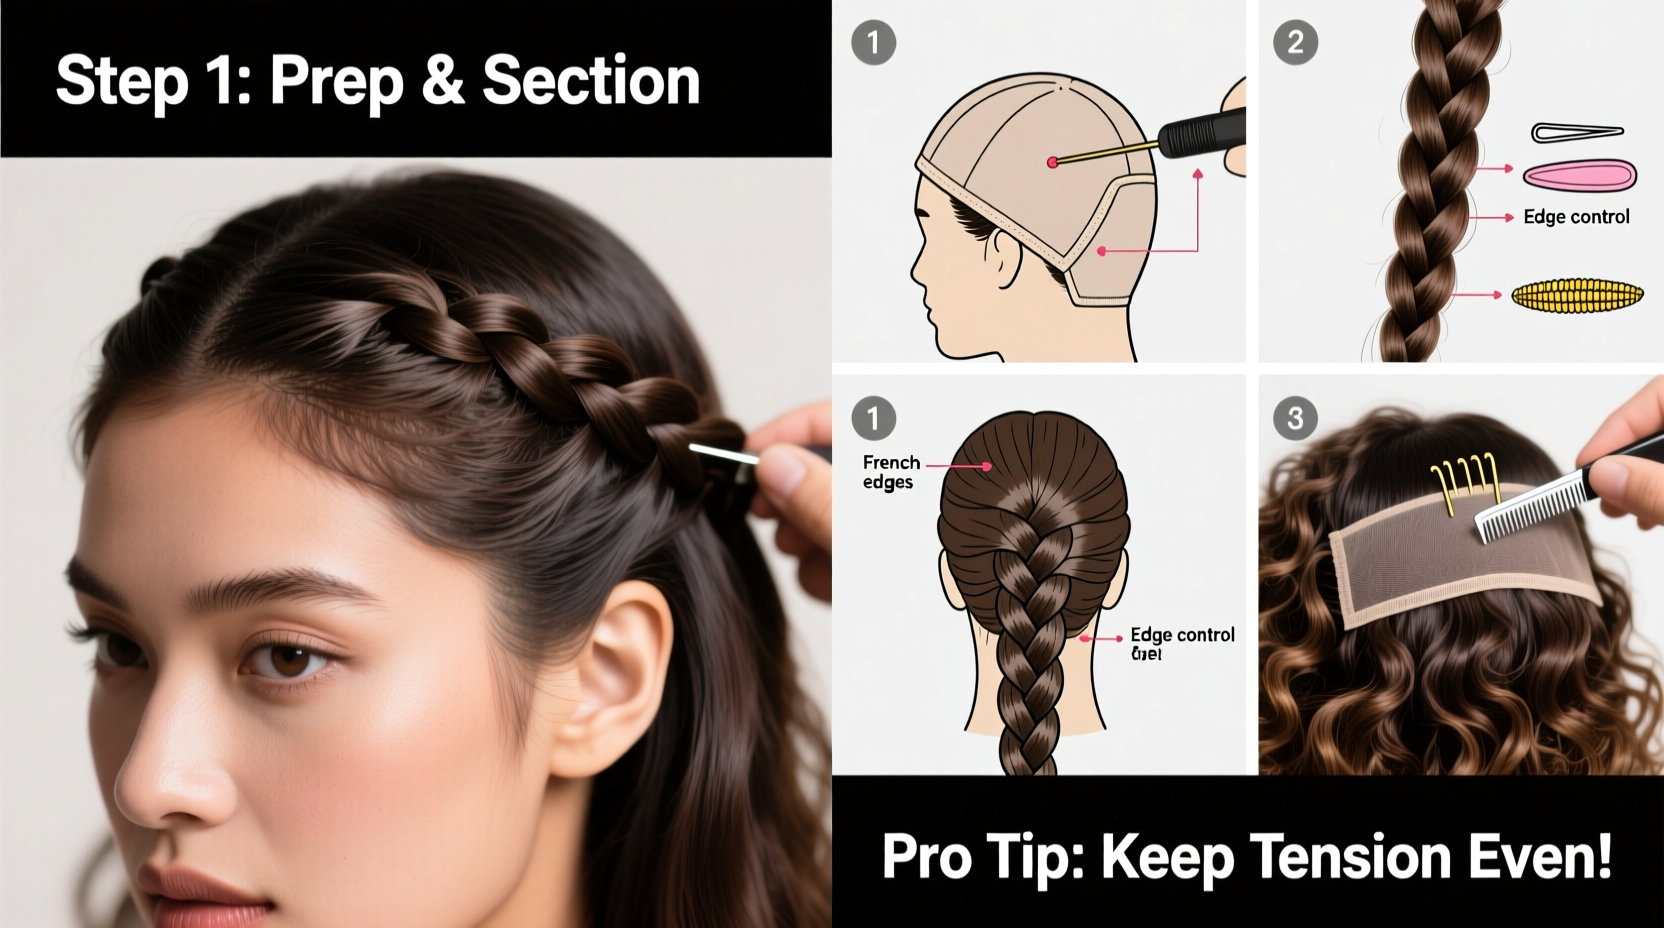
Step-by-Step Guide to Braiding for Wig Security
Follow this detailed sequence to create a secure, low-tension braid pattern ideal for wig wear.
- Clean and condition your hair. Start with freshly washed, detangled hair. Apply a light leave-in conditioner to add moisture and reduce frizz.
- Section the hair. Use the rat-tail comb to part your hair into four equal quadrants: two front (left and right), two back (nape and crown). Clip each section out of the way.
- Begin with the back sections. Unclip one rear quadrant and divide it into 1-inch horizontal rows. From each row, create small three-strand braids going horizontally toward the center of the head.
- Use a cornrow technique for maximum flatness. Braid tightly enough to lie flat but not so tight that it pulls on the scalp. Finish each braid with a small knot or tuck the end under and pin it down.
- Move to the sides and front. Work from temple to nape on each side. Be gentle around the temples and hairline—these areas are prone to traction alopecia if overstretched.
- Seal the braids. Lightly dampen edges with water and apply edge control using a soft toothbrush to lay baby hairs smoothly along the hairline.
- Check for symmetry and comfort. Run your fingers over the braided surface. There should be no lumps or sharp ends poking through.
Pro Tip: The Grid Method for Even Distribution
To prevent pressure points under the wig, use a grid-style layout—horizontal rows intersecting with vertical columns. This distributes tension evenly and mimics the structure of a wig cap’s wefts.
Common Mistakes to Avoid
Even experienced braiders can make errors that compromise wig security or hair health. Watch out for these pitfalls:
- Braiding too tightly: Causes headaches and long-term edge loss.
- Leaving loose ends: Can tangle or push up the wig lining.
- Skipping edge control: Results in visible bumps under thin lace fronts.
- Ignoring scalp hygiene: Trapped sweat leads to irritation and odor.
“I once had a client wear her wig for three weeks straight without removing it. The buildup caused folliculitis. Regular breaks and clean braids are non-negotiable.” — Dr. Lila Chen, Trichologist
Mini Case Study: From Frustration to Confidence
Jamila, a 28-year-old teacher in Atlanta, struggled with her lace front slipping by midday. She tried tapes and adhesives, but nothing held. After consulting a stylist, she learned her mistake: she was twisting her hair instead of braiding it flat. Once she switched to a cornrow base with a grid pattern, her wig stayed secure all week—even during outdoor school events. “I didn’t realize how much difference the underneath made,” she said. “Now I spend 30 minutes prepping, and it saves me hours of worry.”
Do’s and Don’ts of Wig-Safe Braiding
| Action | Do | Don't |
|---|---|---|
| Tension | Braid snugly but comfortably—like a firm handshake | Pull so tight it causes immediate discomfort |
| Frequency | Re-braid every 2–3 weeks max | Keep braids longer than 4 weeks without removal |
| Sleeping | Wear a satin bonnet or scarf | Sleep on cotton pillowcases without protection |
| Scalp Care | Apply diluted tea tree oil weekly to soothe | Ignore itching or redness—could signal infection |
FAQ
Can I braid wet hair for wig prep?
It’s best to work with damp, not soaking wet, hair. Wet hair is more elastic and prone to breakage when pulled tightly. Dampen lightly with a spray bottle for control.
How many braids do I need for a full head?
Aim for 20–30 braids total, depending on hair thickness. Too few increases bulk; too many can overcrowd the scalp and limit airflow.
Is it safe to reuse the same braids under multiple wigs?
Yes, as long as the braids remain clean, intact, and tension-free. Replace them if they feel loose, frizzy, or cause irritation.
Final Checklist Before Wig Application
- ✅ All hair is fully braided and secured
- ✅ Edges are smoothed with edge control
- ✅ No loose strands or protruding knots
- ✅ Scalp feels comfortable with no sore spots
- ✅ Braids lie completely flat under fingertips
- ✅ Wig cap or glue block is ready for application
Conclusion
Mastery of braiding for wig installation transforms both the look and longevity of your style. It bridges the gap between temporary beauty and sustainable hair wellness. By investing time in learning proper techniques, choosing the right tools, and listening to your scalp’s needs, you gain confidence in wearing wigs that appear seamless and feel secure.


 浙公网安备
33010002000092号
浙公网安备
33010002000092号 浙B2-20120091-4
Comments
No comments yet. Why don't you start the discussion?