
In the world of bespoke footwear, few elements define craftsmanship like hand-stitched western boots. While machines dominate mass production, true artisans rely on needle and thread to bring character, durability, and individuality to every pair. Hand stitching isn’t just a technique—it’s a language of tradition, patience, and personal expression. For designers and cobblers aiming to stand out in a saturated market, mastering these stitches unlocks the ability to craft truly one-of-a-kind western boots that reflect both heritage and innovation.
The Art and Purpose of Hand Stitching in Western Boots
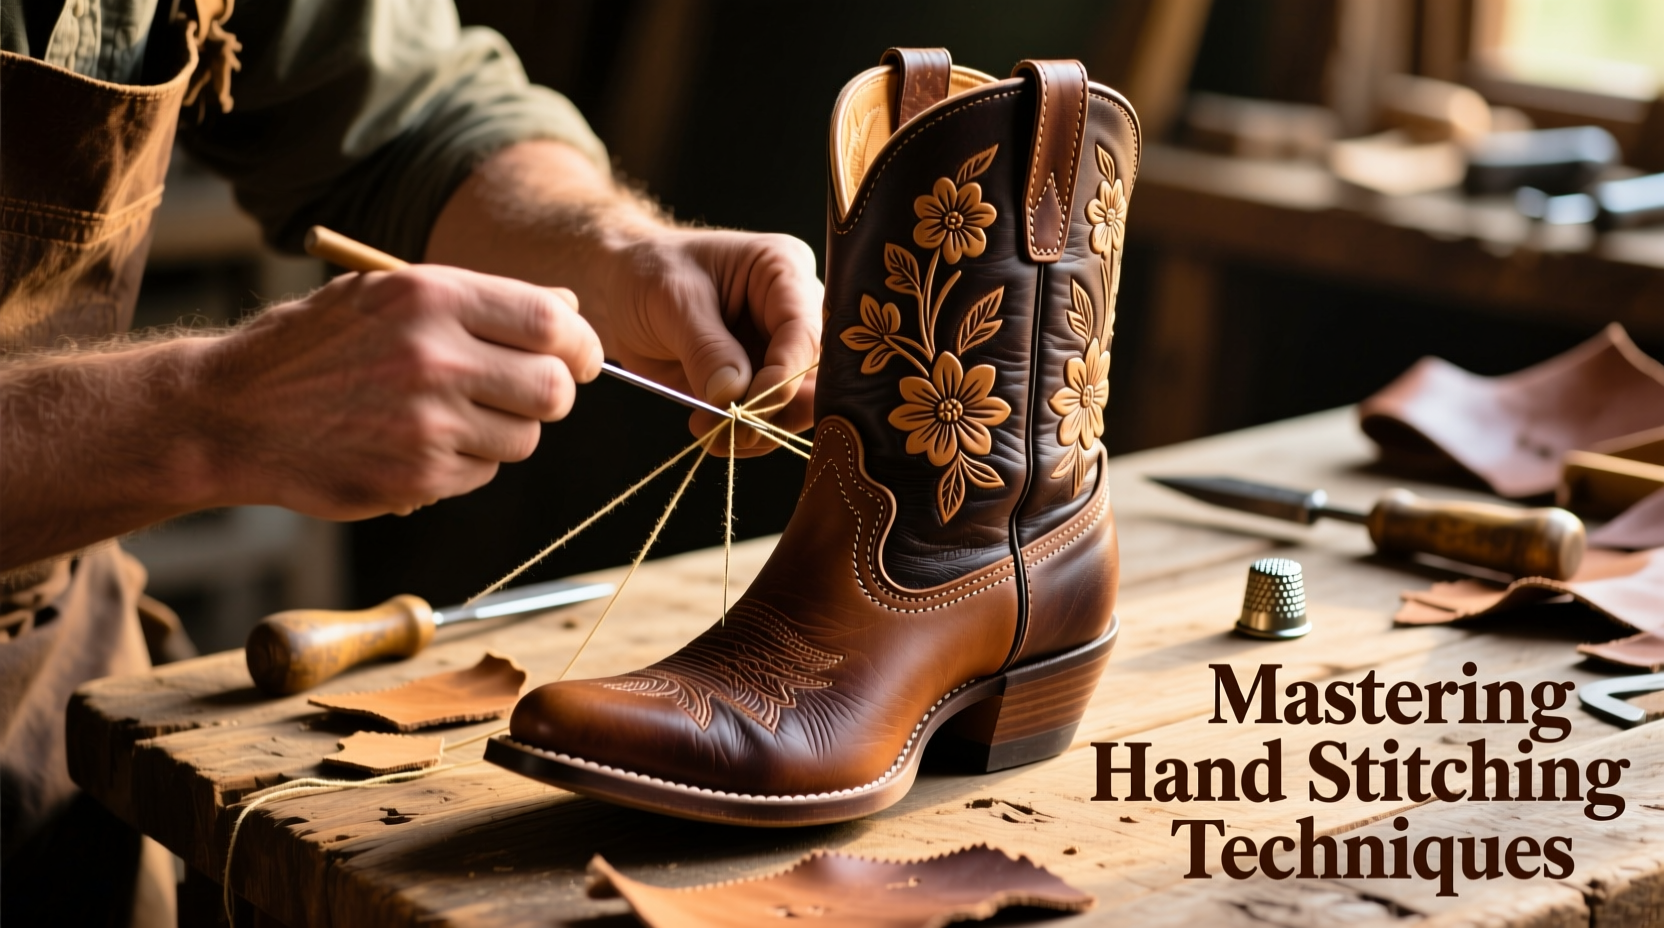
Western boots have long been symbols of identity—worn by cowboys, ranchers, musicians, and fashion icons alike. Their visual impact often comes from intricate design elements, many of which are enhanced or made possible through hand stitching. Unlike machine stitching, which prioritizes speed and uniformity, hand stitching allows for nuanced control over tension, depth, and pattern flow. This makes it ideal for decorative topstitching, structural reinforcement, and personalized detailing.
Historically, hand-stitched boots were built to last decades. The Goodyear welt, Blake stitch, and saddle stitch—each applied by hand—contribute not only to longevity but also to repairability. A well-stitched boot can be resoled multiple times, making it a sustainable investment. Today, modern designers blend these time-tested methods with bold new patterns, color combinations, and textures, creating pieces that honor tradition while pushing creative boundaries.
Essential Tools and Materials for Precision Stitching
Before diving into techniques, gather the right tools. Quality materials make a measurable difference in both process and outcome. Here’s what you’ll need:
- Needles: Glovers needles (available in various sizes) are ideal for piercing thick leathers without splitting fibers.
- Thread: Use high-quality waxed linen or polyester thread; 36–72 weight depending on application.
- Stitching Awl: For pre-punching holes when working with dense sole leather.
- Stitching Pony or Clamp: Holds the boot steady during prolonged stitching sessions.
- Harness Needles: Curved or straight, designed to navigate tight spaces like heel counters.
- Edge Beveler & Burnisher: Prepare leather edges for clean, professional-looking seams.
Investing in ergonomic tools reduces hand fatigue and increases consistency. Many experienced bootmakers recommend starting with a basic kit and gradually adding specialty items as skills develop.
Core Hand Stitching Techniques Every Bootmaker Should Know
Each stitch serves a functional and aesthetic role. Mastery begins with understanding the mechanics behind the most common types used in western boot construction.
- Saddle Stitch (Double Needle): The gold standard for durability. Two needles are attached to either end of a single thread, passing through each hole from opposite sides. If one thread breaks, the other often remains intact. Ideal for welts and vamps.
- Whip Stitch: Used primarily for attaching linings or edging components. Provides flexibility and a clean finish along curved edges.
- Running Stitch: Simple and fast, best for temporary basting or lightweight overlays. Not recommended for load-bearing areas.
- Couching Stitch: Secures metal conchos, beads, or braided trim without puncturing decorative elements directly.
- Buttonhole Stitch (Blanket Stitch): Adds ornamental flair along shaft tops or collar edges. Reinforces exposed borders while contributing to visual rhythm.
| Stitch Type | Best For | Durability | Aesthetic Value |
|---|---|---|---|
| Saddle Stitch | Welt attachment, sole seams | ★★★★★ | ★★★☆☆ |
| Whip Stitch | Lining, flexible joints | ★★★★☆ | ★★★☆☆ |
| Running Stitch | Basting, mock-ups | ★★☆☆☆ | ★☆☆☆☆ |
| Couching Stitch | Embellishments, trims | ★★★☆☆ | ★★★★★ |
| Buttonhole Stitch | Edging, decorative borders | ★★★☆☆ | ★★★★☆ |
Designing Unique Patterns Through Custom Stitching
What sets a handmade western boot apart is not just quality—but personality. Hand stitching enables infinite customization. Consider how spacing, thread color, and stitch direction influence perception:
- Tighter stitch intervals convey formality and precision.
- Alternating thread colors create geometric illusions or brand signatures.
- Asymmetrical patterns on shafts evoke modern artistry within traditional silhouettes.
One designer in Santa Fe, Maria Delgado, uses contrasting red thread in saddle-stitched lightning bolts down the back seam of her boots—a nod to her Navajo ancestry and storm symbolism. “The hand stitch lets me tell stories,” she says. “Every pull of the thread is intentional.”
“Machine-made boots fit feet. Hand-stitched boots speak to souls.” — Rafael Torres, Third-Generation Bootmaker, El Paso, TX
Step-by-Step Guide: Executing a Saddle Stitch on Boot Uppers
To apply the most critical stitch in bootmaking, follow this sequence:
- Mark the Seam Line: Use a silver pen or chalk wheel to trace the stitching path on the upper leather.
- Punch Holes: With an awl or stitching chisel, create evenly spaced holes (typically 8–10 per inch).
- Thread the Needles: Cut a length of waxed thread (no longer than 36 inches). Thread both ends with glover’s needles.
- Start the Stitch: From the inside, push both needles through the first hole. Pull until thread tails are snug against the leather.
- Form the First Loop: Insert the left needle into the second hole from the outside, then the right needle from the inside. Cross the threads and repeat.
- Maintain Tension: Keep consistent, firm pressure—too loose creates slack; too tight warps the leather.
- Finish Securely: At the end, run the thread back through the last loop twice and trim close to the surface.
Frequently Asked Questions
Can I mix hand and machine stitching on the same boot?
Yes—many makers use machine stitching for internal structure (like lasting) and reserve hand stitching for visible, decorative, or high-stress exterior seams. Just ensure thread weights and tensions complement each other.
How do I prevent my thread from twisting during stitching?
Let the thread hang freely between stitches to untwist naturally. Waxing helps, but avoid over-waxing, which stiffens the thread. Using a thread conditioner can also reduce kinking.
What’s the average time to hand-stitch a full western boot?
Depending on complexity, it ranges from 8 to 20 hours. Decorative stitching, multi-layer uppers, and tighter stitch counts increase time significantly.
Checklist: Preparing for Your First Hand-Stitched Boot Project
- ☐ Select premium vegetable-tanned leather for uppers and soles
- ☐ Choose appropriate thread weight and color for design intent
- ☐ Sharpen and organize all needles and awls
- ☐ Set up a stable workbench with a stitching pony
- ☐ Practice core stitches on sample swatches
- ☐ Finalize design sketches with stitch placement marked
- ☐ Allocate uninterrupted blocks of time for continuity
Conclusion
Hand stitching is more than a method—it’s a commitment to excellence. In an era of instant gratification, taking the time to sew each boot by hand sends a powerful message about value, identity, and care. Whether you're crafting for clients, building a brand, or expressing personal artistry, these techniques offer a timeless foundation. The rhythm of needle through leather becomes meditative, each stitch a testament to intention. As demand grows for authentic, customizable goods, those who master this craft position themselves at the forefront of meaningful design.


 浙公网安备
33010002000092号
浙公网安备
33010002000092号 浙B2-20120091-4
Comments
No comments yet. Why don't you start the discussion?