
There’s something deeply satisfying about slicing into a warm, golden loaf of freshly baked bread. The aroma that fills the kitchen, the crisp crust giving way to a soft, airy crumb—it's a sensory experience few store-bought loaves can match. With a bread maker machine, achieving this at home is not only possible but surprisingly simple. No need for advanced baking skills or hours of kneading. When approached with care and attention to detail, your bread maker becomes a powerful ally in crafting consistently excellent bread.
The key lies in understanding both the machine and the ingredients. While modern bread makers automate much of the process, success still depends on ingredient quality, precise measurements, and proper maintenance. This guide walks you through each stage—from selecting the right flour to storing your finished loaf—so you can move beyond trial and error and start producing bakery-quality results from your countertop.
Understanding Your Bread Maker: How It Works
A bread maker automates the entire baking process: mixing, kneading, rising, and baking. Most models use a single paddle inside a non-stick pan to mix ingredients, followed by a heating element and controlled thermostat to regulate temperature during fermentation and baking. Understanding the cycle stages helps you troubleshoot issues and optimize results.
Typical cycles include:
- Mixing (10–20 min): Dry and wet ingredients combine into a shaggy dough.
- Kneading (20–30 min): The dough develops gluten structure for elasticity and rise.
- First Rise (60–90 min): Yeast ferments sugars, producing carbon dioxide that expands the dough.
- Punch Down & Second Rise (optional, 20–40 min): Some programs briefly deflate and re-rise for better texture.
- Baking (40–70 min): Heat sets the structure, browns the crust, and finishes the loaf.
Choosing Ingredients for Optimal Results
Success begins long before the machine starts. High-quality ingredients directly impact flavor, texture, and shelf life. Unlike commercial bread loaded with preservatives, homemade versions rely on freshness and balance.
- Flour: Use bread flour for higher protein (12–14%), which supports better gluten development and rise. All-purpose flour works but may yield a denser loaf.
- Yeast: Fresh or active dry yeast must be stored properly. Instant yeast is preferred for bread machines as it activates faster without pre-dissolving.
- Water: Filtered or bottled water prevents chlorine from inhibiting yeast activity. Lukewarm (around 80°F) is ideal.
- Salt: Enhances flavor and controls yeast growth. Never mix salt directly with yeast at the start—layer ingredients to prevent early inhibition.
- Fats (butter, oil): Add tenderness and extend shelf life. Use unsalted butter to control sodium levels.
- Sweeteners (honey, sugar): Feed yeast and contribute to browning. Even savory loaves benefit from a small amount.
“Consistency in ingredient temperature and measurement is more important than exotic recipes. Master the basics first.” — Daniel Park, Artisan Baker & Instructor
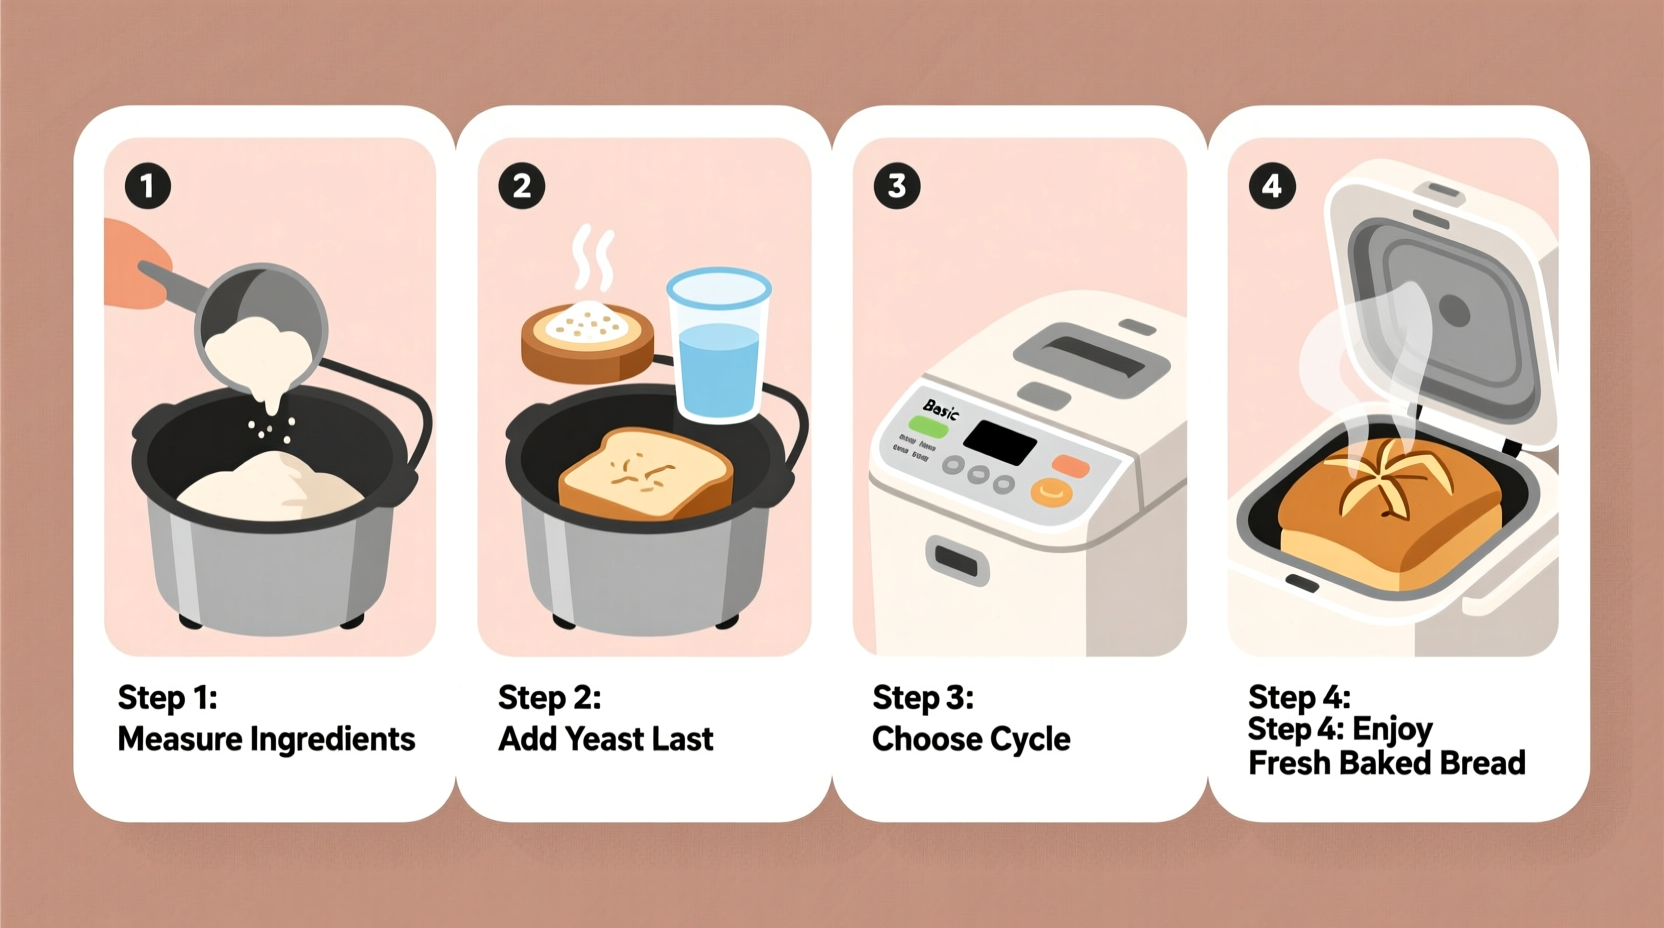
Step-by-Step Guide to Baking the Perfect Loaf
Follow this detailed sequence to ensure reliable results every time. Precision matters—especially in ingredient order and quantity.
- Measure accurately. Use a digital kitchen scale for flour and liquids. Volume measurements vary significantly due to packing.
- Add ingredients in the correct order. Most manufacturers recommend: liquids first, then dry ingredients, with yeast added last in a separate well (never touching liquid initially).
- Select the appropriate setting. Choose “Basic” or “White” for standard loaves. Use “Whole Wheat,” “Sweet,” or “French” settings based on recipe type.
- Start the machine. Close the lid, press start, and let the cycle run uninterrupted. Avoid opening the lid during the first rise or bake unless necessary.
- Monitor progress visually (if possible). Check that dough forms a smooth ball after kneading. If too dry, add water via the dispenser; if too sticky, add flour sparingly.
- Remove immediately after baking. Let the loaf cool completely on a wire rack (at least 1 hour) before slicing to prevent gumminess.
Common Issues and How to Fix Them
Even experienced users encounter problems. The following table outlines frequent challenges and their solutions:
| Issue | Possible Cause | Solution |
|---|---|---|
| Dense or heavy loaf | Old yeast, under-kneading, low-protein flour | Use fresh yeast, switch to bread flour, ensure full kneading cycle |
| Loaf collapses during bake | Too much yeast or sugar, excessive moisture | Reduce yeast by 1/4 tsp, decrease sweetener, measure liquids precisely |
| Tunneling (large air pockets) | Over-rising, too much yeast, uneven mixing | Verify yeast freshness, avoid overfilling pan, check paddle engagement |
| Crust too dark or burnt | “Dark Crust” setting enabled, high sugar content | Select “Light” or “Medium” crust, reduce sugar slightly |
| Dough doesn’t rise | Inactive yeast, cold ingredients, expired leavening agent | Test yeast in warm water with sugar; replace if no foam forms in 10 minutes |
Checklist: Essentials Before You Begin
Run through this checklist before starting any bread-making session:
- ✅ Clean the bread pan and paddle—residue affects texture.
- ✅ Verify yeast is fresh and within expiration date.
- ✅ Measure all ingredients using a scale for accuracy.
- ✅ Pre-measure and organize ingredients to avoid mistakes.
- ✅ Ensure room temperature is stable (68–75°F ideal for rising).
- ✅ Select the correct loaf size (1.5 lb, 2 lb) and crust setting.
- ✅ Place machine on a level, heat-safe surface away from drafts.
Real Example: From Failure to Flawless Sourdough
Sarah, a home cook in Portland, struggled for months with dense sourdough loaves in her bread maker. Her early attempts resulted in hockey pucks—flat, gummy, and barely edible. After researching, she realized she was using all-purpose flour and tap water high in chlorine. She switched to filtered water, added 25% bread flour to her mix, and began feeding her starter 12 hours before use. She also reduced the amount of starter slightly to balance acidity. On her next try, the loaf rose evenly, cracked beautifully on top, and had an open crumb with tangy depth. “It wasn’t the machine,” she said. “It was my understanding of the process.”
FAQ
Can I use whole wheat flour exclusively in my bread maker?
Yes, but expect a denser loaf. Whole wheat absorbs more water and has less gluten. For better rise, use a blend (e.g., 50% whole wheat, 50% bread flour) and increase water by 1–2 tablespoons. Choose the “Whole Wheat” cycle for longer kneading and rising.
Why does my bread have a hole in the bottom?
This is where the kneading paddle retracts during baking. To minimize visibility, remove the paddle promptly when the machine beeps (if it has a preheat alert), or slice off the bottom after cooling. Some high-end models have retractable paddles that leave minimal trace.
How long does homemade bread stay fresh?
At room temperature, most loaves last 3–5 days in a paper bag or bread box. Avoid plastic bags until fully cooled—they trap moisture and accelerate mold. For longer storage, slice and freeze in a sealed container for up to 3 months.
Conclusion
Mastering homemade bread in a bread maker isn’t about complexity—it’s about consistency, precision, and patience. Once you understand how ingredients interact and how your machine responds, each loaf becomes a step toward perfection. Whether you’re baking a simple white sandwich bread or experimenting with seeded multigrain, the reward is more than just food. It’s the pride of creation, the comfort of tradition, and the joy of sharing something truly made by hand—even with the help of a machine.


 浙公网安备
33010002000092号
浙公网安备
33010002000092号 浙B2-20120091-4
Comments
No comments yet. Why don't you start the discussion?