
Epoxy resin has transformed modern crafting, woodworking, and surface finishing. Its glossy, glass-like finish enhances artwork, stabilizes wood, and seals countertops with durability that rivals commercial materials. But achieving a flawless result isn’t just about pouring and waiting—it’s a science that demands precision, preparation, and patience. Whether you're creating river tables, coating bar tops, or sealing resin art, mastering the application process is essential. This comprehensive guide walks you through every phase, from selecting materials to post-cure finishing, ensuring success on your first attempt.
Understanding Epoxy Resin: The Foundation of Success
Epoxy resin is a two-part thermosetting polymer composed of a resin and a hardener. When mixed in precise ratios, they trigger a chemical reaction that transforms the liquid into a solid, transparent, and durable material. Not all epoxies are created equal—some cure faster, others self-level better, and certain formulations are designed specifically for deep pours or UV resistance.
For most DIY and artistic applications, a clear, low-viscosity, slow-curing epoxy is ideal. It allows ample working time (typically 20–45 minutes) and minimizes bubbles. Always check the manufacturer’s technical data sheet for pot life, cure time, and recommended thickness per pour. Exceeding the suggested depth can lead to overheating, cracking, or incomplete curing.
“Epoxy doesn’t forgive mistakes—it rewards preparation.” — James Lin, Industrial Coatings Specialist
Step-by-Step Guide to Applying Epoxy Resin
Follow this structured sequence to ensure a smooth, bubble-free, and durable finish. Skipping even one step can compromise the final appearance and integrity of your project.
- Prepare Your Workspace: Choose a clean, dust-free environment with stable temperatures between 70°F and 75°F (21°C–24°C). Humidity should be below 50%. Lay down plastic sheeting or silicone mats to protect surfaces. Ensure good ventilation, especially if working indoors.
- Gather Materials and Tools: You’ll need epoxy resin and hardener, mixing containers, stir sticks, a digital scale, heat gun or torch, gloves, safety goggles, masking tape, and levelers if coating furniture.
- Prepare the Substrate: Sand wooden surfaces to at least 220-grit. Remove dust with a tack cloth or lint-free wipe dampened with isopropyl alcohol. Seal porous materials like live-edge wood with a thin coat of diluted resin (called a “seal coat”) to prevent outgassing.
- Measure Accurately: Use a digital scale to measure the resin and hardener according to the manufacturer’s ratio—commonly 1:1 or 2:1. Inaccurate mixing leads to sticky spots or soft cure.
- Mix Thoroughly: Pour both components into a clean container. Stir slowly for 3–5 minutes, scraping the sides and bottom to ensure full integration. Avoid whipping to reduce air bubbles.
-
Pouring and Spreading the Resin
Once mixed, pour the epoxy slowly onto the center of your surface. Use a spreader or foam brush to guide it toward edges. For large surfaces like tables, work in sections to maintain control. Tilt the piece slightly if needed to encourage flow, but avoid over-manipulating once poured.
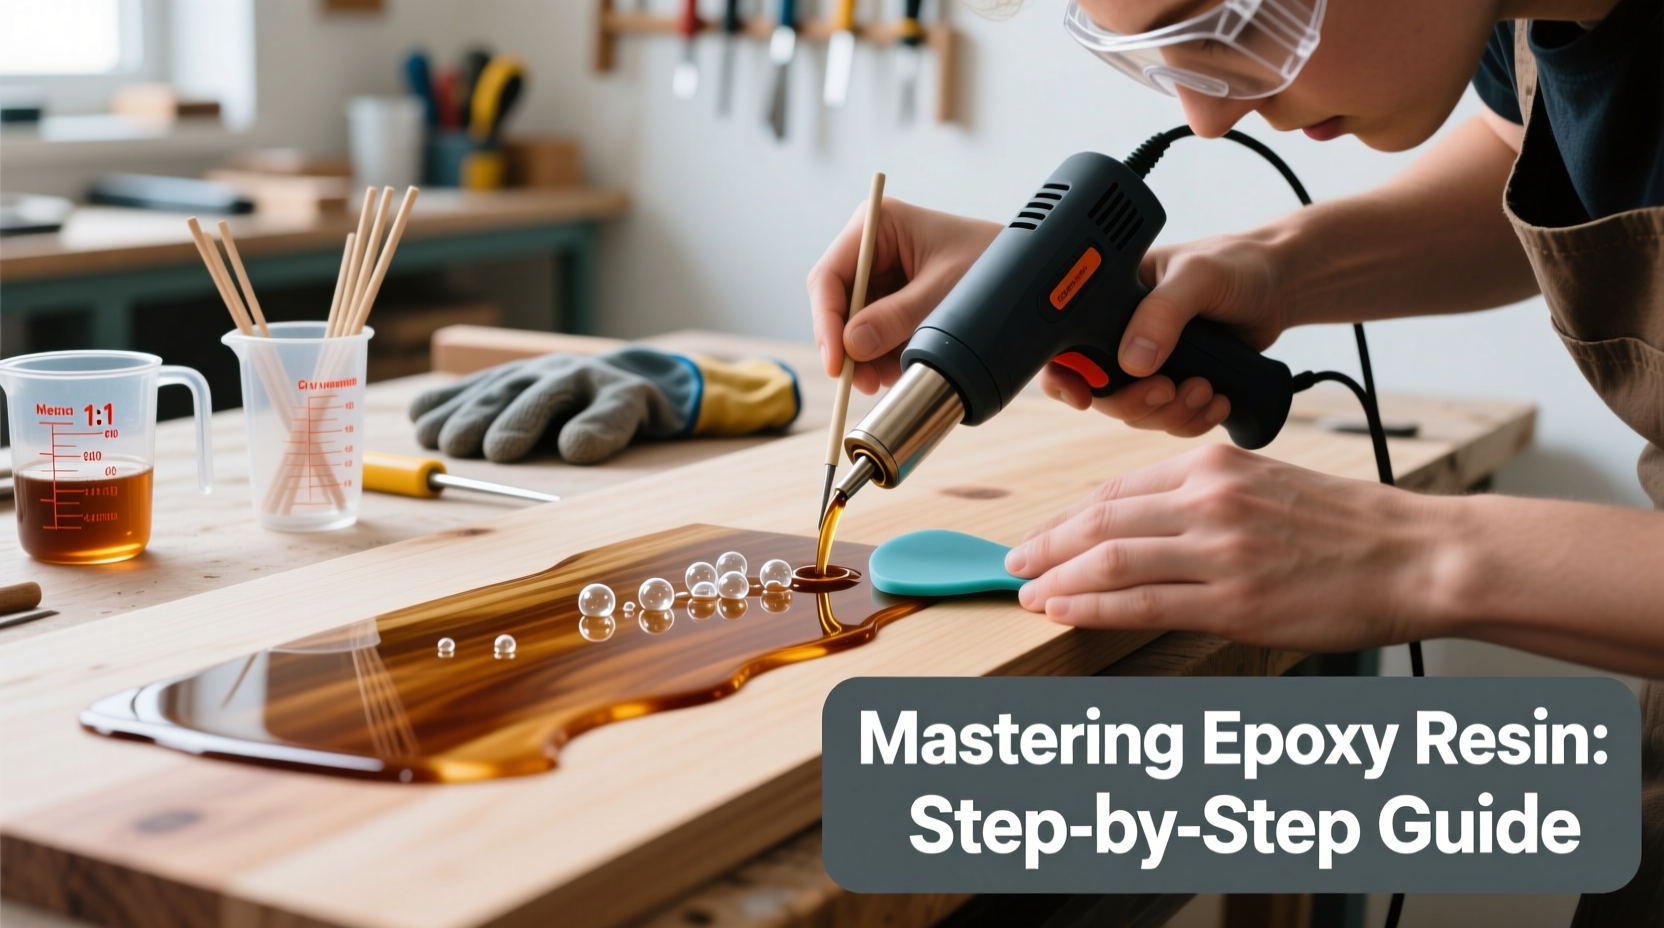
Removing Bubbles
Bubbles are the most common flaw in epoxy projects. They form during mixing and pouring, especially in porous materials. Immediately after pouring, pass a propane torch or heat gun 6–8 inches above the surface in quick, sweeping motions. The heat thins the resin momentarily, allowing bubbles to rise and pop. Do not linger—overheating causes ripples or yellowing.
Curing Process and Environment Control
Cover the piece with a dust cover—like a cardboard box with open ends—to prevent debris from settling. Maintain consistent temperature throughout the cure. Most epoxies reach initial hardness in 24 hours but require 5–7 days for full chemical cure. Avoid touching or moving the piece during this time.
Essential Tools and Materials Checklist
- Digital precision scale
- Plastic or silicone mixing cups (graduated)
- Wooden stir sticks or silicone spatulas
- Nitrile gloves and safety goggles
- Respirator mask (if working in enclosed space)
- Heat gun or small propane torch
- Tack cloth or microfiber wipes
- Isopropyl alcohol (90% or higher)
- Leveling tools (for horizontal surfaces)
- Dust cover (plastic sheet or tent)
Common Mistakes and How to Avoid Them
| Mistake | Consequence | Solution |
|---|---|---|
| Inaccurate mixing ratio | Sticky, uncured areas | Always use a digital scale; never eyeball |
| Pouring too thick | Heat buildup, cracking, cloudiness | Limit to 1/8–1/4 inch per layer unless using deep-pour epoxy |
| Working in cold conditions | Slow cure, poor adhesion | Warm workspace and materials to 70°F+ |
| Skipping the seal coat | Bubbles surfacing hours later | Apply thin seal layer on porous substrates |
| Touching surface during cure | Fingerprints, imperfections | Wait at least 24 hours before light handling |
Real-World Example: River Table Restoration
A woodworker in Portland, Oregon, took on a client project involving a cracked walnut slab with an existing failed epoxy pour. The original resin had yellowed, delaminated, and trapped debris. After removing the old epoxy with a planer and sanding down to bare wood, he applied a seal coat of mixed epoxy using a foam brush. He let it cure for 12 hours, then poured three incremental layers of high-clarity epoxy, each 3/16 inch thick, allowing 24 hours between pours. A butane torch eliminated bubbles immediately after each application. The final result was a crystal-clear river effect that enhanced the wood grain without distortion. The client reported it looked better than store-bought furniture.
Post-Cure Finishing Techniques
After full cure (7 days), you can sand and polish the surface for enhanced clarity. Start with 400-grit wet sandpaper and progress through 600, 1000, 1500, and 2000 grit. Rinse frequently and keep the surface wet to avoid clogging. Finish with a polishing compound designed for clear coatings, applied with a soft cloth or buffing wheel. This brings back the high-gloss shine and removes minor surface haze.
For functional surfaces like tables, consider adding a UV-resistant topcoat if exposed to direct sunlight, as prolonged UV exposure can eventually cause yellowing—even in \"UV-stable\" resins.
Frequently Asked Questions
Can I apply epoxy resin over paint or ink?
Yes, but only if the underlying material is fully cured and non-oily. Acrylic paints and alcohol inks generally work well. Test adhesion on a small area first. Avoid oil-based paints unless sealed properly, as they may inhibit curing.
How do I fix a tacky spot after curing?
Tacky areas usually result from improper mixing. Lightly sand the area with 220-grit paper, wipe clean, and apply a thin repair layer of fresh epoxy. Ensure proper ratio and thorough mixing for the touch-up.
Is epoxy resin food-safe when cured?
Many epoxies are FDA-compliant for indirect food contact when fully cured (after 7 days). However, they are not antimicrobial and should not replace cutting boards. Never use epoxy on items that will be submerged in hot liquids or scrubbed aggressively.
Final Tips for Consistent Success
Conclusion: Turn Practice into Perfection
Mastering epoxy resin application is within reach for any dedicated crafter or artisan. With careful planning, attention to detail, and respect for the material’s chemistry, you can achieve results that look professionally finished. Each project builds confidence and refines technique. Don’t fear mistakes—they’re part of the learning curve. Now that you have the complete roadmap, gather your supplies, set up your space, and pour with purpose. The clarity, depth, and brilliance of a perfect epoxy finish await your next creation.


 浙公网安备
33010002000092号
浙公网安备
33010002000092号 浙B2-20120091-4
Comments
No comments yet. Why don't you start the discussion?