
Cutting and pasting in Photoshop is one of the most fundamental skills for digital image manipulation. Whether you're isolating a subject for a composite, removing distractions from a photo, or repositioning elements for creative effect, mastering this process ensures clean, seamless edits. However, many users struggle with jagged edges, misaligned layers, or lost details—issues that stem from skipping key steps or using tools incorrectly. This guide breaks down the entire workflow into actionable stages, emphasizing precision, non-destructive editing, and smart layer management.
Selecting with Precision: The Foundation of Clean Cuts
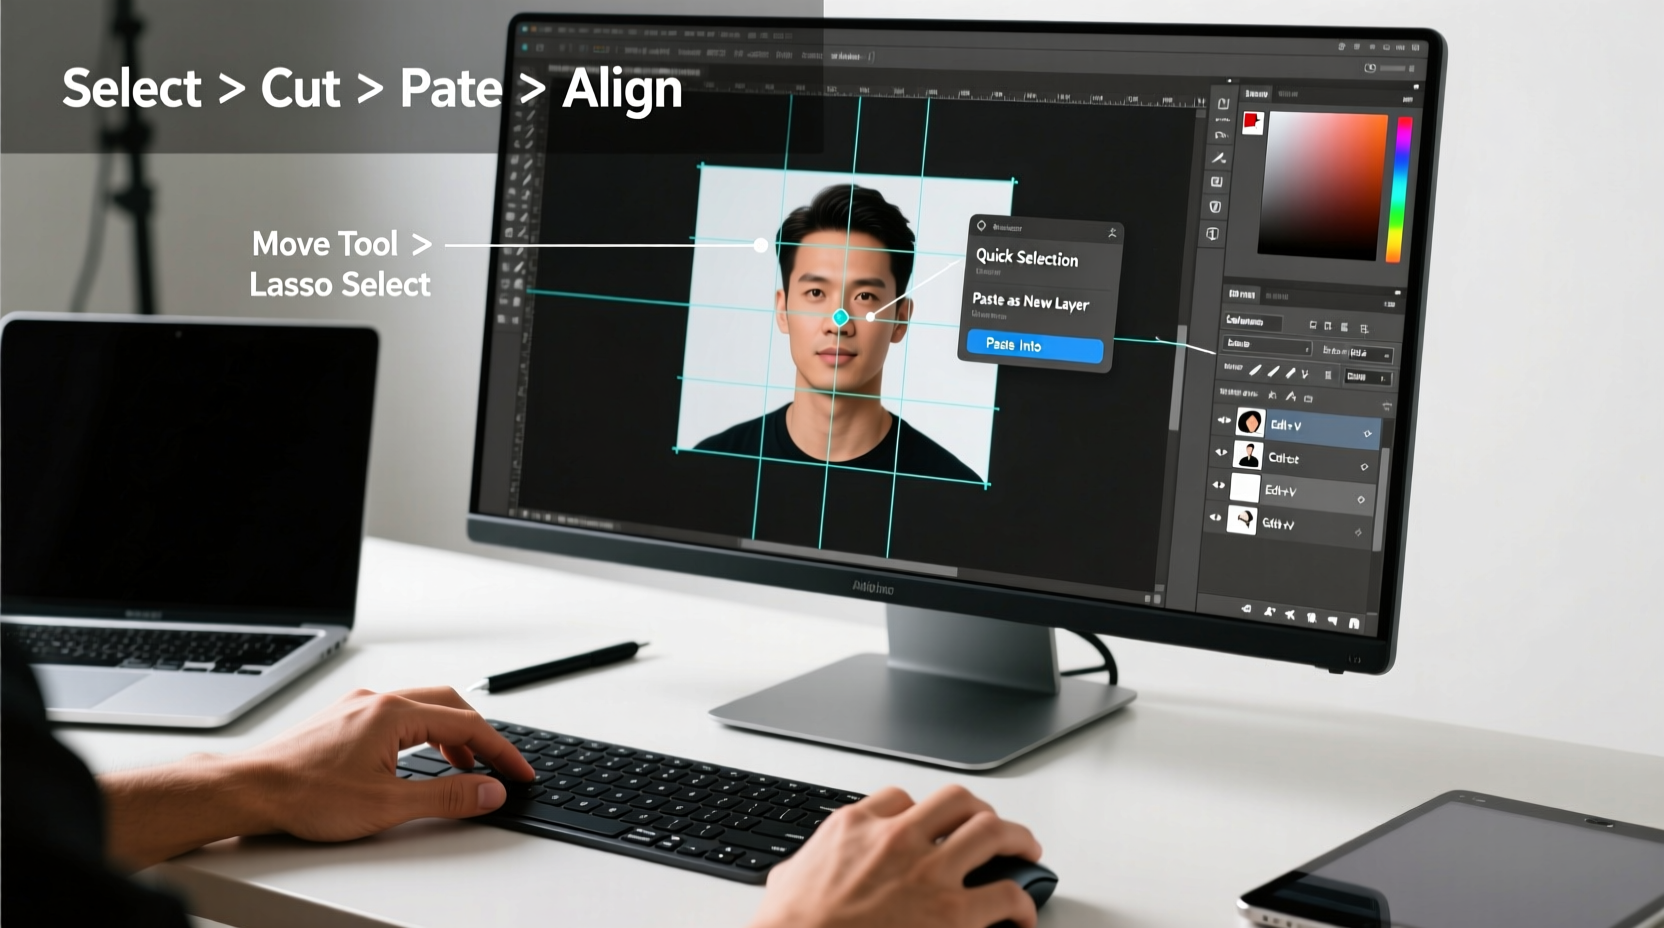
The quality of your cut depends entirely on the accuracy of your selection. A rushed selection leads to poor edges, halos, and wasted time correcting mistakes later. Photoshop offers multiple selection tools, each suited to different scenarios:
- Quick Selection Tool (W): Ideal for objects with high contrast against their background. It automatically detects edges as you paint over the subject.
- Magic Wand (W): Best for selecting large areas of uniform color. Adjust the tolerance to control how similar the colors must be.
- Lasso Tools (L): Use the Polygonal Lasso for straight-edged objects and the Magnetic Lasso for subjects with defined borders.
- Object Selection Tool (W): Powered by Adobe Sensei AI, this tool intelligently detects and selects entire objects with minimal input.
- Pen Tool (P): Offers pixel-perfect control for complex shapes like hair, glass, or intricate architecture. It creates vector paths that can be converted to selections.
For maximum precision, combine tools. Start with the Object Selection Tool to get a rough outline, then switch to the Pen Tool for fine-tuning around delicate areas like hair strands or fabric textures.
Step-by-Step: How to Cut and Paste Without Losing Quality
- Open your image in Photoshop and ensure it’s on its own layer (not the Background layer). If necessary, double-click “Background” and click OK to convert it to a regular layer.
- Choose the right selection tool based on your subject. For people or animals, start with the Object Selection Tool.
- Refine the selection edge by clicking “Select and Mask” at the top options bar. This opens a workspace where you can adjust smoothness, feather, contrast, and shift edges inward or outward.
- Output the selection to a new layer with a layer mask. In Select and Mask, set Output To: “New Layer with Layer Mask.” This keeps the original intact and allows future adjustments.
- Cut or copy the selection: Press Ctrl/Cmd + X to cut (removes pixels), or Ctrl/Cmd + C to copy. Then press Ctrl/Cmd + V to paste onto a new layer if needed.
- Reposition the pasted element using the Move Tool (V). Hold Shift to constrain movement to straight lines.
- Scale appropriately by pressing Ctrl/Cmd + T for Free Transform. Right-click and choose Warp or Perspective if matching angles in a composite scene.
This method preserves flexibility. Instead of permanently deleting parts of an image, use layer masks so you can always restore hidden areas.
Avoiding Common Pitfalls: Do’s and Don’ts
| Do’s | Don’ts |
|---|---|
| Use non-destructive editing (layer masks instead of erasing) | Delete original pixels permanently without backup |
| Zoom in when refining edges near hair or fur | Rely solely on automatic selections for complex subjects |
| Match lighting and perspective after pasting | Paste a bright object into a dark scene without adjusting brightness |
| Work on high-resolution files when possible | Stretch low-res images, causing pixelation |
| Save layered PSD files before flattening | Flatten too early and lose editability |
Real-World Example: Creating a Travel Poster Composite
Jessica, a freelance graphic designer, was hired to create a promotional poster combining a model photographed in-studio with a scenic mountain backdrop. Her first attempt resulted in a harsh, artificial-looking silhouette because she used the Magic Wand and pasted directly without refining edges.
On her second try, she followed a better process: She selected the model using the Object Selection Tool, entered Select and Mask, increased Edge Smoothness to 15, reduced Feather slightly, and checked Decontaminate Colors to remove green spill from the studio backdrop. After outputting to a new layer with a mask, she pasted the model onto the mountain image, adjusted hue/saturation to match ambient warmth, and added a subtle shadow beneath the feet using a soft black brush on a new layer below.
The final result looked natural and convincing. Jessica credits the success to taking time during the cut-and-paste phase rather than rushing to finish.
“Precision in selection separates amateur composites from professional ones. Spend extra minutes refining edges—it saves hours in rework.” — David Lin, Senior Photo Editor at VisualEdge Studios
Pro Checklist: Cut and Paste Like a Pro
- ✅ Unlock the Background layer before editing
- ✅ Use “Select and Mask” for all critical selections
- ✅ Output to a new layer with a layer mask
- ✅ Adjust lighting/color after pasting to blend seamlessly
- ✅ Save a .PSD version with layers intact
- ✅ Use Smart Objects when scaling to preserve quality
Frequently Asked Questions
Can I cut and paste part of an image into another Photoshop document?
Yes. Simply make your selection, copy (Ctrl/Cmd + C), switch to the target document, and paste (Ctrl/Cmd + V). Photoshop automatically resizes the pasted layer to fit, but you may need to scale it manually to match resolution or perspective.
Why does my pasted object look blurry or pixelated?
This usually happens when the source image has lower resolution than the destination, or when you stretch the image beyond its original dimensions. Always work with high-quality source files and consider converting pasted layers into Smart Objects (right-click layer > Convert to Smart Object) before transforming.
How do I fix fringes or colored halos around my cut-out?
These are often caused by leftover background color along the edges. In Select and Mask, enable “Decontaminate Colors” to automatically remove edge contamination. Alternatively, use a layer mask and a small black brush to manually clean up stray pixels.
Final Thoughts: Precision Is a Process, Not a Click
Cutting and pasting in Photoshop isn’t just about moving pixels—it’s about maintaining integrity, context, and realism. The best edits go unnoticed because they respect light, texture, and proportion. By adopting a disciplined approach to selection, leveraging non-destructive techniques, and verifying each step before proceeding, you’ll produce cleaner, more professional results consistently.


 浙公网安备
33010002000092号
浙公网安备
33010002000092号 浙B2-20120091-4
Comments
No comments yet. Why don't you start the discussion?