
Drawing a baseball bat may seem simple at first glance—after all, it’s just a long cylinder with a rounded end. But capturing its true form, weight, and character requires more than basic shapes. A well-drawn bat conveys wood grain, curvature, wear, and even the legacy of the game. Whether you're sketching for an illustration, practicing still life, or building your foundational drawing skills, mastering this object offers valuable lessons in realism, proportion, and surface detail.
The key lies not in complexity but in observation. A professional-grade bat has subtle tapers, engraved logos, natural imperfections, and light interactions that reveal its three-dimensionality. By breaking down these elements systematically, you can transform a flat sketch into a convincing representation.
Understanding Proportions and Structure
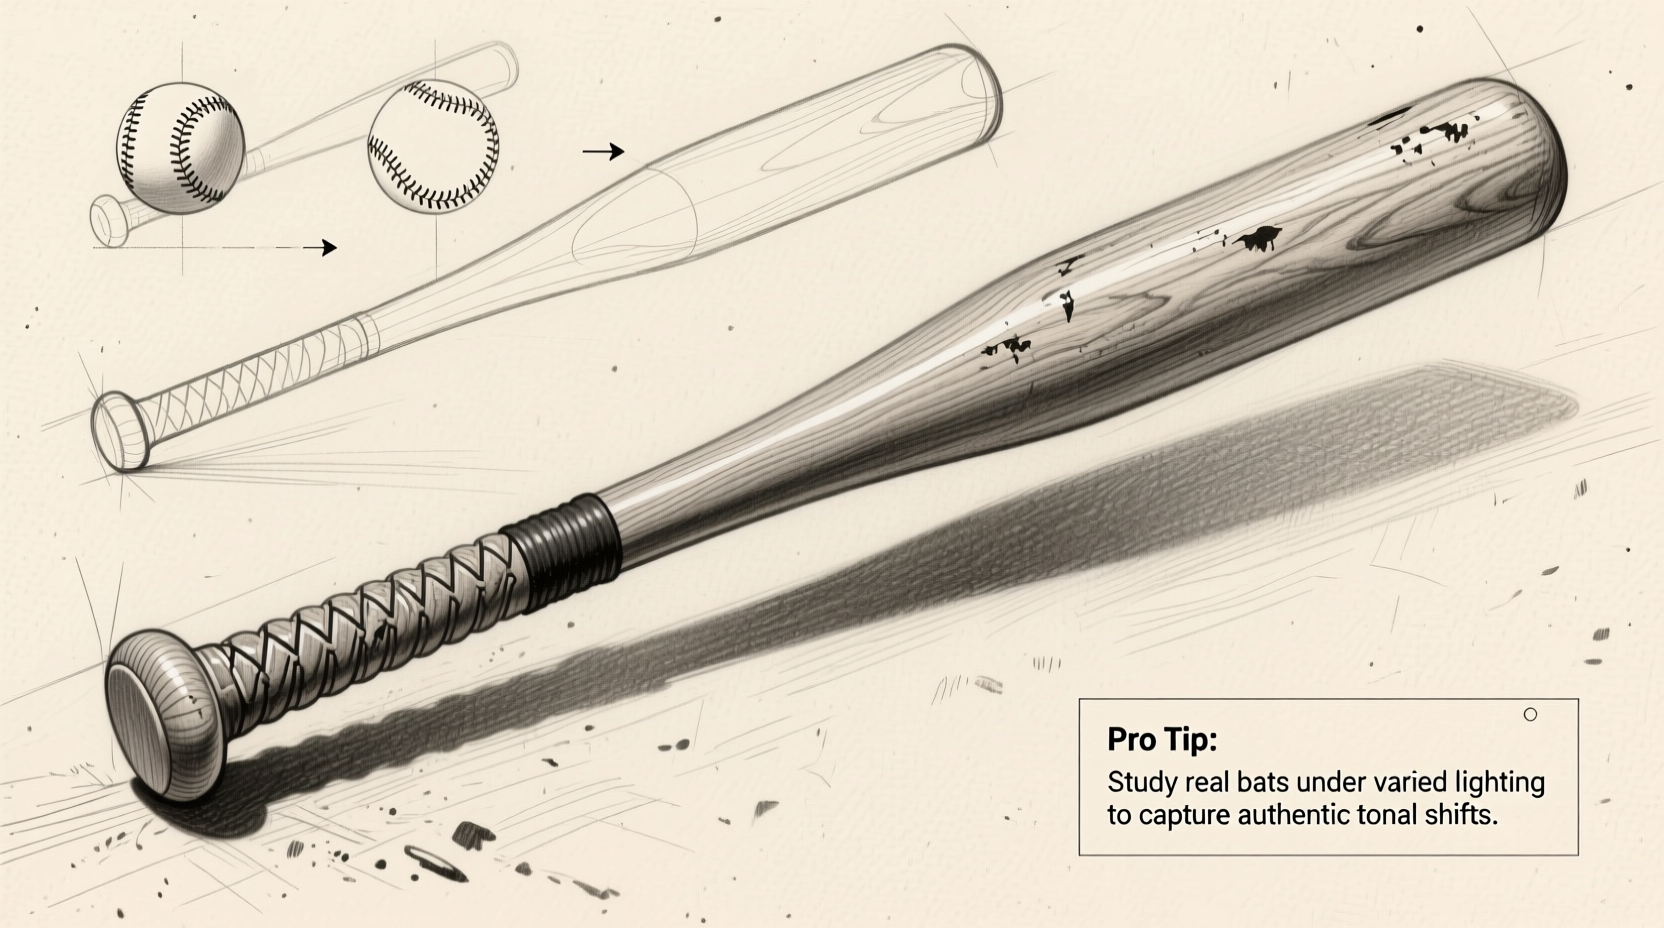
Before adding details, establish accurate proportions. Most adult baseball bats range from 32 to 34 inches in length, with a barrel diameter of about 2.75 inches. The handle is significantly thinner—around 0.9 to 1 inch—and gradually widens toward the barrel. This transition isn’t abrupt; there's a smooth taper known as the \"neck\" connecting the two sections.
To draw this correctly:
- Begin with a centerline indicating the bat’s axis.
- Mark the total length and divide it into functional zones: knob (bottom), handle, neck, and barrel (top).
- Use ellipses to define the ends—especially the barrel tip, which appears as a flattened oval depending on viewing angle.
- Slightly curve the centerline if depicting a dynamic pose, such as mid-swing.
Adding Realistic Texture: Capturing Wood Grain
Wood grain defines authenticity. Most bats are made from ash, maple, or birch, each with distinct patterns. Maple tends to have tight, straight grains with minimal contrast, while ash shows broader, wavy lines. Birch falls between the two, offering flexibility and visible but soft grain variation.
To render wood convincingly:
- Study reference photos closely—notice how grain follows the contour of the bat.
- Use a sharp pencil and vary line weight: darker where grooves recede, lighter on raised ridges.
- Follow the longitudinal flow from knob to barrel, never crossing perpendicularly unless simulating damage.
- Incorporate minor inconsistencies—natural wood isn’t uniform. Add faint splits, knots, or discoloration near the barrel for realism.
“Texture sells believability. Even a perfectly proportioned bat will look flat without attention to material nuance.” — Daniel Reyes, Illustration Instructor at Boston Art Institute
Shading Techniques for Depth and Volume
A cylindrical object like a bat responds dramatically to light. Proper shading turns a line drawing into a dimensional form. Start by defining your light source—typically top-left or top-right for consistency.
Apply tonal values in stages:
- Highlight: Leave the area directly facing the light untouched.
- Midtones: Use light hatching along the side receiving partial illumination.
- Core Shadow: Darken the opposite side where light doesn’t reach.
- Reflected Light: Gently lift shadow near edges using an eraser to suggest ambient bounce.
- Cast Shadow: Extend a soft gradient beneath the bat to anchor it to the surface.
| Tonal Zone | Pencil Grade | Application Method |
|---|---|---|
| Highlight | None / Erased | Preserve paper white or use kneaded eraser |
| Midtone | B or HB | Crosshatching or circular strokes |
| Core Shadow | 2B–4B | Layered strokes with blending stump |
| Cast Shadow | 4B–6B | Graduated pressure, blurred edge |
Detailing Style: Logos, Wear, and Character
A bat isn't just wood—it carries identity. Brands like Louisville Slugger, Marucci, or Rawlings imprint logos, model numbers, and ink dots (proof of grain straightness). These details enhance realism when drawn accurately.
For branding:
- Research official logo placement—usually centered on the flat side of the barrel.
- Draw letters with precision using a fine liner or sharpened pencil.
- Add slight wear: faded lettering, scratches over text, or smudged ink dots.
Wear tells a story. A used bat shows dents, scuff marks, and tape residue on the handle. Include:
- Impact bruises on the barrel—circular depressions with dark centers.
- Frayed batting gloves residue—a textured ring near the knob.
- Slight warping or splintering if depicting an older bat.
Mini Case Study: Drawing a Game-Worn Bat
Artist Lena Tran was commissioned to illustrate a retired player’s memorabilia collection. One piece was a well-used maple bat signed after a championship win. She began with standard proportions but spent extra time studying close-up photos provided by the team archivist.
She noticed micro-cracks radiating from impact points and subtle discoloration from pine tar buildup. By layering graphite and selectively lifting highlights with a kneaded eraser, she recreated the bat’s history. The final drawing included faint smudges around the brand logo—evidence of repeated gripping—and a worn-down knob smoothed by years of use. The client praised the emotional depth captured through physical detail.
Step-by-Step Drawing Process
Follow this sequence to build a realistic baseball bat drawing from start to finish:
- Sketch the Centerline: Lightly draw a vertical line with slight curve if desired.
- Define Key Points: Mark knob base, handle midpoint, neck, and barrel end.
- Outline Silhouette: Connect points using parallel lines that widen toward the barrel.
- Add Ellipses: Cap both ends with appropriate oval shapes based on perspective.
- Refine Contours: Adjust thickness transitions for natural taper.
- Plot Major Shadows: Block in core shadow and cast shadow regions.
- Develop Tonal Range: Build up layers from light to dark.
- Render Wood Grain: Overlay directional lines matching form curvature.
- Insert Branding: Carefully draw logos and inscriptions.
- Finalize Wear Details: Add dents, scratches, and surface aging.
Frequently Asked Questions
How do I make my bat drawing look three-dimensional?
Focus on consistent lighting, smooth tonal gradients, and accurate perspective. Use ellipses for rounded ends and emphasize the shift in diameter from handle to barrel. Avoid flat, even shading—real objects have dynamic value shifts.
Should I draw the bat vertically or at an angle?
Both are valid. A vertical orientation simplifies symmetry and alignment. An angled or diagonal position introduces foreshortening, which adds visual interest but demands stronger spatial understanding. Beginners should start upright before attempting dynamic poses.
What kind of pencil should I use for fine details?
A sharpened 2H or H pencil works best for light guidelines and precise lines like logos. For deeper textures and shadows, switch to softer grades (2B–6B). Mechanical pencils offer control for intricate work like engraving text.
Mastery Through Practice and Observation
Drawing a baseball bat well is less about technical perfection and more about seeing deeply. It teaches patience, observational discipline, and respect for everyday forms. Every groove, shadow, and imperfection contributes to a narrative—of games played, swings taken, and moments remembered.
With deliberate practice, your ability to translate three-dimensional objects onto paper will grow far beyond sports equipment. The principles applied here—proportion, texture, light logic, and storytelling detail—are transferable to portraits, architecture, and industrial design.


 浙公网安备
33010002000092号
浙公网安备
33010002000092号 浙B2-20120091-4
Comments
No comments yet. Why don't you start the discussion?