
Drawing a clock may seem simple, but it's an excellent exercise in symmetry, proportion, and attention to detail. For beginners and children, it offers a structured way to build confidence in drawing while learning basic geometry and time concepts. With clear steps and practical tips, anyone can learn to draw a neat, accurate clock—whether on paper or digitally. This guide breaks down the process into manageable stages, introduces common mistakes to avoid, and includes creative ways to personalize your design.
Why Drawing a Clock Matters
More than just a sketch, a clock drawing combines art and logic. It reinforces spatial awareness as you place numbers evenly around a circle. For children, it doubles as a visual aid for understanding time. Teachers often use clock-drawing exercises in early math lessons because they engage both creativity and cognitive skills. Even adults revisiting basic drawing benefit from the precision required in spacing hour markers and aligning clock hands.
“Drawing a clock isn’t just about lines and shapes—it’s a foundational skill that blends art, math, and motor control.” — Dr. Lena Peterson, Art Education Specialist
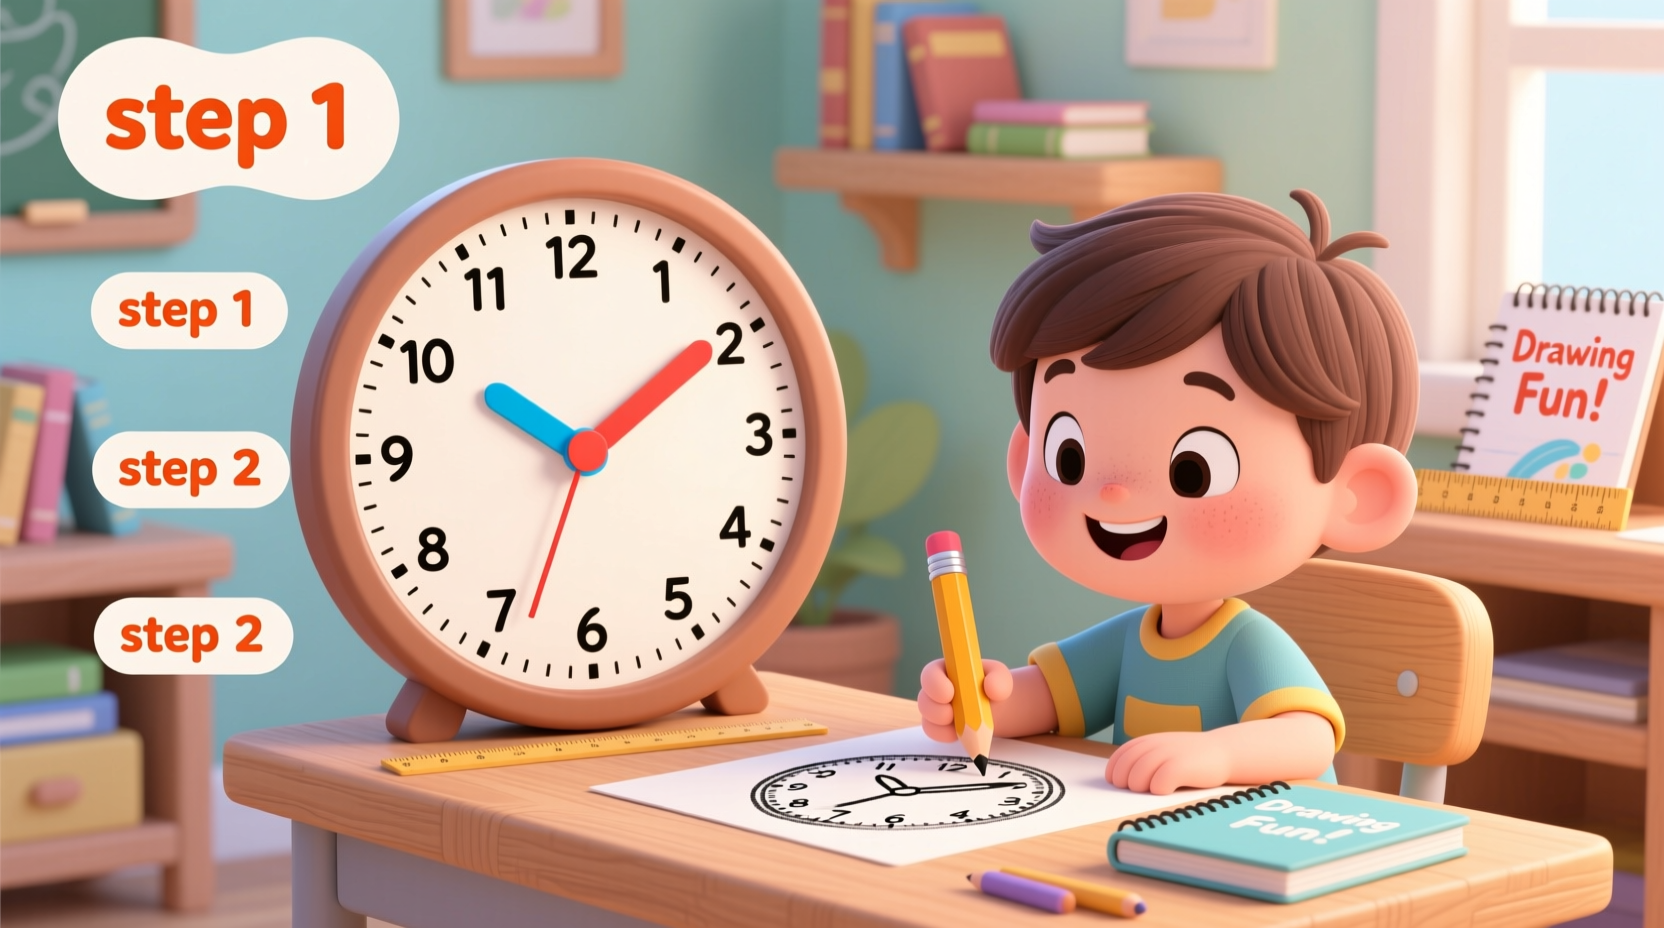
Step-by-Step Guide: How to Draw a Clock
Follow these seven steps to create a clean, proportional clock face. Use pencil and eraser for corrections, especially if you're new to drawing.
- Draw a Perfect Circle
Use a compass or trace a round object like a cup or plate. Ensure the circle is centered on your page. This will be the outer edge of your clock. - Add Center Point and Guidelines
Lightly draw a vertical and horizontal line through the center of the circle. These help align the 12, 3, 6, and 9 positions accurately. - Mark the Main Numbers
At the top (12 o’clock), bottom (6), right (3), and left (9), lightly mark where the numbers go. These act as anchors for the rest. - Divide the Remaining Hours
Between each main number, add the intermediate hours: 1, 2, 4, 5, 7, 8, 10, and 11. Estimate equal spacing—each should be roughly 30 degrees apart. - Write the Numbers Clearly
Use block or printed numerals for clarity. Keep them consistent in size and orientation. Avoid cursive unless stylizing artistically. - Draw the Clock Hands
Sketch a short thick hand for the hour and a longer thin one for the minute. Position them toward the center, overlapping slightly. Add a small circle at the center point to anchor the hands. - Finalize and Clean Up
Erase the guideline lines inside the clock. Outline the circle, numbers, and hands with a darker pencil or pen. Add decorative elements if desired.
Common Mistakes and How to Avoid Them
Even simple drawings can go wrong without attention to detail. Here are frequent issues and their fixes:
| Mistake | Why It Happens | Solution |
|---|---|---|
| Numbers spaced unevenly | Rushing placement without guidelines | Always start with cross-lines and mark major points first |
| Clock hands look crooked | Poor alignment or incorrect angles | Double-check angles using light guide lines from center to number |
| Circle appears lopsided | Freehanding without tools or steady surface | Use a circular object to trace or practice slow, even strokes |
| Center point misaligned | Guessing instead of measuring | Fold the paper gently to find center or use ruler diagonals |
Creative Variations for Kids and Beginners
Once the basics are mastered, encourage creativity. Turning a standard clock into a themed artwork boosts engagement and fun. Try these ideas:
- Animal Clock: Shape the clock like an owl, cat, or turtle, placing numbers around its body.
- Color-Themed Clock: Use rainbow order for numbers or alternate colors for odd/even hours.
- Story Clock: Replace numbers with images—a sun at 12, moon at 6, animals at other times.
- 3D Effect: Add shading around the edge to make the clock look raised or inset.
Mini Case Study: Classroom Success with Clock Drawing
In Ms. Rivera’s second-grade class, students struggled with reading analog clocks. She introduced a weekly “Clock Art Day” where children drew and labeled their own timepieces. Using the step-by-step method, she guided them through circles, number placement, and hand positioning. After four weeks, 87% of her students improved their time-telling accuracy on assessments. More importantly, engagement in math lessons increased. One student, Jamie, said, “I didn’t get clocks before, but now I draw them at home with my dog’s name on the back!” The combination of art and function turned confusion into confidence.
Essential Tools and Materials Checklist
You don’t need expensive supplies to start. Here’s what works best for beginners:
- ✏️ Pencil (HB or #2) – for sketching and easy erasing
- 🧼 Eraser – preferably white vinyl for clean removal
- 📏 Ruler – helps draw straight hand lines and find center
- ⭕ Compass or circular template – ensures a symmetrical face
- 🖊️ Fine-liner or marker – for final outlining
- 🎨 Colored pencils or crayons – for adding personality
Expert Tips for Teaching Kids to Draw Clocks
Children learn best through structure and encouragement. When guiding young artists, keep these principles in mind:
- Start with large circles—small ones are harder to manage.
- Use verbal cues: “12 is at the top, like the sky. 6 is at the bottom, like feet.”
- Break sessions into 10–15 minute chunks to maintain focus.
- Let them choose a favorite color for the minute hand to increase ownership.
- Praise effort over perfection—crooked numbers still teach valuable skills.
“Art builds neural pathways that support mathematical thinking. A child who draws a clock is not just creating—they’re calculating.” — Dr. Alan Zhou, Child Development Researcher
Frequently Asked Questions
Can very young kids (ages 5–6) learn to draw a clock?
Yes, with simplified steps. Start by tracing a plate, then help them place 12, 3, 6, and 9. Use stickers or stamps for numbers if writing is challenging. Focus on fun, not precision.
What if my circle isn’t perfect?
A slightly imperfect circle is normal. As long as it’s close to round and centered, it won’t affect the overall result. You can refine it later with tracing paper or digital tools.
How do I make the clock hands show a specific time?
To show 3:15, position the hour hand slightly past 3 (since 15 minutes have passed) and the minute hand directly on 3 (which represents 15 minutes). Practice with real clock examples for accuracy.
Conclusion: Start Drawing, Keep Practicing
Drawing a clock is more than a simple sketch—it’s a gateway to understanding symmetry, time, and artistic precision. Whether you're a beginner refining your technique or a parent helping a child explore creativity, the step-by-step method makes the process accessible and rewarding. Each stroke builds skill, and every finished clock is a milestone. Don’t worry about perfection; focus on progress. With practice, your confidence and accuracy will grow.


 浙公网安备
33010002000092号
浙公网安备
33010002000092号 浙B2-20120091-4
Comments
No comments yet. Why don't you start the discussion?