
Drawing a guitar may seem intimidating at first, especially when faced with its intricate curves, strings, and hardware. However, with structured guidance and consistent practice, anyone can learn to render this iconic instrument accurately and artistically. Whether you're a beginner picking up a pencil for the first time or an intermediate artist refining your skills, mastering the process of drawing a guitar is both achievable and deeply rewarding. This guide breaks down the journey into clear, actionable steps while offering insights that go beyond basic outlines—helping you capture realism, depth, and character in your artwork.
Understanding Guitar Anatomy: The Foundation of Accurate Drawing
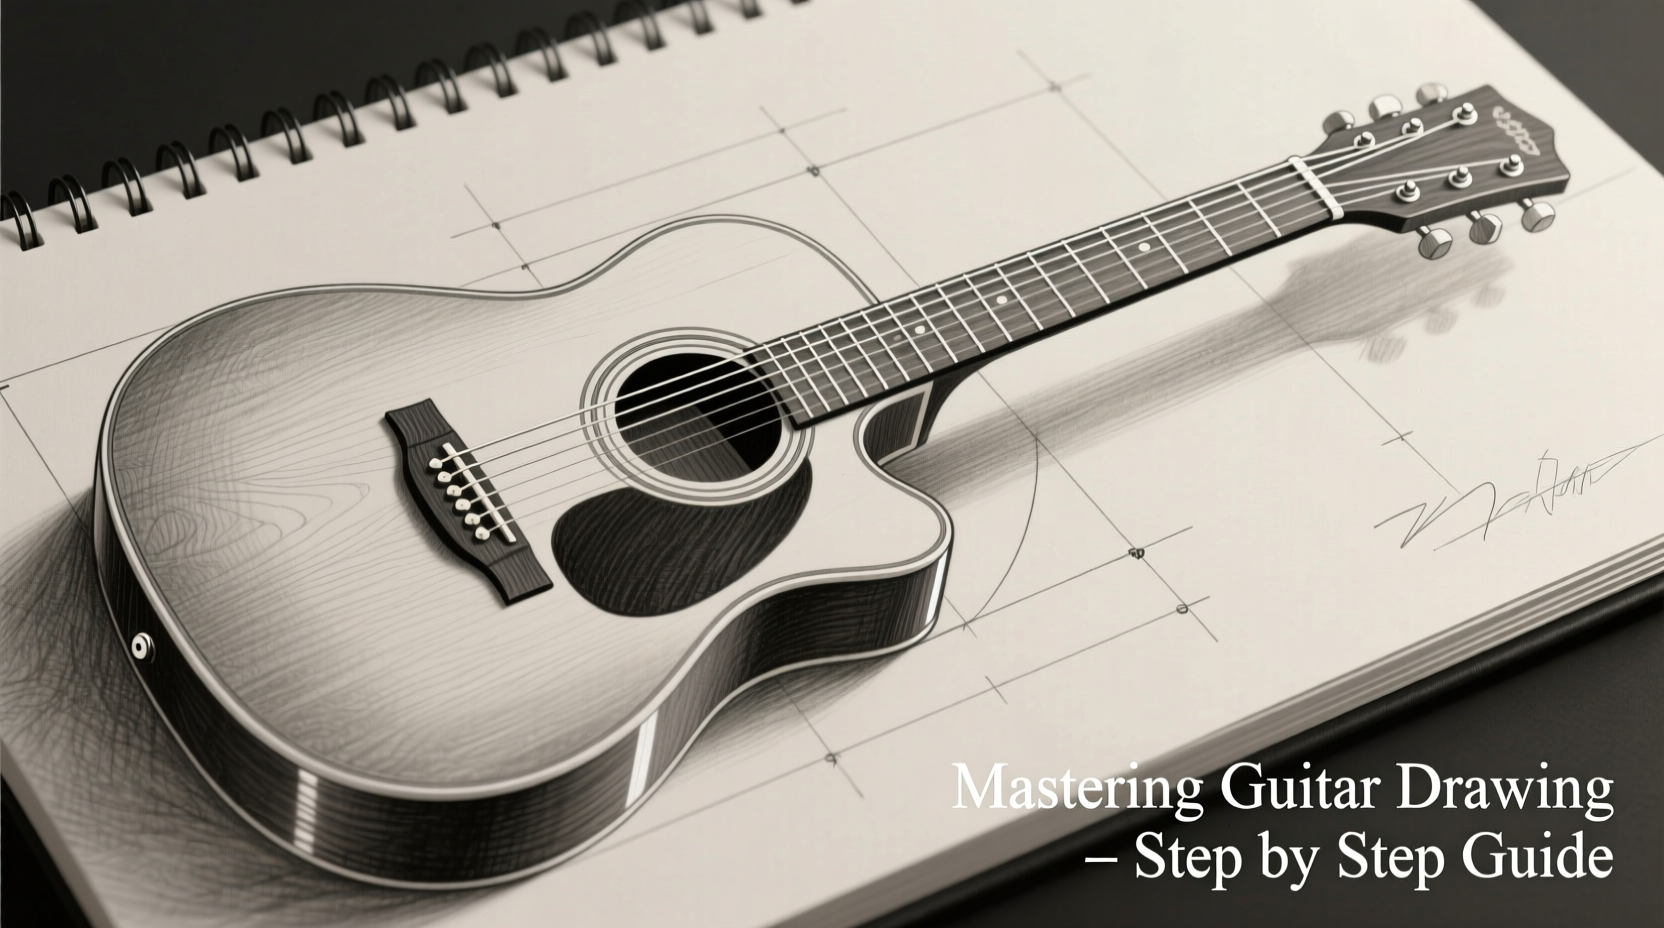
Before putting pencil to paper, it's essential to understand the basic components of a guitar. Most acoustic and electric guitars share core structural elements, even if their shapes differ slightly. Familiarity with these parts ensures your drawing maintains proportion and authenticity.
- Headstock: Located at the top, holds the tuning pegs.
- Tuning Pegs (or Machines): Used to adjust string tension; usually six in total.
- Nut: Small ridge near the headstock that guides strings toward the fretboard.
- Fretboard: The long strip where fingers press down on strings; embedded with metal frets.
- Body: The large resonant chamber (acoustic) or solid frame (electric), often featuring curves like the upper and lower bouts.
- Sounds Hole (Acoustic): Circular opening on the body that amplifies sound.
- Bridge: Anchors the strings to the body and transfers vibrations.
- Strings: Typically six thin lines running from bridge to headstock.
Step-by-Step Guide to Drawing a Guitar
Follow this logical sequence to build your guitar drawing from simple shapes to refined details. Use light pencil strokes initially so corrections are easy.
- Sketch the Basic Shape: Begin with an oval for the body’s lower bout and a smaller circle for the upper bout. Connect them with gentle curves to form the waist. These shapes act as placeholders for correct proportions.
- Add the Neck: Draw a long rectangle extending from the upper bout. Ensure it aligns correctly—too wide or angled improperly will distort the final look.
- Refine the Body Outline: Smooth out the combined ovals into the classic figure-eight silhouette. Acoustic guitars have more pronounced curves than electrics like Stratocasters or Les Pauls.
- Draw the Headstock: Extend the neck upward and widen it into a flat or angled headshape. For standard models, make it symmetrical with space for six tuning pegs. <5> Mark Key Features: Lightly sketch the soundhole (centered below the neck joint), bridge position (near bottom of body), and fret markers along the neck.
- Detail the Fretboard: Add perpendicular lines across the fretboard to represent frets. Space them evenly but slightly closer together as they approach the body (perspective).
- Outline Strings: Draw six parallel lines from the bridge through the soundhole (if present) up to the headstock. They should be straight and taut-looking.
- Finalize Hardware: Sketch tuning pegs on the headstock, bridge elements, and any pickups (for electric guitars). Keep these small but precise.
- Clean Up and Darken Lines: Erase construction lines gently. Reinforce final contours with darker strokes for clarity.
- Add Shading and Texture: Use hatching and blending to create volume. Highlight edges, deepen crevices, and suggest wood grain subtly.
Pro Tips for Realistic Results
A technically accurate outline is just the beginning. To elevate your drawing, focus on dimensionality and material representation.
- Apply Perspective: If drawing the guitar at an angle, use vanishing points to keep lines consistent. Even slight foreshortening affects how the body and neck relate.
- Study Light Sources: Decide where light comes from and stick to it. Shadows under the body, behind the headstock, and beneath strings add realism.
- Vary Line Weight: Thicker lines on outer edges and thinner ones for internal details help guide the viewer’s eye and create depth.
- Render Wood Grain Subtly: Use soft, wavy lines following the direction of the grain. Avoid overdoing it—less is more.
“Drawing isn’t about replicating every detail—it’s about suggesting reality through selective emphasis.” — Daniel Reyes, Fine Art Instructor and Illustrator
Common Mistakes and How to Avoid Them
Even experienced artists stumble on common pitfalls. Recognizing these early saves time and frustration.
| Mistake | Why It Happens | How to Fix It |
|---|---|---|
| Neck too thick or misaligned | Poor initial proportions | Use reference grids; measure against body width |
| Strings not parallel | Inconsistent spacing or perspective errors | Lightly mark endpoints first, then connect with ruler or straight edge |
| Flat, lifeless shading | Uniform pressure or lack of light source planning | Blend gradients smoothly; use circular motions for curved surfaces |
| Over-detailing early stages | Excitement to finish quickly | Stick to the step-by-step process—details come last |
From Beginner to Advanced: Growing Your Skills
Once you’ve mastered a basic guitar drawing, challenge yourself with variations. Try different types—classical, jazz archtop, semi-hollow electric—or experiment with dramatic lighting, close-ups of the headstock, or action shots with hands playing.
For advanced artists, consider combining technical precision with expressive style. Some illustrators exaggerate certain features for stylistic effect, while others aim for photorealism using graphite or digital tools. Both approaches require foundational knowledge, which this step-by-step method provides.
Mini Case Study: Sarah’s Progress in Six Weeks
Sarah, a self-taught hobbyist, struggled with symmetry when she first attempted to draw her grandfather’s old acoustic guitar. Her early sketches had lopsided bodies and uneven strings. She followed the nine-step guide above, practicing one stage per session. By week three, her proportions improved dramatically. In week five, she added cross-contour lines to test curvature accuracy. By week six, she completed a shaded drawing that captured the warm glow of mahogany wood under lamplight. Her secret? Daily 20-minute sketching sessions and using a single photo reference consistently to track progress.
Essential Checklist for Every Guitar Drawing Session
Keep this checklist handy to ensure nothing is overlooked during your drawing process:
- ✅ Choose a clear reference image (front, side, or 3/4 view)
- ✅ Gather supplies: pencils (HB, 2B, 4B), eraser, sharpener, ruler (optional)
- ✅ Lightly sketch basic shapes (ovals, rectangles) for layout
- ✅ Confirm alignment between neck and body
- ✅ Place key features: soundhole, bridge, headstock, frets
- ✅ Draw strings as perfectly parallel lines
- ✅ Refine outlines and erase guidelines
- ✅ Apply consistent shading based on a single light source
- ✅ Sign and date your work for tracking improvement
FAQ
Can I draw a guitar without knowing how to play one?
Absolutely. Musical knowledge enhances appreciation but isn’t required for drawing. Visual observation and anatomical understanding are far more important for accurate rendering.
What pencil hardness should I use?
Start with an HB pencil for light sketching, then use 2B–4B for darker outlines and shading. Softer leads produce richer tones ideal for shadows and textures.
How do I make my drawing look three-dimensional?
Focus on value contrast—areas hit by light should be lighter, recesses darker. Use gradual transitions between tones and emphasize cast shadows beneath the body and around hardware.
Conclusion: Pick Up Your Pencil and Play
Drawing a guitar is more than copying a shape—it’s an exercise in observation, patience, and craftsmanship. With each stroke, you develop not only artistic skill but also a deeper connection to one of music’s most beloved instruments. Whether you’re sketching to decorate a journal, illustrate a song lyric, or simply challenge your creativity, the techniques outlined here provide a reliable path forward. Mastery doesn’t happen overnight, but consistency turns effort into excellence.


 浙公网安备
33010002000092号
浙公网安备
33010002000092号 浙B2-20120091-4
Comments
No comments yet. Why don't you start the discussion?