
Drawing everyday objects like a headset might seem simple at first glance, but capturing the right proportions, curves, and mechanical details requires attention and practice. For beginners, starting with structured guidance can transform frustration into confidence. This guide breaks down the process of drawing a realistic headset from scratch—no prior experience needed. Whether you're sketching for fun, building an art portfolio, or improving your observational skills, mastering this common tech accessory is a practical milestone.
Understanding the Structure of a Headset
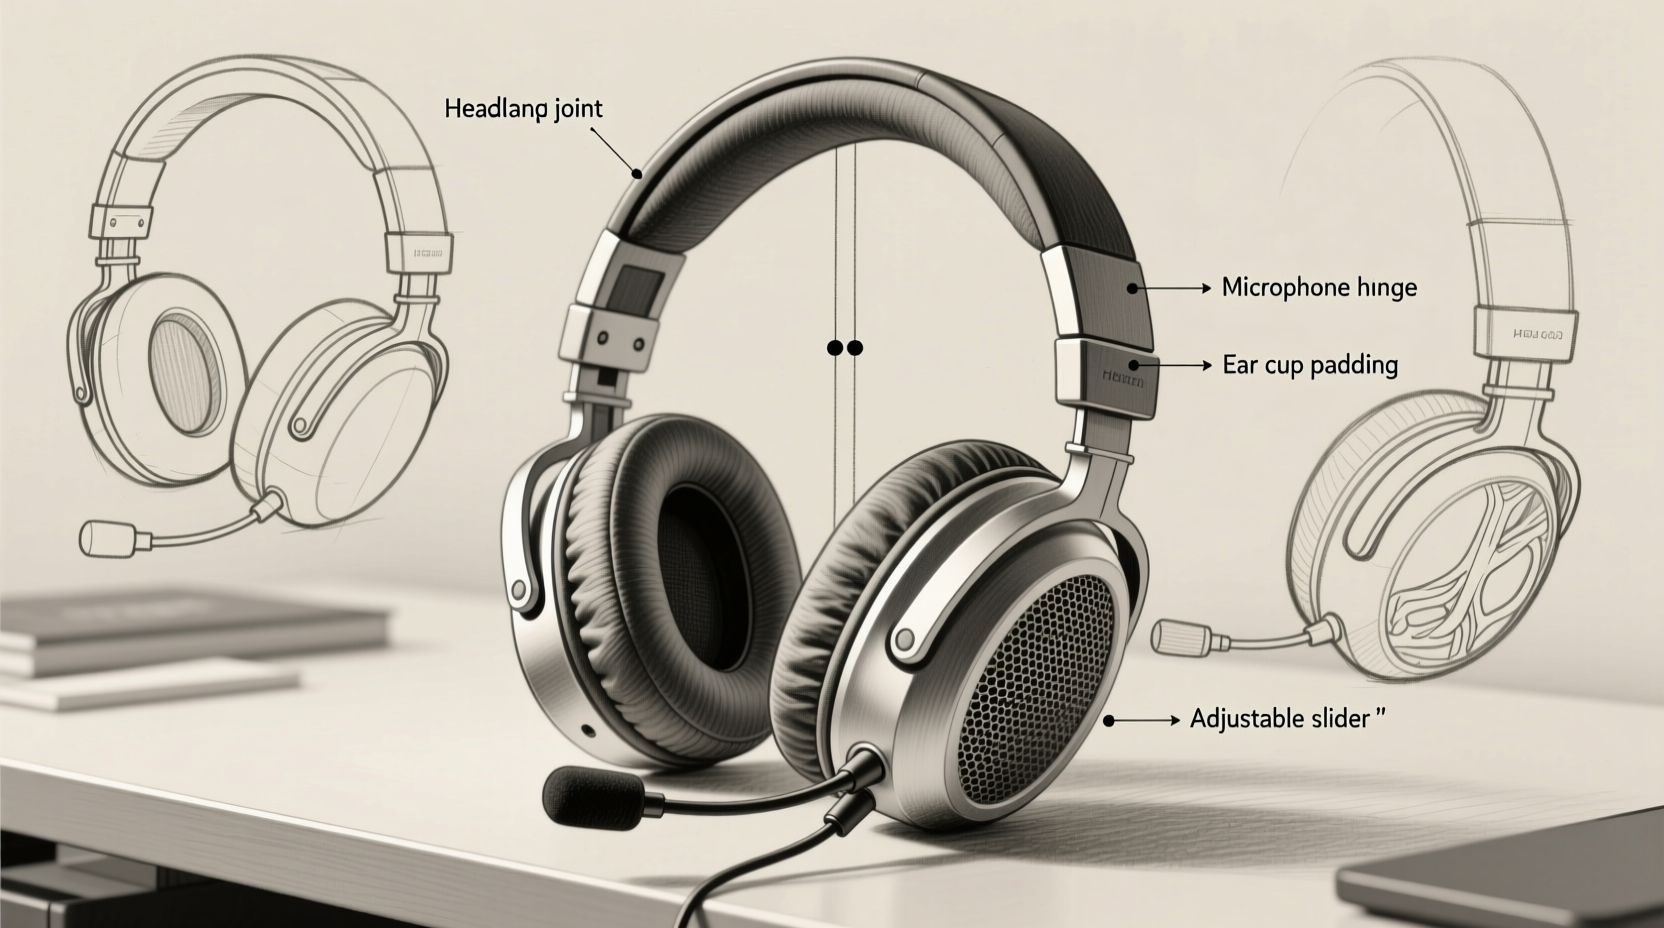
A headset combines both organic and geometric forms: curved earcups, angular headband segments, and soft padding textures. Before drawing, it helps to mentally dissect the object. Most over-ear headsets consist of three main parts: the headband, the left and right earcups, and the connecting arms (also called sliders or yokes). Recognizing how these components connect and overlap is crucial for accurate representation.
The key challenge lies in maintaining symmetry. Since headsets are bilateral, any misalignment in one earcup will be immediately noticeable. Beginners often rush into detailing before establishing correct proportions, which leads to distorted results. Taking time to map out basic shapes ensures a solid foundation.
Essential Tools and Materials
You don’t need expensive supplies to begin. A standard pencil (HB or 2B), eraser, ruler, and plain paper are sufficient for learning. As you progress, consider upgrading to a range of pencils (from 2H for light lines to 6B for deep shading) to enhance tonal variation.
Digital artists can use tablets with drawing software such as Krita, Procreate, or Adobe Illustrator. The principles remain the same whether working on paper or screen—focus on accuracy before aesthetics.
“Beginners often underestimate the power of light construction lines. They’re not mistakes—they’re the blueprint.” — Daniel Reyes, Illustration Instructor at Brooklyn Art Collective
Step-by-Step Guide to Drawing a Headset
Follow this sequence to build your headset drawing logically and avoid common pitfalls. Each stage builds upon the last, allowing corrections early before committing to details.
- Sketch the Centerline and Horizon: Lightly draw a vertical centerline to maintain symmetry. Add a slight horizontal tilt if drawing the headset at an angle.
- Draw the Headband Top Arc: Use an elongated oval or curved rectangle to represent the top curve of the headband. Keep lines faint—this is just a guide.
- Position the Earcups: On either side of the centerline, draw two circles or slightly flattened ovals. These will become the outer shells of the earcups. Align them so they mirror each other.
- Add Connecting Arms: Draw tapered rectangles extending from the headband down to each earcup. These should taper slightly inward to suggest perspective.
- Outline the Earpad Shapes: Inside each earcup, add a smaller concentric circle or oval to represent the padded interior. This creates depth.
- Refine the Structure: Go over your light sketch with cleaner, more confident lines. Define edges, remove overlapping guidelines, and adjust asymmetries.
- Add Mechanical Details: Include seam lines, logo placements, microphone (if present), and texture indicators like stitching or grille patterns on the earcups.
- Apply Shading and Volume: Identify a single light source. Shade the underside of the headband, inside the earcups, and along the inner edges of the arms. Use gradual hatching to simulate plastic, metal, or leather finishes.
- Finalize and Clean Up: Erase remaining construction lines. Darken final outlines where appropriate and deepen shadows for contrast.
Common Mistakes and How to Avoid Them
Even with careful planning, beginners often fall into predictable traps. Awareness is the first step toward improvement.
| Mistake | Why It Happens | Solution |
|---|---|---|
| Asymmetrical earcups | Drawing one side first and guessing the other | Use a centerline and measure distances with your pencil |
| Flat, lifeless appearance | Lack of shading or inconsistent light source | Define one light direction and shadow accordingly |
| Over-detailing too soon | Adding texture before structure is fixed | Complete basic shapes first; save details for last |
| Perspective distortion | Incorrect angles in connecting arms | Sketch arms as 3D prisms, not flat lines |
Developing Realism Through Texture and Depth
A headset isn’t made of a single material. The earpads may be leather or fabric, the shell plastic or metal, and the headband cushioned foam. Representing these differences elevates your drawing from flat to lifelike.
- Plastic Shells: Use smooth gradients with sharp highlights to mimic glossy surfaces.
- Leather Pads: Apply subtle cross-hatching with softer edges to suggest texture and flexibility.
- Mesh or Fabric: Tiny dots or fine parallel lines can simulate breathable materials.
- Metal Accents: High contrast between bright spots and deep blacks indicates reflectivity.
Observe real headsets under natural light. Notice how reflections stretch across curved surfaces and how shadows gather in crevices between parts. Translating these observations into marks on paper trains your eye and hand to work together.
Mini Case Study: From Sketch to Confidence
Jamie, a high school student new to drawing, struggled with symmetry when attempting to draw her gaming headset. Her first attempt had one earcup noticeably larger and lower than the other. After watching a tutorial emphasizing construction lines, she retraced her approach using a centerline and measured spacing with her pencil. On her second try, the headset looked balanced. By the third iteration, she added shading based on a desk lamp’s position, creating convincing depth. Within a week of daily 20-minute sessions, her sketches became consistent and detailed. “I didn’t think I could draw something technical,” she said. “But breaking it down made it possible.”
Checklist: Your Headset Drawing Workflow
Keep this checklist handy during your next drawing session to stay focused and efficient:
- ✅ Gather reference images from multiple angles
- ✅ Prepare tools: pencil, eraser, paper, ruler
- ✅ Lightly sketch centerline and horizon
- ✅ Block in headband and earcup positions
- ✅ Check symmetry using measurement technique
- ✅ Refine outlines with clean, darkened lines
- ✅ Add structural details (arms, seams, logos)
- ✅ Choose a light source and apply consistent shading
- ✅ Enhance textures based on material type
- ✅ Step back and evaluate proportions before finishing
Frequently Asked Questions
How long does it take to learn how to draw a headset realistically?
With regular practice, most beginners produce a recognizable, well-proportioned headset within 2–3 attempts. Achieving realism—especially in shading and texture—can take several weeks of dedicated drawing. Progress depends more on observation and revision than innate talent.
Can I draw a headset without a reference?
It’s possible, but not recommended for beginners. Without a reference, assumptions about proportions and design details can lead to inaccuracies. Even experienced artists use references to ensure precision. Start with photos or real objects, then gradually rely less as your memory and understanding grow.
What if my lines aren’t smooth or symmetrical?
Imperfect lines are normal. Use light pressure initially so mistakes are easy to erase. For smoother curves, rotate the paper and draw from your shoulder, not just your wrist. Symmetry improves with measurement—hold your pencil up to the page and compare distances between elements.
Keep Practicing, Keep Improving
Drawing a headset is more than just replicating a gadget—it’s training your brain to see shapes, relationships, and light. Every stroke builds muscle memory and visual literacy. Don’t aim for perfection on the first try. Instead, focus on progress: better alignment, clearer forms, deeper shadows. With each drawing, you’re not just sketching a headset—you’re developing the foundational skills that apply to all kinds of objects and scenes.


 浙公网安备
33010002000092号
浙公网安备
33010002000092号 浙B2-20120091-4
Comments
No comments yet. Why don't you start the discussion?