
Drawing the human figure is one of the most rewarding yet challenging skills in visual art. Whether you're sketching for personal development, illustration, or fine art, mastering how to draw a man requires more than just copying what you see—it demands understanding structure, movement, and expression. This guide breaks down the process into actionable steps, offering practical techniques to create realistic and emotionally resonant male figures.
Understanding Proportion: The Foundation of Realism
Before adding details, establish correct proportions. The average adult male body is typically measured in head lengths—about 7.5 to 8 heads tall from crown to heel. Using this system helps maintain consistency across poses and prevents distortion.
Start with a vertical line down the center of your page. Mark the top as the crown and divide the line into eight equal segments:
- Head (from chin to crown)
- Chest (nipple line at ~2.5 heads)
- Waist (~3.5 heads)
- Hip line (~4 heads)
- Mid-thigh (~4.5 heads)
- Knee (~6 heads)
- Ankle (~7.5 heads)
- Feet extend to the full 8th head
This proportional framework adapts to different body types. A muscular build may have broader shoulders but still follows the same head-count logic. Children or stylized characters deviate intentionally, but realism begins with accurate measurement.
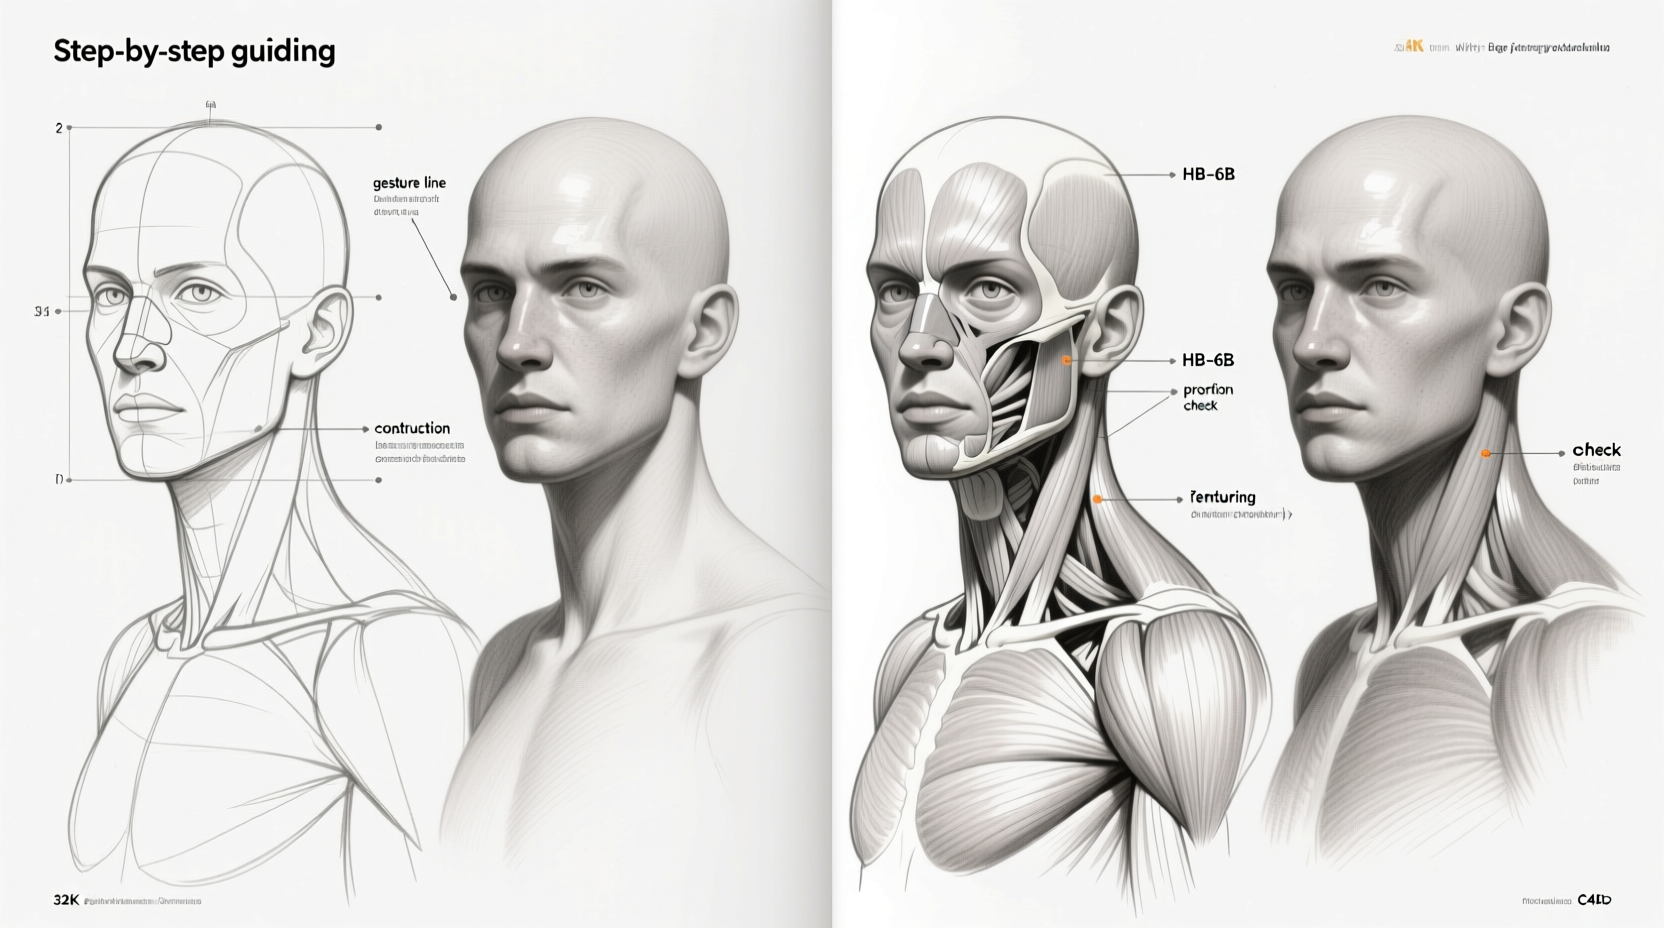
Constructing the Figure: From Gesture to Form
Once proportions are set, move from flat outlines to three-dimensional construction. Begin with a gesture drawing—a quick, fluid sketch capturing motion and weight distribution. This step prevents stiffness and ensures natural posture.
Next, build the body using basic geometric forms:
- Head: Sphere with a jawline
- Torso: Two connected ovals (ribcage and pelvis) or a mannequin-like capsule shape
- Limbs: Cylinders for arms and legs, noting tapering toward joints
- Hands and Feet: Simplified boxes or wedges
Connect these shapes with attention to alignment. The spine should curve naturally; shoulders and hips tilt in opposition during dynamic poses. Overlapping forms suggest depth—forearms overlapping biceps, thighs overlapping pelvis.
“Drawing isn’t about copying surfaces. It’s about constructing volume in space.” — George Bridgman, Anatomy for Artists
Step-by-Step Guide: Drawing a Male Figure in Six Stages
A structured approach transforms uncertainty into confidence. Follow this sequence each time you draw:
- Gesture Line (30 seconds): Capture the pose’s energy with a single flowing line representing the spine’s arc.
- Proportional Marks: Lightly indicate head units and joint locations.
- Form Blocks: Place spheres, cylinders, and boxes for major body parts, aligning them along the gesture line.
- Refine Silhouette: Connect forms smoothly, defining muscle groups like pectorals, deltoids, and quadriceps.
- Add Anatomical Details: Sketch tendons, knuckles, facial features, and surface landmarks (e.g., clavicles, kneecaps).
- Shading & Expression: Apply values to model form, then refine facial expression and clothing folds to convey mood.
Anatomy That Matters: Focus on Key Landmarks
You don’t need medical-level detail to draw convincingly. Instead, memorize critical anatomical markers that define realism:
| Body Area | Key Landmark | Visual Effect |
|---|---|---|
| Neck | Sternocleidomastoid muscles | Create V-shape leading to collarbones |
| Shoulders | Acromion process (bony tip) | Determines sleeve fit and arm angle |
| Chest | Nipple line and sternal notch | Anchor for ribcage orientation |
| Abdomen | Naval and iliac crest | Defines waist-to-hip transition |
| Arms | Olecranon (elbow), biceps tendon | Shows flexion and extension |
| Legs | Patella (kneecap), tibial crest | Guides leg direction and stance |
These landmarks remain visible even under clothing. They act as reference points when rendering fabric draping or dynamic action. Study them through life drawing sessions or anatomical diagrams until they become second nature.
Bringing Expression to Life: Beyond Realism
A technically perfect figure can still feel lifeless without emotional intent. Expression stems not only from the face but from the entire body language.
The position of the head, tension in the shoulders, and openness of the chest communicate confidence, fatigue, aggression, or vulnerability. For example:
- A forward-leaning torso with clenched fists suggests urgency or anger.
- Rounded shoulders and downward gaze imply introspection or sadness.
- One hand in a pocket, weight shifted to a hip—casual confidence.
To practice expression:
- Observe people in public spaces. Note how posture reflects mood.
- Draw short 2-minute sketches focusing solely on emotional tone.
- Use mirrors to study your own expressions and replicate them.
“The face tells part of the story, but the body speaks the whole sentence.” — Kim Jung Gi, Master Draftsman
Mini Case Study: From Stiff to Dynamic
Jamal, an intermediate artist, struggled with flat, mannequin-like figures. His early attempts used rigid symmetry and lacked weight. After studying gesture drawing and applying the 8-head proportion system, he began warming up with 30-second pose sketches from online references.
Within three weeks, his figures showed improved balance and flow. By incorporating anatomical landmarks—especially the pelvis tilt and shoulder counterbalance—his characters gained believability. He added expressive elements by exaggerating hand gestures and head angles, transforming static studies into storytelling moments.
His breakthrough came when he drew a man catching a falling child. The twisted torso, stretched arm, and furrowed brow combined technical accuracy with raw emotion—proof that mastery lies at the intersection of knowledge and feeling.
Essential Drawing Checklist
Use this checklist before finalizing any figure drawing:
- ✅ Gesture line captures movement and weight shift
- ✅ Head-to-body ratio is consistent (7.5–8 heads)
- ✅ Forms are constructed in 3D, not flat outlines
- ✅ Key anatomical landmarks are correctly placed
- ✅ Hands and feet are simplified but structurally sound
- ✅ Facial expression matches body language
- ✅ Shading follows form, enhancing volume
- ✅ Negative space feels balanced
Frequently Asked Questions
How long does it take to master drawing realistic male figures?
With consistent practice—3–5 sessions per week—most artists see significant improvement within 3 to 6 months. Mastery is ongoing, but foundational competence is achievable in under a year. Focus on progress, not perfection.
Do I need to memorize all muscles to draw well?
No. While knowing muscle names helps, what matters more is recognizing their surface impact—where they bulge, stretch, or recede. Focus on how muscles affect silhouette and shadow rather than anatomical nomenclature.
What if my drawings look stiff or unnatural?
Stiffness often comes from over-relying on symmetry and neglecting gesture. Try starting every drawing with a 20-second timed gesture warm-up. Embrace asymmetry: shoulders rarely sit level, and weight shifts create dynamic imbalance.
Conclusion: Your Journey Starts Now
Drawing a realistic and expressive male figure is not about innate talent—it’s about disciplined practice grounded in observation and structure. Every line you draw builds muscle memory, deepens understanding, and sharpens your artistic voice. Don’t wait for inspiration. Set a timer, grab a pencil, and begin with a single gesture line. Repeat daily. Refine relentlessly. Let each sketch bring you closer to the figures you envision.


 浙公网安备
33010002000092号
浙公网安备
33010002000092号 浙B2-20120091-4
Comments
No comments yet. Why don't you start the discussion?