
Drawing the human body is one of the most challenging yet rewarding skills an artist can develop. Whether you're a beginner sketching stick figures or an intermediate artist struggling with foreshortening, mastering human anatomy in art requires structured learning, consistent practice, and an understanding of form beyond surface details. This guide breaks down the process into manageable, progressive steps that build real skill over time—no shortcuts, just effective methods used by professionals.
Understanding Basic Proportions and Structure
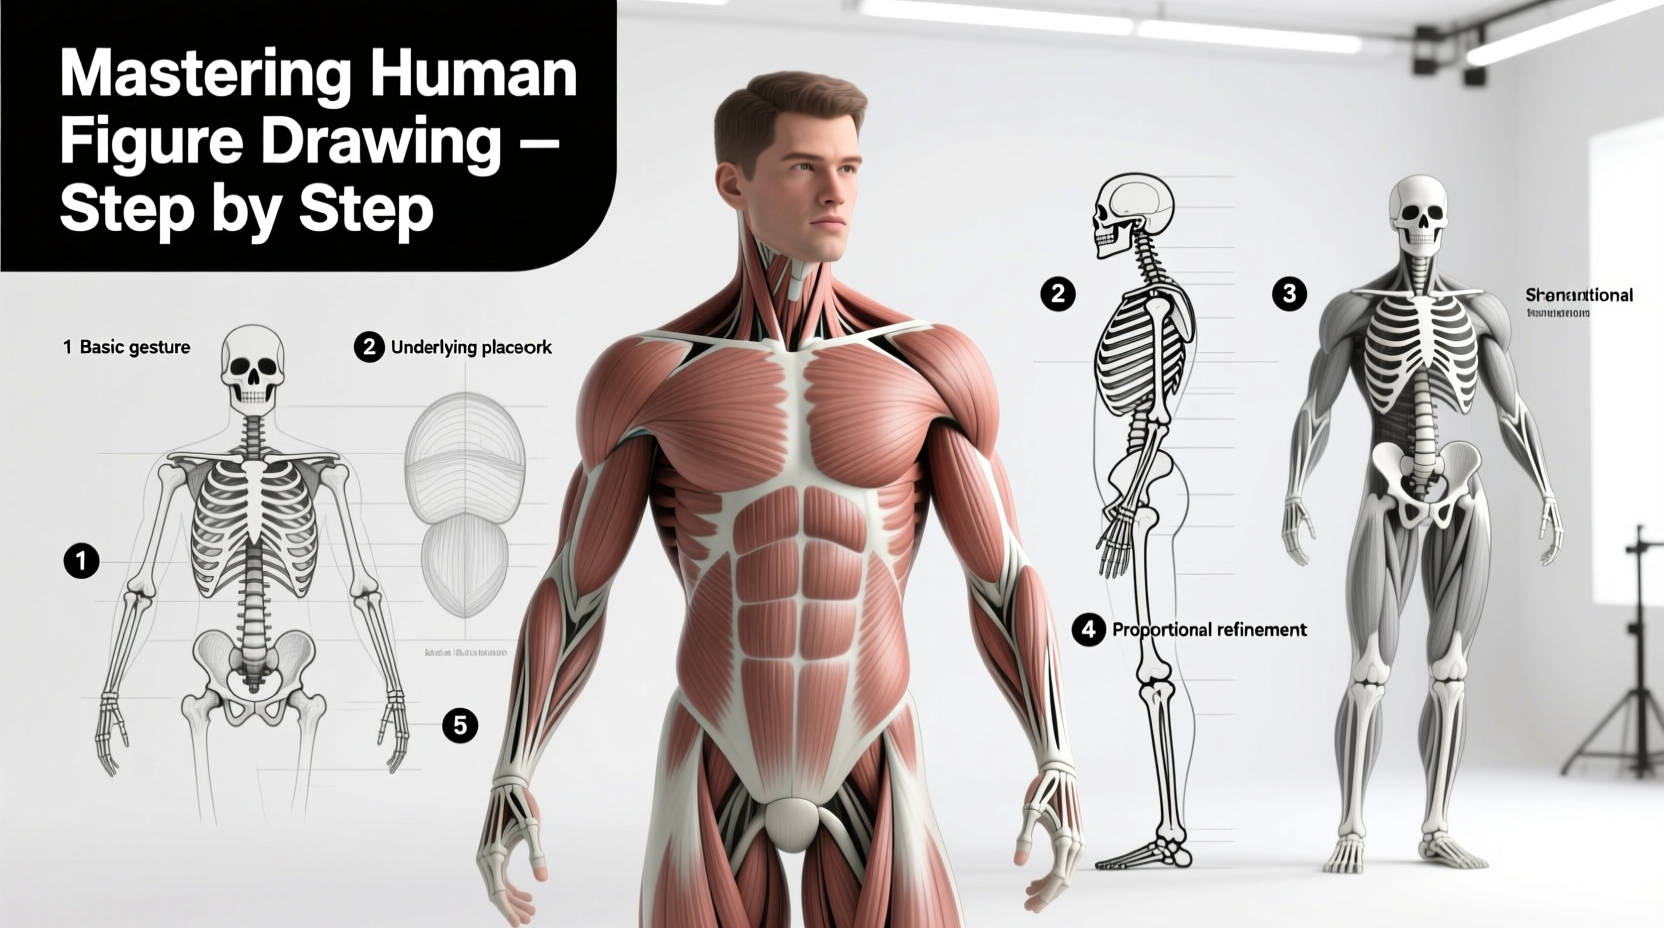
The foundation of realistic figure drawing lies in understanding average human proportions. While individuals vary, most adult figures follow a general rule: the body is approximately seven to eight head lengths tall. Measuring the height of the head and using it as a unit allows artists to map out the entire figure accurately on paper.
Start by visualizing the body as a series of connected geometric shapes:
- The head as an oval or sphere
- The torso as a combination of a ribcage (chest) and pelvis (hips), resembling two connected blocks
- Limbs as simplified cylinders
- Joints as spheres or rounded forms
This method, known as \"mannequinization,\" strips away complexity and helps you focus on spatial relationships, angles, and balance before adding muscle detail.
Step-by-Step Guide to Building the Figure
Follow this sequence to construct a well-proportioned human figure from scratch. Practice each stage separately before combining them into full drawings.
- Establish the center line: Draw a vertical line down the middle of your page to represent the spine. This acts as the core axis for symmetry and posture.
- Place the head: Sketch a circle or oval at the top. Divide it horizontally for eye level and vertically for facial symmetry.
- Mark the neck and shoulders: Add a narrow cylinder for the neck. Draw angled lines extending outward for shoulder placement.
- Construct the ribcage and pelvis: Use simple 3D shapes (boxes or ovals) tilted according to pose. Their orientation determines the body’s twist and balance.
- Add limb lines: Use straight lines to indicate arm and leg directions. Mark joints (elbows, knees) halfway along each limb.
- Refine with masses: Replace stick limbs with tapered cylinders. Define hand and foot placements with small rectangles.
- Check alignment and gesture: Ensure weight distribution makes sense. Is the figure leaning? Balanced? Use a quick gesture line to capture motion.
This framework turns abstract ideas into tangible structure. As you advance, overlay anatomical knowledge—muscle groups, bone landmarks—to refine realism.
Common Pitfalls and How to Avoid Them
Even experienced artists fall into recurring traps when drawing figures. Recognizing these early accelerates improvement.
| Common Mistake | Why It Happens | Solution |
|---|---|---|
| Limb distortion (too long/short) | Poor measurement technique | Use comparative measuring: “Is the forearm as long as the upper arm?” |
| Stiff, unnatural poses | Over-reliance on symmetry | Introduce counterbalance—hips opposite shoulders, relaxed joints |
| Flat-looking torsos | Ignoring 3D form | Shade based on volume, not outline; consider light source |
| Hands and feet too large/small | Exaggeration due to lack of reference | Treat hands like boxes with wedges; feet like slanted rectangles |
“Drawing the body isn’t about copying what you see—it’s about understanding how it moves through space.” — Julian Kim, Figure Drawing Instructor at The Art League
Progressive Skill Development: From Beginner to Advanced
Improvement in figure drawing follows a clear path. Align your practice with your current level to avoid frustration and plateaus.
Beginner Level (Weeks 1–8)
- Focus: Gesture drawing and basic proportions
- Practice: 30-second to 2-minute poses to capture movement
- Tools: Newsprint pad, soft pencil (2B–6B)
- Goal: Learn to see the whole figure, not isolated parts
Intermediate Level (Months 3–6)
- Focus: Anatomy overlays and constructive drawing
- Practice: 5–10 minute studies with emphasis on joint alignment and mass distribution
- Tools: Reference apps (e.g., Line of Action, QuickPoses), anatomy books
- Goal: Accurately render standing, seated, and dynamic poses
Advanced Level (6+ months)
- Focus: Surface anatomy, lighting, and expressive form
- Practice: Long poses (20+ minutes), detailed studies of musculature in action
- Tools: Ecorché models, life drawing sessions, digital layering (if using tablets)
- Goal: Draw convincing figures from imagination and memory
Real Example: From Stick Figures to Dynamic Poses
Sophie, a self-taught artist from Portland, began drawing six months ago with only doodles and cartoon characters. Frustrated by her inability to draw people realistically, she committed to a structured routine:
- Monday–Friday: 10 gesture drawings (2 minutes each)
- Every Saturday: One detailed 20-minute study with anatomy notes
- Sunday: Review previous week’s work and identify patterns
Within three months, her sketches evolved from flat silhouettes to balanced, dimensional figures. By month five, she completed her first shaded life drawing using chiaroscuro techniques. Her breakthrough came not from talent, but consistency and targeted exercises.
Frequently Asked Questions
How long does it take to learn to draw the human body well?
With regular practice (4–5 sessions per week), most artists see significant improvement within 3–6 months. Mastery takes years, but functional proficiency for illustration or concept art is achievable in under a year.
Do I need to memorize every muscle?
No. Focus first on major muscle groups (pectorals, deltoids, biceps, triceps, abdominals, quadriceps, hamstrings, calves) and their effect on surface form. Memorization follows repeated observation and drawing.
Can I draw accurately without live models?
Yes. High-quality photo references, 3D mannequins (like those in Clip Studio Paint), and online pose generators (e.g., PoseManiacs) are excellent alternatives. However, live drawing offers unmatched depth perception and motion cues.
Essential Checklist for Daily Practice
Use this checklist to stay focused and track progress:
- ☐ Warm up with 5 gesture drawings (1–2 minutes each)
- ☐ Measure proportions using the head as a unit
- ☐ Construct the figure with basic shapes before detailing
- ☐ Check alignment of shoulders, hips, and spine
- ☐ Identify light source and suggest form with simple shading
- ☐ Review one anatomical feature per session (e.g., how elbows bend)
Conclusion: Start Where You Are, Draw Every Day
Mastering how to draw the human body isn't reserved for art school graduates or prodigies. It's available to anyone willing to break it down, practice deliberately, and embrace mistakes as part of the process. Begin with simple construction, train your eye through gesture, and gradually layer in anatomy and expression. Over time, your hand will follow your vision with growing confidence.


 浙公网安备
33010002000092号
浙公网安备
33010002000092号 浙B2-20120091-4
Comments
No comments yet. Why don't you start the discussion?