
Crafting a dress from scratch is more than just sewing fabric together—it’s an act of personal expression, precision, and craftsmanship. Whether you're designing a simple summer shift or a tailored evening gown, mastering the process ensures not only a beautiful outcome but a garment that fits your body perfectly. With the right techniques, tools, and mindset, anyone can learn to create a custom-fitted dress that reflects their unique style. This guide walks you through each stage of the journey, from initial measurements to final stitching, emphasizing accuracy, adaptability, and creative confidence.
Understanding Your Body: The Foundation of Fit
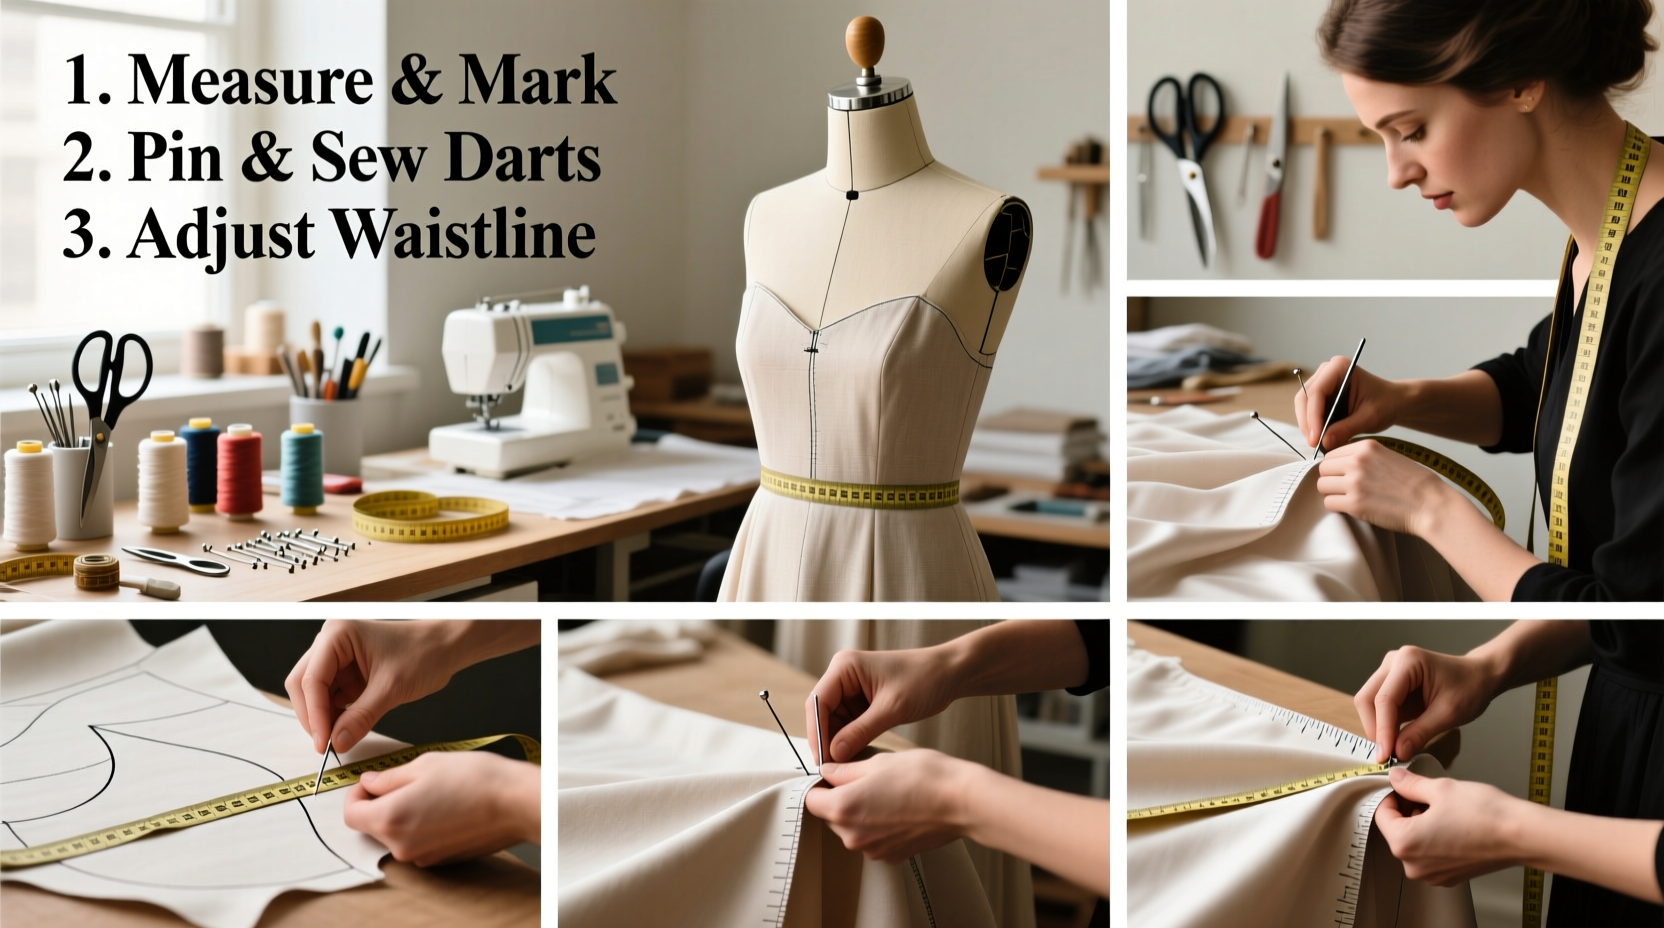
A well-fitting dress starts long before the first stitch. It begins with understanding your body shape and taking accurate measurements. Off-the-rack patterns rarely account for individual proportions—shoulders that slope slightly, hips that sit higher, or torsos that are longer or shorter than average. Customizing a dress means starting with data specific to you.
Use a soft measuring tape and have someone assist you when possible. Key measurements include bust, waist, hips, shoulder width, armhole depth, back length, and torso height (from shoulder to natural waist). Record these numbers clearly and refer to them throughout the pattern-making and fitting stages.
Once you’ve gathered your stats, compare them to standard sizing charts provided with commercial patterns. Identify where deviations occur. For example, if your bust matches size 10 but your hips align with size 12, you’ll need to blend sizes—a common adjustment even among experienced sewers.
Choosing and Adapting a Pattern
Selecting the right base pattern sets the tone for success. Look for one that closely matches your desired silhouette—A-line, sheath, empire waist, etc.—and includes detailed instructions and multiple size options. Independent designers often offer more inclusive sizing and clearer guidance than mass-market brands.
After selecting a pattern, perform a “muslin fit” using inexpensive fabric like cotton calico. This mock-up allows you to test the design on your body, identify tightness, gapping, or drag lines, and make corrections before cutting into your fashion fabric.
“Fitting isn’t a one-time task—it’s an iterative process. The muslin is your dress’s blueprint.” — Lila Montgomery, Fashion Designer & Pattern Maker
Common adjustments include:
- Shortening or lengthening the bodice
- Adding fullness at the hip or dart manipulation for better bust support
- Adjusting shoulder slope to prevent pulling
- Reshaping armholes for comfort and mobility
Step-by-Step Guide: Constructing Your Dress
With a properly fitted pattern in hand, it’s time to move into construction. Follow this timeline for smooth progress:
- Prepare Fabric: Pre-wash and press your fabric to prevent shrinkage after sewing.
- Lay Out Pattern Pieces: Align grain lines with the fabric’s selvage; pin or weight pieces securely.
- Cut Carefully: Use sharp scissors or a rotary cutter for clean edges. Mark darts, notches, and seam allowances.
- Sew the Bodice: Start with darts, then assemble front and back panels. Insert lining or interfacing as needed.
- Construct Skirt: Gather, pleat, or shape according to design. Attach to bodice with a strong, even seam.
- Add Closure: Install a zipper (invisible or centered), buttons, or ties depending on style.
- Hemming: Try on the dress to determine ideal length. Press and stitch with appropriate technique (rolled hem, blind hem, etc.).
- Final Press: Steam gently to set seams and give a polished finish.
Customization: From Fit to Style Details
A truly mastered dress goes beyond fit—it carries personality. Once structural elements are complete, elevate your creation with intentional styling choices:
- Swap sleeve styles—try cap sleeves, flutter, or puff sleeves for drama.
- Modify necklines: lower a scoop neck, add a keyhole, or insert lace trim.
- Play with length: turn a midi into a tea-length dress with a new hemline.
- Incorporate pockets—even formal dresses can hide functional side-seam pockets.
Consider fabric choice as part of your style equation. A crisp cotton poplin gives structure; silk charmeuse drapes luxuriously; linen breathes beautifully in warm weather. Each alters both look and behavior of the garment.
| Design Element | Impact on Fit | Styling Opportunity |
|---|---|---|
| Dart Placement | Defines waist, supports bust | Can be turned into tucks or decorative seams |
| Waistline Position | Alters proportion and comfort | Empire = romantic; natural = classic; dropped = modern |
| Seam Lines | Shape the garment around curves | Princess seams allow sleek shaping without darts |
| Neckline Depth | Affects shoulder balance | Add contrast binding or embroidery for flair |
Mini Case Study: Transforming a Basic Shift
Sophie, an intermediate sewer, wanted a versatile black dress for work and evenings. She began with a basic shift pattern but found it boxy and unflattering. After taking precise measurements, she adjusted the side seams to curve inward at the waist and added subtle princess seams for contouring. She replaced the round neckline with a deeper V and inserted a concealed back zipper for cleaner lines. Finally, she chose a medium-weight crepe fabric with slight stretch, which enhanced drape and movement. The result was a sleek, figure-skimming dress that received compliments at every office event—and proved that small changes yield big impact.
Avoiding Common Pitfalls: Do’s and Don’ts
Even skilled crafters encounter setbacks. Learning what *not* to do is just as valuable as knowing the correct method.
| Do | Don't |
|---|---|
| Label all pattern pieces immediately | Assume you’ll remember which is front/back later |
| Transfer all markings to fabric (darts, notches) | Forget to mark critical alignment points |
| Test stitches on scraps first | Use default machine settings blindly |
| Walk away and re-evaluate during fitting | Make emotional decisions under frustration |
| Use thread that matches fabric weight | Use heavy thread on delicate silks |
Frequently Asked Questions
How do I know if my dress fits correctly?
A well-fitted dress should feel secure without restricting movement. There should be no pulling across the chest or gaps at the back. Darts should point toward apexes (bust, shoulder blades) without distorting. When buttoned or zipped, the fabric lies flat without tension lines.
Can I make a dress without a sewing machine?
Yes, though it takes longer. Hand sewing with backstitches and slip hems produces durable results. Use a thimble and fine needles for control. Prioritize stable fabrics like cotton or wool, which hold shape better during manual construction.
What if my fabric slips while cutting?
Pin frequently along edges or use pattern weights. Work on a non-slip surface like a cutting mat. For slippery fabrics like satin or chiffon, consider stabilizing with tissue paper underneath during cutting and sewing—tear it away afterward.
Checklist: Your Dress-Making Roadmap
- ☑ Take accurate body measurements
- ☑ Select and adjust a commercial pattern (or draft your own)
- ☑ Cut a muslin toile for fit testing
- ☑ Make necessary alterations to pattern
- ☑ Choose suitable fabric and pre-treat it
- ☑ Transfer all markings to fabric
- ☑ Sew in order: bodice → skirt → assembly → closure → hem
- ☑ Press every seam as you go
- ☑ Try on frequently during construction
- ☑ Add finishing touches: labels, embellishments, final press
Conclusion: Wear Your Confidence
Mastering how to make the dress step by step transforms sewing from a hobby into a form of self-reliance. Every seam you stitch reinforces your ability to shape clothing exactly how you want it—no compromises. With attention to detail, patience through fittings, and courage to personalize, you’re not just making a dress. You’re creating a wearable testament to skill, vision, and individuality.


 浙公网安备
33010002000092号
浙公网安备
33010002000092号 浙B2-20120091-4
Comments
No comments yet. Why don't you start the discussion?