
Upholstering a round puff offers a satisfying blend of craftsmanship and creativity. Whether it’s a footrest, extra seating, or a stylish accent piece, reupholstering can breathe new life into an old favorite or elevate a thrifted find. Stapling is one of the most effective and durable methods for securing fabric, especially on circular forms where tension and smoothness are critical. This guide walks you through every stage—from prep to final trim—with precision, practical advice, and professional insight.
Gather Your Tools and Materials
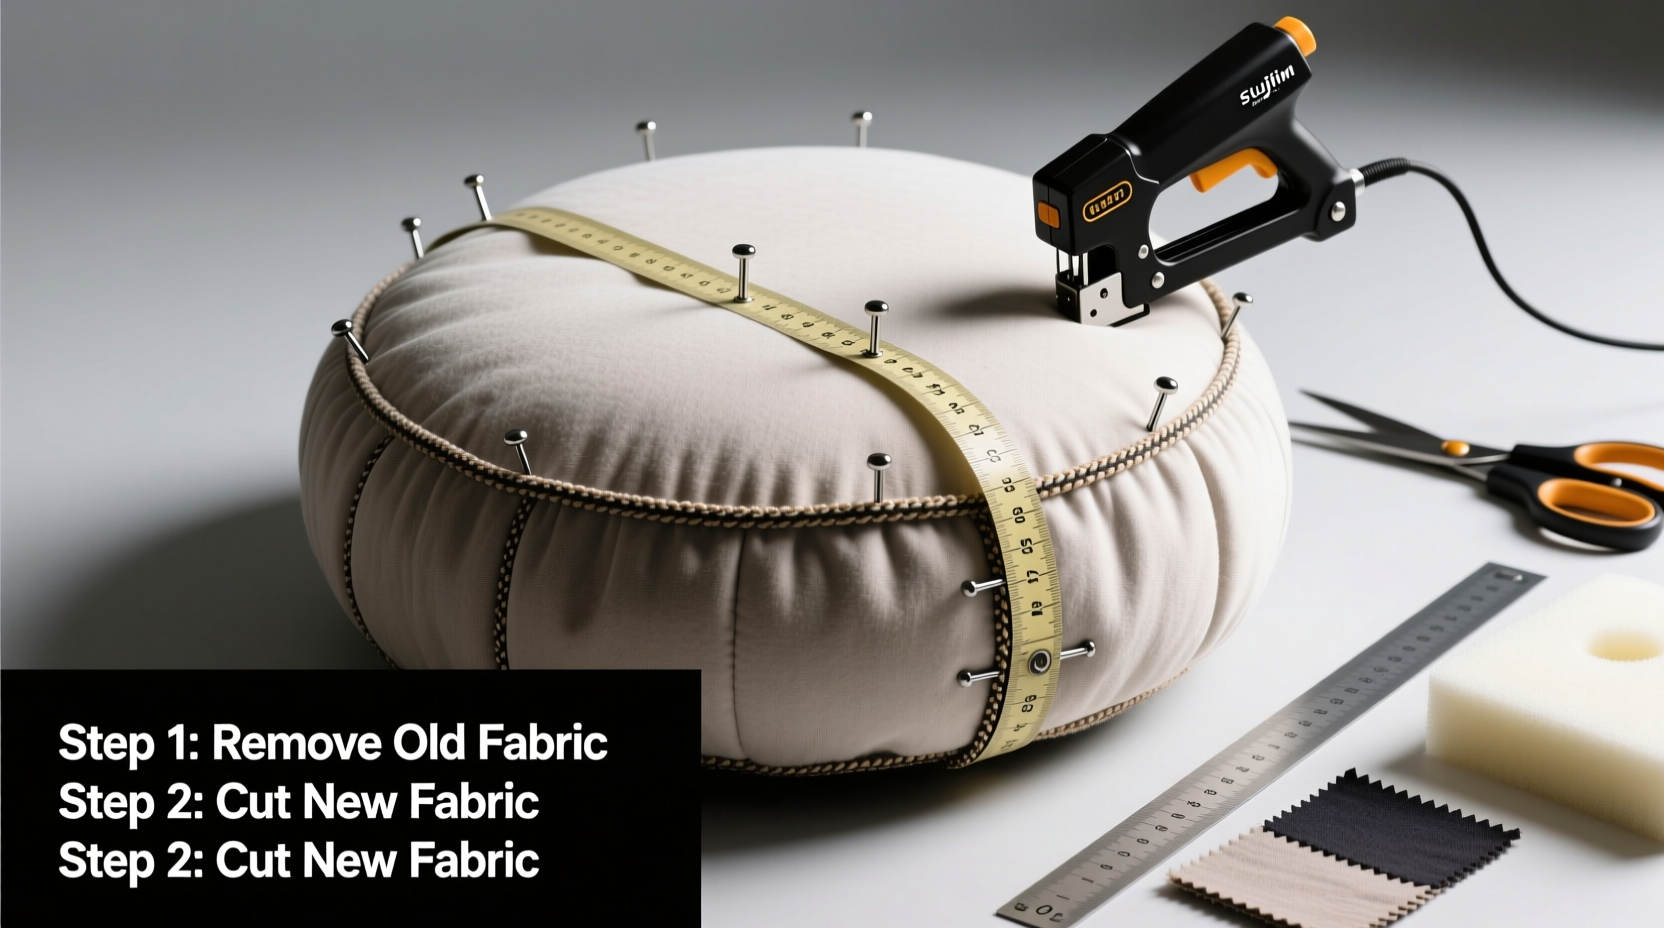
Before beginning any upholstery project, having the right tools ensures efficiency and quality. A round puff typically consists of a padded foam core mounted on a wooden base or frame. The challenge lies in evenly stretching fabric over a curved surface without wrinkles or loose spots. Here’s what you’ll need:
- Staple gun (manual or electric)
- Heavy-duty upholstery staples (¼” to ⅜”)
- Sharp utility knife or scissors
- Measuring tape
- Fabric of choice (at least 6–8 inches larger than the diameter of the puff)
- Round puff base with foam padding
- Screwdriver (if removing existing fabric)
- Seam ripper (optional, for disassembly)
- Push pins or clips (to temporarily secure fabric)
Step-by-Step Upholstery Process
- Remove Old Fabric (if applicable): Use a seam ripper or flat screwdriver to carefully pry out staples from the underside of the base. Peel back the old fabric slowly to avoid damaging the foam or base. If the foam is compressed or torn, consider replacing it with a fresh cut-to-size round foam pad.
- Clean and Prep the Base: Wipe down the wooden base and foam. Remove dust, debris, or sticky residue. Let dry completely before proceeding. A clean surface ensures better adhesion and prevents shifting during stapling.
- Measure and Cut Fabric: Lay your fabric face-down on a large, flat surface. Place the puff top-side down onto the fabric. Measure at least 4–6 inches of excess fabric around the entire edge—this allows room for pulling taut and stapling underneath. Cut the fabric in a rough circle slightly larger than needed; you can trim later.
- Center and Pin the Fabric: Flip the puff and position it centered on the backside of the fabric. Use push pins or fabric clips to temporarily hold the material in place at four cardinal points (north, south, east, west). This alignment prevents slippage during stapling.
- Begin Stapling at Opposite Points: Start at one pinned point—say, the north position—and pull the fabric snugly toward you. Do not stretch to the point of distortion. Fire one staple into the side of the base. Move directly across to the south position, pull with equal tension, and staple. Repeat for east and west. This cross-pattern minimizes shifting and creates even distribution.
- Work in Quadrants: Now divide each quarter into smaller increments. Pull and staple every 2–3 inches, alternating sides to maintain balance. As you approach curved areas, small pleats may form. Fold these neatly like a pie crust—avoid bunching or puckering.
- Handle Curves and Pleats: On rounded edges, fabric naturally gathers. Instead of forcing it flat, make small vertical cuts (no more than ½ inch deep) along the seam allowance near high-curvature zones. This lets the fabric lay flatter when folded under and stapled. Fold each cut section neatly before stapling.
- Secure the Underside: Once the perimeter is fully stapled, inspect for loose areas. Trim excess fabric, leaving about 1–2 inches beyond the staples. Tuck the remaining edge under itself for a clean finish and staple as needed. Ensure all raw edges are hidden and secured.
Common Challenges and How to Solve Them
Even experienced DIYers encounter hiccups when working with curves. Understanding these issues ahead of time improves outcomes significantly.
| Challenge | Solution |
|---|---|
| Wrinkles or bubbles after stapling | Remove nearby staples and re-pull with consistent tension. Work from center outward. |
| Fabric tears during stretching | Use a stronger fabric next time. For now, patch with fusible webbing or switch to a decorative cover like a skirt. |
| Pleats look messy or uneven | Create uniform folds by pinching fabric vertically and folding in the same direction all around. |
| Staples won’t penetrate wood | Pre-drill pilot holes with a nail or use a power staple gun rated for hardwood. |
“Mastering upholstery isn’t about perfection—it’s about controlled tension and smart folding. A well-pleated edge shows care, not compromise.” — Daniel Ruiz, Master Upholsterer & Furniture Restorer
Checklist: Before You Begin and After Completion
Follow this checklist to ensure nothing is overlooked during your project.
- ✅ Removed old fabric and inspected foam integrity
- ✅ Cleaned base and allowed to dry
- ✅ Selected appropriate fabric (durable, medium-weight, minimal stretch)
- ✅ Measured and cut fabric with ample overhang
- ✅ Used cross-stitch stapling technique for even tension
- ✅ Made relief cuts where necessary for smooth curves
- ✅ Trimmed and tucked edges neatly underneath
- ✅ Inspected underside for exposed staples or loose sections
- ✅ Vacuumed finished puff to remove lint and debris
Real Example: Reviving a Vintage Floor Pouf
Sophie, a home stylist in Portland, found a worn round puff at a flea market. The foam was intact but flattened on one side, and the velvet cover was frayed. She replaced the foam with a 4-inch high-density round pad, chose a textured oatmeal-toned bouclé fabric for durability, and followed the cross-pulling method described above. By making small relief cuts every 2 inches near the base curve and folding each pleat clockwise, she achieved a tailored, boutique-quality finish. The result became a centerpiece in her living room—and inspired her to launch a small reupholstery side business.
Frequently Asked Questions
Can I use a hot glue gun instead of a staple gun?
While hot glue can supplement in minor repairs, it lacks the holding strength needed for full upholstery. Over time, heat and pressure will cause glued fabric to peel. Staples provide long-term security, especially on load-bearing pieces like puffs.
What type of fabric should I avoid?
Steer clear of highly elastic materials like jersey knit, sheer fabrics, or loosely woven weaves. These stretch unpredictably and tear easily under tension. Also avoid thick leather unless you have industrial tools—it requires pre-punching and heavy-duty fasteners.
How do I clean the puff after upholstering?
Spot clean with a damp cloth and mild detergent. Avoid soaking the base, as moisture can warp wood or degrade foam. For stain-resistant fabrics, follow manufacturer guidelines. Always let dry fully before use.
Final Thoughts and Next Steps
Upholstering a round puff by stapling is more than a repair—it’s a transformation. With patience and attention to detail, you gain not only a refreshed piece but also a valuable skill applicable to chairs, ottomans, and headboards. The key lies in preparation, consistent tension, and respect for the material’s behavior under stress. Every fold, staple, and cut contributes to a professional outcome.
Don’t wait for furniture to wear out before acting. Start with a simple project like a floor puff to build confidence. Document your process, note what works, and refine your technique. Soon, you’ll be reupholstering with instinct and precision.


 浙公网安备
33010002000092号
浙公网安备
33010002000092号 浙B2-20120091-4
Comments
No comments yet. Why don't you start the discussion?