
Creating videos for YouTube isn’t just about capturing footage—it’s about storytelling through editing. For beginners, the editing process can feel overwhelming, especially with so many tools and techniques available. Yet, with the right approach, anyone can learn to produce polished, engaging videos that capture attention and grow an audience. This guide walks you through every essential stage of YouTube video editing, from choosing software to publishing your final cut.
Choosing the Right Video Editing Software
The first decision every beginner faces is which editing software to use. The ideal program balances ease of use with powerful features. Fortunately, there are excellent options for every skill level and budget.
| Software | Best For | Platform | Price |
|---|---|---|---|
| Davinci Resolve | Beginners & pros wanting professional color grading | Windows, Mac, Linux | Free (Studio version: $295) |
| CapCut | Quick edits, mobile-friendly, trending effects | Desktop & Mobile | Free (Pro: $7.99/month) |
| Adobe Premiere Pro | Advanced creators seeking full control | Windows, Mac | $20.99/month |
| iMovie | Mac/iOS users starting out | Mac, iOS | Free |
| Shotcut | Open-source enthusiasts on a budget | Windows, Mac, Linux | Free |
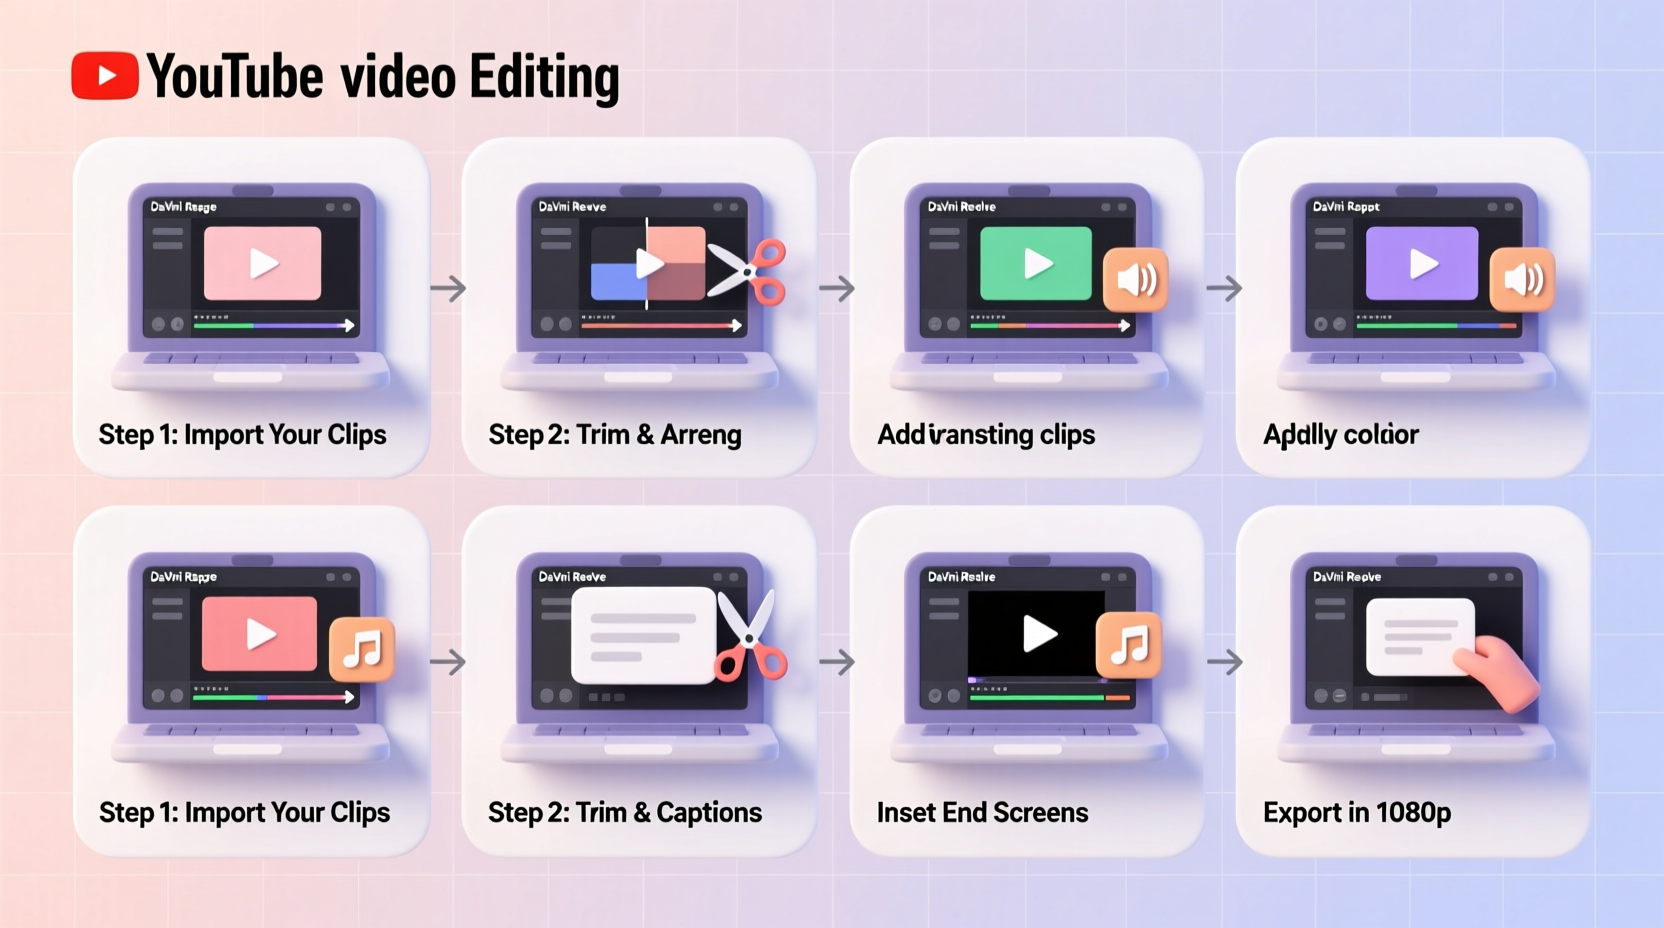
Step-by-Step Editing Process for Beginners
Editing doesn’t have to be chaotic. Follow this structured workflow to turn raw clips into a compelling YouTube video.
- Organize Your Footage: Create folders for raw clips, audio, music, and exports. Name files clearly (e.g., “Intro_Take2,” “Broll_Park”).
- Set Up Your Project: Open your editing software and create a new project. Match settings to your camera’s resolution (usually 1080p or 4K) and frame rate (24fps or 30fps).
- Build a Rough Cut: Drag clips onto the timeline in order. Trim obvious mistakes or long pauses. Focus on structure, not perfection.
- Add B-Roll and Visuals: Insert supplementary footage (b-roll), images, or screen recordings to support your narration and keep viewers engaged.
- Refine the Edit: Tighten cuts, remove filler words (“um,” “like”), and ensure smooth transitions between scenes.
- Enhance Audio: Lower background noise, balance voice levels, and add subtle background music. Use royalty-free tracks from sites like Epidemic Sound or YouTube Audio Library.
- Apply Color Correction: Adjust brightness, contrast, and white balance to make your video look consistent and professional.
- Add Text and Graphics: Include titles, lower thirds, and captions to emphasize key points. Keep text minimal and readable.
- Export in the Right Format: Choose MP4 (H.264 codec), 1080p resolution, and a bitrate of at least 15 Mbps for optimal YouTube quality.
- Upload and Optimize: Add a strong title, description, tags, and custom thumbnail before publishing.
Avoiding Common Beginner Mistakes
New editors often repeat errors that hurt viewer retention. Awareness is the first step toward improvement.
- Overusing transitions: Fades and zooms should enhance, not distract. Stick to simple cuts unless a transition serves a purpose.
- Neglecting audio quality: Poor sound drives viewers away faster than bad visuals. Always use a dedicated microphone if possible.
- Ignoring pacing: Long pauses or drawn-out explanations lose attention. Aim for tight, dynamic edits.
- Skipping backups: Save project files and media to an external drive or cloud storage. Losing hours of work is preventable.
- Forgetting subtitles: Over 70% of videos are watched without sound. Burn in subtitles or enable auto-captions.
“Editing is where the magic happens. A well-edited video can elevate average footage into something memorable.” — Sarah Kim, YouTube Content Strategist
Real Example: From Raw Clips to Viral Short
Consider Alex, a beginner vlogger documenting a day at a local farmers market. His initial 20-minute raw footage included shaky walking shots, inconsistent lighting, and background chatter.
Using CapCut, he organized clips by scene—entrance, produce section, food tasting. He trimmed each segment to under 10 seconds, added upbeat royalty-free music, and overlaid text explaining what he was sampling. He enhanced audio by reducing ambient noise and boosting his voiceover. Finally, he added a branded intro and end card.
The result? A 90-second video that gained over 50,000 views in a week. Viewers praised the clean pacing and clear audio. What started as disorganized footage became a shareable piece of content—all thanks to thoughtful editing.
Essential Editing Checklist
Before exporting your next video, run through this checklist to ensure quality and consistency:
- ✅ All clips are in correct order with no awkward jumps
- ✅ Audio levels are balanced (voice clear, music low)
- ✅ Background noise reduced or removed
- ✅ Color corrected for consistency across scenes
- ✅ Subtitles or captions included
- ✅ Branding elements (intro, outro, logo) added
- ✅ Video exported in 1080p or higher, H.264 format
- ✅ File size optimized for fast upload
Frequently Asked Questions
How long should my first YouTube video be?
Start between 3–7 minutes. Shorter videos are easier to edit and more likely to be watched fully. As you gain confidence, adjust length based on content type—tutorials may need more time, while vlogs can stay concise.
Do I need a powerful computer to edit videos?
Not necessarily. Entry-level laptops can handle basic editing in lightweight software like iMovie or CapCut. For 4K editing or heavy effects, a machine with at least 16GB RAM and a dedicated GPU is recommended.
Can I edit YouTube videos on my phone?
Yes. Apps like CapCut, InShot, and Adobe Premiere Rush offer robust mobile editing with intuitive interfaces. They’re ideal for quick cuts, social shorts, or when you’re on the go. Just ensure your final export meets YouTube’s quality standards.
Developing a Consistent Editing Workflow
Efficiency comes from repetition. Build a repeatable workflow so each video takes less time and yields better results. Start by creating templates for intros, outros, and lower thirds. Save color presets and audio profiles to apply with one click. Organize your assets so you can find music, logos, and transitions instantly.
Over time, editing becomes second nature. You’ll spend less time figuring out tools and more time focusing on creativity—crafting narratives, enhancing emotion, and connecting with your audience.
Conclusion
Video editing is a skill that grows with practice. You don’t need expensive gear or years of experience to start making great YouTube content. By choosing accessible software, following a clear editing process, and learning from real-world examples, you can produce videos that inform, entertain, and inspire.


 浙公网安备
33010002000092号
浙公网安备
33010002000092号 浙B2-20120091-4
Comments
No comments yet. Why don't you start the discussion?