
Traveling with a large backpack—whether for a week or six months—shouldn’t mean sacrificing convenience for capacity. Many travelers assume that bigger bags lead to cluttered chaos, but with intentional organization, a 50-70 liter backpack can be as accessible and streamlined as a carry-on suitcase. The key lies not in how much you pack, but in how you pack it. Strategic compartmentalization, weight distribution, and smart categorization transform your backpack from a black hole of forgotten items into a well-oiled travel system.
Understand Your Backpack’s Anatomy
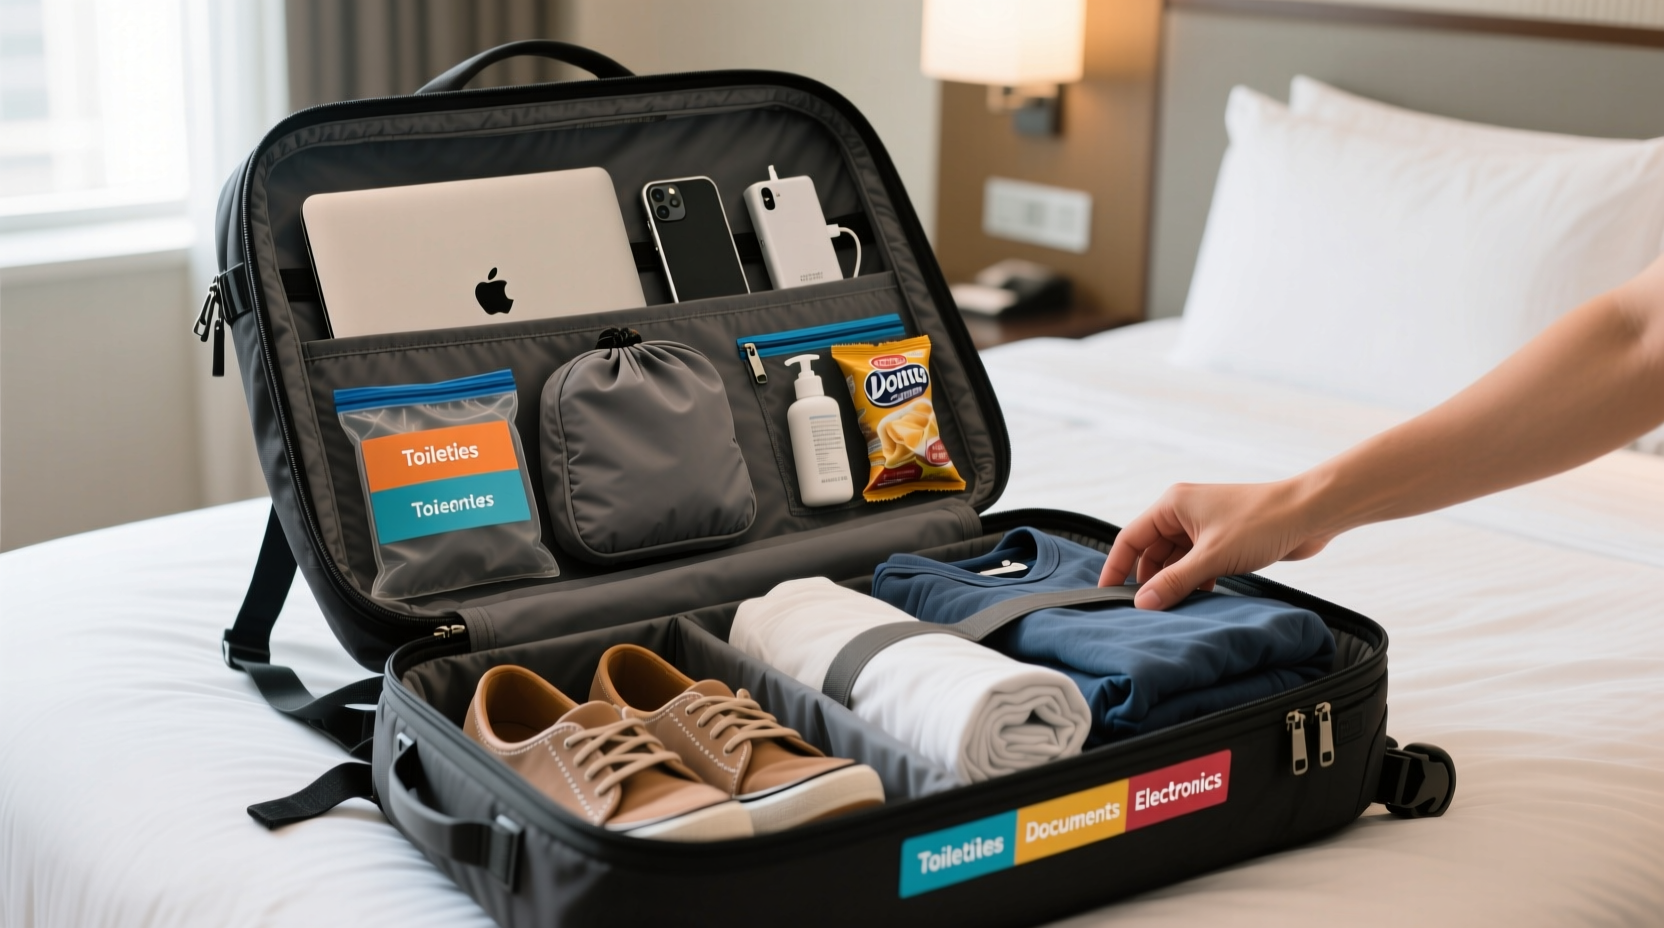
Before you begin packing, take time to study your backpack’s design. Most large travel backpacks include multiple compartments: a main cavity, front-loading panel, laptop sleeve, hip belt pockets, top lid, side pockets, and sometimes compression straps or external attachment points. Each serves a specific purpose.
The main compartment is ideal for bulkier, less frequently accessed items like clothing and sleeping bags. Front panels allow for organized layering—perfect for separating outfits by day or activity. Hip belt pockets hold essentials like lip balm, sunscreen, or energy bars for quick access while hiking. The top lid often stores small, high-priority items such as passports, headlamps, or earplugs.
Adopt the Packing Cube System
Packing cubes are not just trendy accessories—they are organizational game-changers. These lightweight fabric containers compress clothing, separate categories (e.g., tops, bottoms, underwear), and maintain order even after repeated unpacking.
Choose a set of three to five cubes in varying sizes. Assign each a dedicated role:
- Large cube: Folded shirts, pants, dresses
- Medium cube: Sweaters, lightweight jackets
- Small cube: Underwear, socks, swimwear
- Compression cube: Puffy jackets, down items
- Toiletry pouch: Not technically a cube, but should be leak-proof and upright-standing
Color-coding cubes by category or day-of-the-week further reduces decision fatigue on the road. When you arrive at a hostel or hotel, simply pull out one cube instead of dumping everything onto the bed.
“Packing cubes increase usable space by up to 30% and drastically reduce search time.” — Sarah Lin, Adventure Travel Organizer & Founder of PackLight Expeditions
Follow the Weight-and-Access Hierarchy
Efficient packing isn’t just about fitting things in—it’s about placing them correctly. Follow this internal hierarchy:
- Bottom (closest to back): Light, bulky, rarely used items (sleeping bag, extra shoes)
- Middle (center of back): Heaviest gear (laptop, books, water bottles) aligned with your spine
- Top (near shoulder straps): Frequently needed items (jacket, snacks, rain cover)
- External pockets: Immediate-access tools (passport, phone, tissues, hand sanitizer)
This distribution keeps the center of gravity close to your body, improving balance and reducing strain during long treks through airports or mountain trails.
| Compartment | Best For | Avoid Storing Here |
|---|---|---|
| Main Cavity | Clothing, bedding, non-essentials | Passport, medications, electronics |
| Hip Belt Pockets | Snacks, lip balm, trail map | Bulky items, wet gear |
| Top Lid | Headlamp, power bank, ID | Heavy objects, loose liquids |
| Side Pockets | Water bottles, trekking poles | Fragile devices, documents |
| Front Zip Panel | Toiletries, tech cables, adapters | Dirty laundry without a liner |
Real-World Example: A Two-Week Trek Through Southeast Asia
Consider Maya, a digital nomad traveling across Thailand, Laos, and Vietnam with only a 65L backpack. Her initial attempt left her frustrated—she’d spend 20 minutes digging for her toothbrush every morning, and her laptop was crushed under jeans at the bottom.
After reorganizing using the principles above, she assigned zones: bottom for spare shoes and sarongs, middle for cube-stacked clothes and a padded laptop sleeve, top for her e-reader and universal adapter. She added a clear plastic bag inside the front panel for toiletries and kept hand sanitizer and local currency in her hip pockets.
The result? She cleared immigration in under two minutes, accessed lunch without stopping, and never once strained her back. More importantly, she spent less mental energy managing her bag and more exploring.
Step-by-Step: How to Pack Your Backpack in 7 Minutes
Speed and consistency matter, especially when moving between accommodations. Follow this routine:
- Empty completely – After each trip, unpack entirely to assess wear and reset.
- Dry all compartments – Wipe down interiors; air out overnight to prevent mildew.
- Lay out cubes and categories – Group items before placing them anywhere.
- Load base layer – Place sleeping bag or soft duffel at the very bottom.
- Add medium-weight items – Insert packed cubes around central axis.
- Insert essentials near top – Jacket, eye mask, book, charging kit.
- Final check – Ensure zippers work, straps are secure, and emergency contacts are visible.
Packing Checklist: Never Forget the Essentials
Use this concise checklist before closing your backpack:
- ✅ Passport and copies (digital + physical)
- ✅ Power bank and charging cables
- ✅ Universal outlet adapter
- ✅ First-aid kit (blister pads, pain relievers)
- ✅ Reusable water bottle or filter
- ✅ Quick-dry towel
- ✅ Lockable cable for hostel security
- ✅ Weather-appropriate outer layer
- ✅ Backup pair of socks and underwear
- ✅ Face masks and hand sanitizer
Frequently Asked Questions
How do I prevent my clothes from getting wrinkled?
Roll garments instead of folding them. This minimizes creases, saves space, and makes items easier to see. For wrinkle-prone fabrics like cotton dress shirts, place them flat on top of other rolled items or use tissue paper between layers.
Should I use a liner bag inside my backpack?
Yes. A waterproof dry sack or trash compactor bag lining the interior protects your gear from rain, spills, and damp hostel floors. It also simplifies cleaning and acts as a barrier if you pick up dirty or muddy items during hikes.
What’s the best way to organize tech gear?
Keep all cords, batteries, and devices in a dedicated tech cube with elastic loops and mesh pockets. Label cables with colored tape or tags. Always carry backup storage (USB drive or cloud-synced device) for photos and documents.
Final Thoughts: Travel Smarter, Not Harder
Mastering large travel backpack organization isn't about perfection—it's about creating a system that works consistently across destinations and durations. When your gear has a designated place and you know exactly where to find it, you reclaim time, energy, and peace of mind. That means less frustration at airport security, faster setup at campsites, and more presence during your journey.
Great packing habits compound over time. What starts as a simple cube system evolves into an intuitive rhythm—one where your backpack feels like an extension of your body rather than a burden. Whether you're navigating bustling train stations or remote jungle trails, a well-organized pack gives you confidence and freedom.


 浙公网安备
33010002000092号
浙公网安备
33010002000092号 浙B2-20120091-4
Comments
No comments yet. Why don't you start the discussion?