
Dog leashes endure constant stress from pulling, tugging, and outdoor exposure. Over time, the loop handle—the part you grip—is often the first to fray or break. While replacement is an option, mastering loop handle splicing offers a cost-effective, sustainable, and surprisingly satisfying solution. This guide walks through the essential techniques, tools, and best practices for creating strong, long-lasting splices that outperform factory stitching.
The Strength of Splicing: Why It Outlasts Sewing
Sewn seams in dog leashes rely on thread tension, which can degrade under repeated strain. UV exposure, moisture, and friction accelerate wear, especially at high-stress points like the loop handle. In contrast, splicing integrates the rope fibers themselves into the structure, distributing load across multiple strands rather than relying on external stitching.
Marine-grade kernmantle ropes—commonly used in high-performance leashes—feature a braided outer sheath (mantle) and a load-bearing inner core (kern). A properly executed splice maintains the integrity of both layers, preserving up to 90% of the rope’s original strength. Sewn connections rarely exceed 60–70% efficiency.
“Splicing isn’t just repair—it’s reinforcement. When done correctly, a splice becomes stronger than the rope itself.” — Captain Rafael Mendez, Rope Craft Specialist & Maritime Instructor
Essential Tools and Materials
Before beginning any splice, gather the right tools. Precision matters—using improper equipment leads to weak joins or frayed ends.
| Tool/Material | Purpose | Recommended Specs |
|---|---|---|
| Splicing fid | Separates rope strands for weaving | Size matched to rope diameter (e.g., 5mm for 10mm rope) |
| Sharp utility knife or tape cutter | Cleanly cuts rope without fraying | Replaceable blade for precision |
| Lighter or heat-shrink tubing | Seals cut ends to prevent unraveling | Butane lighter for synthetic fibers |
| Measuring tape | Ensures consistent tail length | Metric/imperial dual scale |
| Rope whipping thread (optional) | Temporary strand control during splice | Waxed polyester thread |
Avoid using scissors on modern kernmantle rope—they crush the fibers. Always melt the ends of synthetic ropes like polyester or nylon after cutting to prevent fraying.
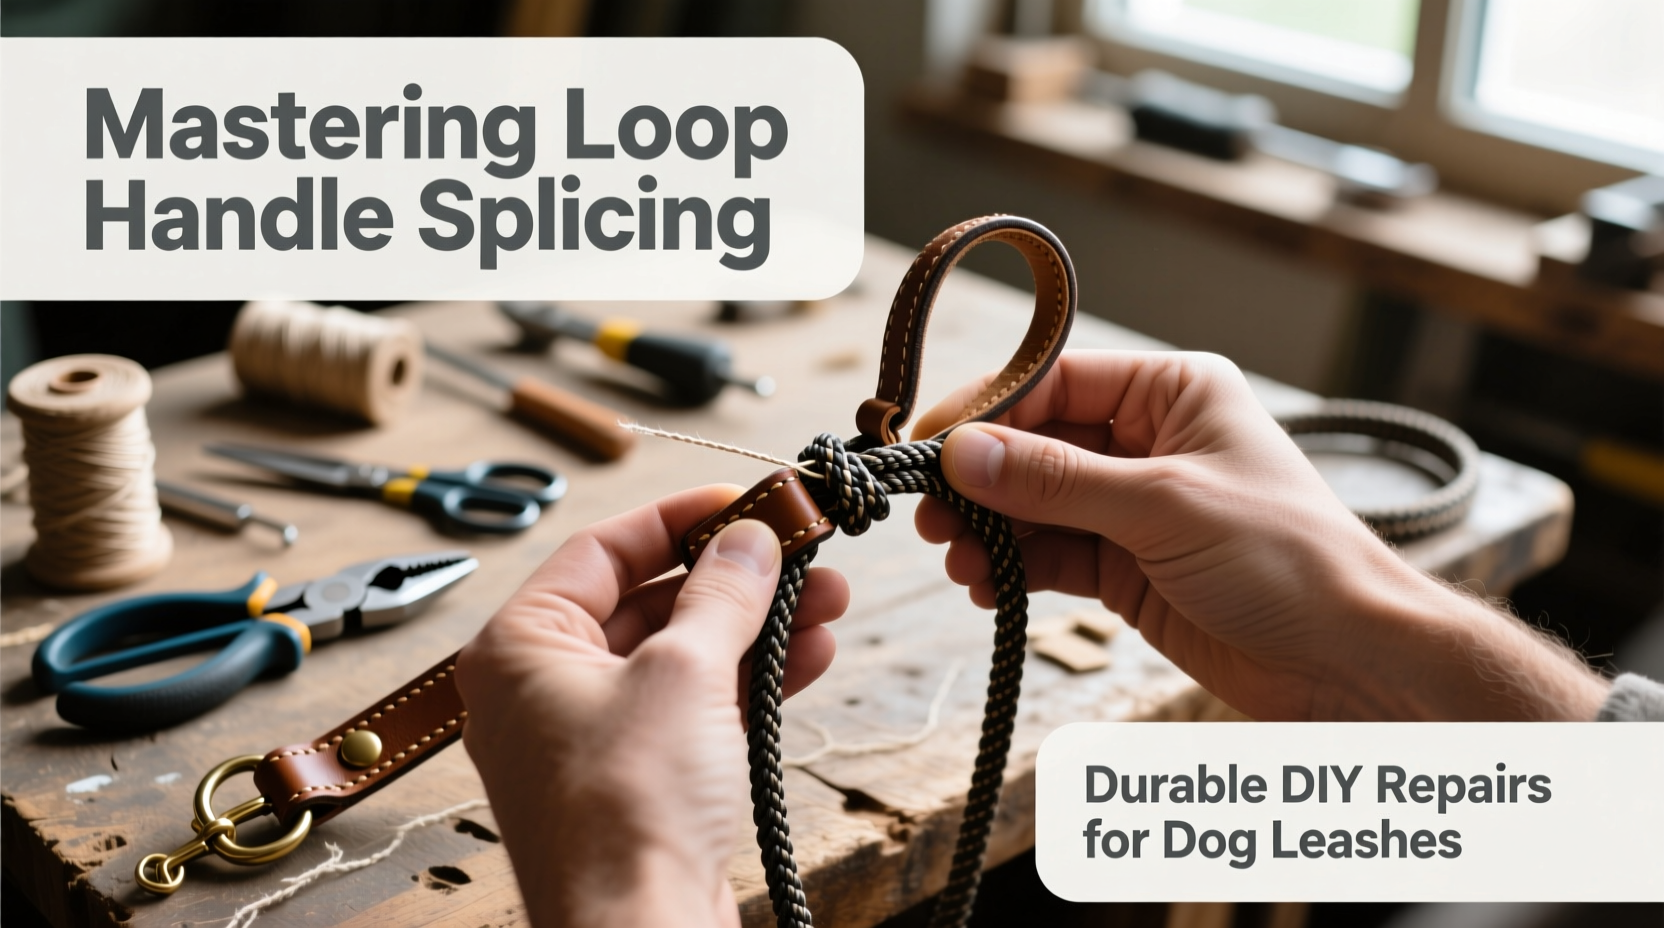
Step-by-Step: Completing a Permanent Loop Handle Splice
This method creates a secure, seamless eye splice ideal for dog leash handles. It maintains a smooth grip and resists snagging.
- Measure and mark: Determine the desired loop size (typically 4–6 inches in diameter). Measure eight times the rope diameter from the end as your initial marking point.
- Prepare the tail: Cut the rope cleanly using a sharp knife. Melt the end slightly to seal it, then cool and trim flush.
- Unlay the sheath: Using the fid, carefully separate the outer braid approximately 16 rope diameters back. Keep the core intact inside.
- Create the eye: Form the loop at your marked point. Insert the fid into the standing part of the rope and open a path through the core.
- Weave the core: Extract the inner core from the tail section and weave it back through the standing end using a three-tuck minimum. Each tuck should go under one strand of the core.
- Finish the sheath splice: Weave the outer braid back into the standing sheath over a distance of 12–16 diameters. Maintain even tension to avoid bulges.
- Inspect and dress: Pull all sections tight evenly. Run the splice through your hands to seat the fibers. Trim excess only after final tensioning.
Real-World Example: Repairing a Working Dog's Leash
Ben, a search-and-rescue handler in Colorado, noticed fraying at the base of his German Shepherd’s primary training leash. The 10mm polyester kernmantle line had endured months of mountain terrain, snow, and daily use. Rather than risk failure mid-training, he opted to re-splice the loop handle.
Using a 6mm aluminum fid and following the core-and-sheath method, Ben completed the splice in under 45 minutes. He tested it gradually with controlled pulls before field use. Six months later, the leash remains intact—even after being caught on jagged rock during a live drill. “The splice held better than the original factory end,” he reported. “It’s now my standard maintenance routine every six months.”
Common Mistakes and How to Avoid Them
- Insufficient tucks: Fewer than three tucks drastically reduce strength. Always aim for four when possible.
- Uneven tension: Loose weaves create weak spots. Dress the splice progressively as you work.
- Cutting too short: Always leave at least 20 rope diameters of tail for manipulation. You can trim later—but can’t add length.
- Ignoring fiber type: Never splice natural fibers (like hemp) the same way as synthetics. Polyester and nylon respond well to heat-sealing; cotton does not.
“The most common failure I see is impatience. Rushing the tucks or skipping dressing steps leads to early separation.” — Lila Tran, Technical Rope Consultant
Do’s and Don’ts of Loop Handle Splicing
| Do | Don’t |
|---|---|
| Use proper fid size for clean strand separation | Use screwdrivers or improvised tools that damage fibers |
| Melt cut ends of synthetic rope | Leave raw, unraveled ends exposed |
| Test splice under gradual load before full use | Subject new splice to sudden shock loads |
| Inspect existing splices monthly for wear | Ignore small frays—address them immediately |
| Learn the difference between short and long splices | Use a long splice where a compact loop is needed |
Frequently Asked Questions
Can I splice different rope materials together?
No. Mixing materials (e.g., nylon and polypropylene) compromises strength due to differing stretch rates and wear characteristics. Always use matching rope types and diameters.
How long does a well-made splice last?
With proper care, a spliced loop handle can last longer than the leash itself—often 2–3 years of regular use. Factors like UV exposure, frequency of use, and dog size affect longevity. Inspect quarterly for signs of internal wear.
Is splicing safe for small dogs or puppies?
Absolutely. The safety depends on execution, not dog size. A properly made splice on appropriately rated rope (minimum 550 lb test for small breeds) is more reliable than stitched webbing, which can delaminate silently.
Final Checklist: Before You Begin Your First Splice
- Confirm rope material and diameter
- Select correct fid size
- Clean workspace with good lighting
- Have sharp cutting tool and heat source ready
- Measure twice, cut once
- Practice on scrap rope if new to splicing
- Allow time—rushing leads to errors
Conclusion: Take Control of Your Gear’s Longevity
Mastering loop handle splicing transforms how you maintain your dog’s gear. It’s not merely about fixing a broken leash—it’s about building resilience into every connection. With minimal investment in tools and practice, you gain the ability to restore, reinforce, and customize your leashes to meet real-world demands. Whether you’re a pet owner, trainer, or outdoor enthusiast, this skill pays dividends in safety, economy, and confidence. Start with a spare piece of rope, follow the steps meticulously, and soon you’ll wonder why you ever relied solely on sewing or replacements.


 浙公网安备
33010002000092号
浙公网安备
33010002000092号 浙B2-20120091-4
Comments
No comments yet. Why don't you start the discussion?