
Painting is as much about precision as it is about color. One of the most critical tools in achieving clean, crisp edges and protecting surfaces isn’t the brush or roller—it’s masking tape. Yet, even experienced DIYers often apply tape incorrectly, leading to peeling paint, bleed-through, and wasted time. Mastering masking means understanding not just where to place tape, but how to load, apply, and remove it with finesse. This guide walks through every stage of working with masking tape like a seasoned professional.
The Importance of Proper Masking Technique
Masking tape is designed to create sharp boundaries between painted and unpainted areas. When used correctly, it prevents overspray and smudging, protects trim, glass, and fixtures, and ensures a polished finish. But poor technique—such as applying tape over dusty surfaces, stretching it too tightly, or leaving it on too long—can ruin an otherwise perfect job.
Professional painters don’t rely on luck; they follow consistent methods that guarantee reliability. The difference between amateur and pro results often comes down to preparation and execution—especially when handling something as seemingly simple as tape.
Selecting the Right Masking Tape
Not all masking tapes are created equal. Choosing the correct type depends on surface material, paint type, duration of application, and environmental conditions. Using the wrong tape can lead to adhesive residue, lifting, or inadequate protection.
| Tape Type | Best For | Avoid On |
|---|---|---|
| Paper Tape (Low Adhesion) | Fresh paint, wallpaper, delicate surfaces | Rough textures, outdoor use |
| Film Tape (Plastic Backing) | Moisture-prone areas, bathrooms, kitchens | Direct sunlight, high heat |
| High-Adhesion Tape | Outdoor projects, textured walls, long durations | Wallpaper, aged paint, fragile trims |
| UV-Resistant Tape | Exterior jobs exposed to sun | Indoor short-term use (overkill) |
For interior painting, a medium-adhesion crepe paper tape (like 3M’s Fine Line or ScotchBlue) offers excellent balance between grip and clean removal. In humid environments, opt for moisture-resistant film-backed variants.
“Tape failure usually happens at the edge. If you don’t seal it properly, paint will wick underneath.” — Carlos Mendez, Professional Painter & Contractor
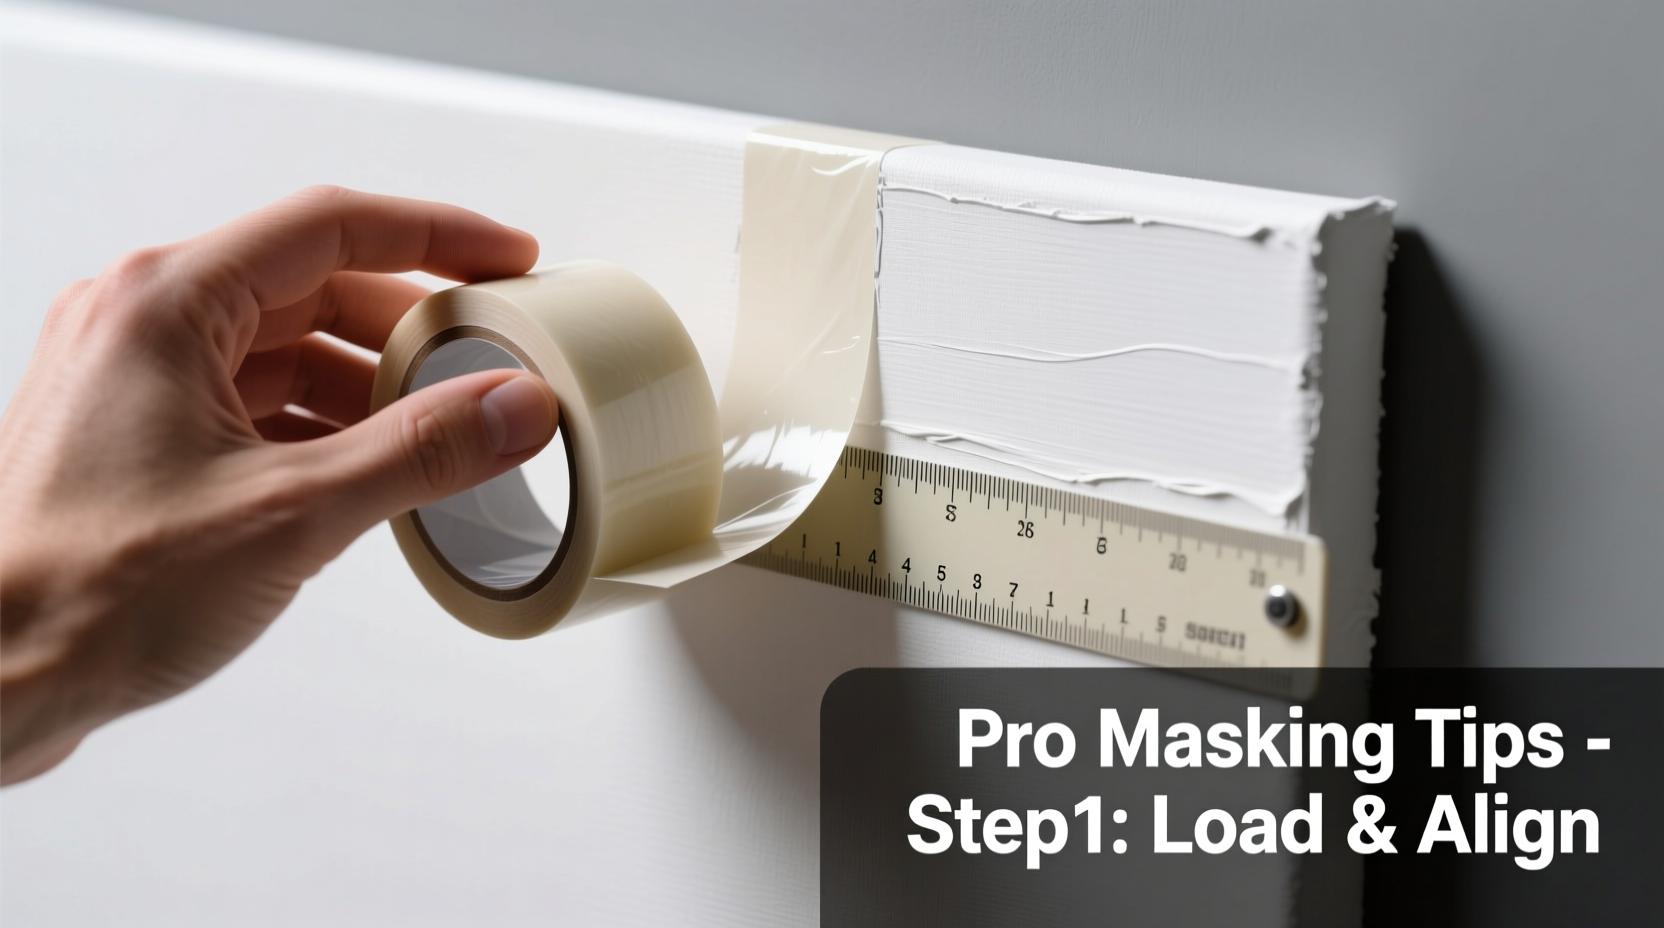
Step-by-Step Guide to Loading and Applying Masking Tape
Loading masking tape refers to how you handle it during unrolling and placement. Poor loading leads to kinks, uneven tension, and misalignment. Follow this sequence for flawless results:
- Clean the Surface: Wipe down edges, baseboards, windowsills, and trim with a lint-free cloth and mild cleaner. Dust and grease prevent proper adhesion.
- Unroll Smoothly: Pull tape slowly from the roll without jerking. Hold the roll in one hand and guide the tape with the other to maintain control.
- Align Precisely: Position the edge of the tape exactly where you want the paint boundary. Use a level or straightedge for horizontal or vertical lines.
- Apply Light Pressure First: Lay the tape down gently along its length, ensuring no gaps or bubbles.
- Burnish the Edge: Run a plastic putty knife or credit card firmly along the taped edge to press the adhesive into place. This creates a tight seal that blocks paint bleed.
- Seal Critical Edges (Optional): For ultra-sharp lines, especially with spray painting, apply a thin coat of the base wall color along the tape edge. Once dry, the topcoat won’t seep underneath.
Real-World Example: Painting Around Window Trim
Homeowner Lisa Thompson decided to repaint her living room with a bold navy accent wall. The challenge? Preserving the white window trim without any blue bleed. She initially applied standard masking tape quickly, skipping surface cleaning and burnishing. After painting, she peeled off the tape to find jagged edges and smeared paint along the woodwork.
On her second attempt, she followed proper masking protocol: cleaned the trim with alcohol wipes, used painter’s crepe tape rated for delicate surfaces, aligned it precisely against the wall, and burnished each section. She then sealed the edge with a thin coat of white paint before applying the navy. The result? A razor-sharp line that looked professionally done.
This case illustrates how technique—not talent or expensive tools—makes the difference.
Removing Masking Tape Like a Pro
When you remove the tape matters as much as how you applied it. Peel too early, and wet paint can pull up. Wait too long, and the adhesive bonds permanently.
- Remove tape when the paint is dry to the touch but not fully cured—typically 1–2 hours after application for latex paint.
- Peel at a 45-degree angle, pulling backward rather than upward to avoid lifting paint edges.
- If paint starts to chip, score the edge lightly with a utility knife before removal.
- Work slowly and continuously; stopping mid-peel increases the risk of tear-out.
In cooler temperatures or high humidity, drying times increase. Adjust accordingly. For oil-based paints, wait longer—up to 24 hours—before removal.
Common Mistakes and How to Avoid Them
Even experienced painters make errors with masking tape. Awareness helps prevent recurring issues.
- Mistake: Applying tape over dirty or greasy surfaces.
Solution: Clean thoroughly before taping. - Mistake: Leaving tape on for days after painting.
Solution: Remove within 24 hours unless specified otherwise by manufacturer. - Mistake: Using duct tape or electrical tape instead of painter’s tape.
Solution: Invest in quality masking tape designed for paint projects. - Mistake: Overlapping tape layers on corners.
Solution: Butt joints cleanly or use corner-specific tapes for inside/outside edges.
Checklist: Professional Masking Workflow
Follow this checklist before, during, and after taping for consistently clean results:
- Choose the right tape for your surface and paint type.
- Clean and dry all areas to be masked.
- Unroll tape smoothly—no snapping or stretching.
- Align edges precisely using a straightedge if needed.
- Burnish the tape firmly along the entire length.
- Seal edges with base color if spraying or using high-pressure tools.
- Paint carefully, keeping brushes and rollers away from the tape edge.
- Remove tape at the optimal time—dry to touch, not tacky.
- Peel at a 45° angle in a continuous motion.
- Inspect lines and touch up minor imperfections with a fine brush.
Frequently Asked Questions
Can I reuse masking tape?
No. Once removed, the adhesive loses integrity and may leave residue or fail to stick. Always use fresh tape for each project.
Why does paint bleed under my tape?
Bleed occurs due to poor adhesion, surface contamination, or failure to burnish. It can also happen if you apply paint too heavily near the edge. Sealing the tape edge with base paint reduces this risk significantly.
Is there a way to fix a crooked tape line before painting?
Yes. If you notice misalignment before painting, carefully lift the tape and reposition it. Avoid repeated sticking and unsticking, which weakens adhesion. For slight adjustments, use a pin to nudge the edge into place.
Final Thoughts: Elevate Your Painting Game
Mastering masking tape isn’t glamorous, but it’s fundamental. The cleanest paint jobs aren’t achieved with the most expensive rollers—they’re earned through meticulous prep and disciplined process. From selecting the right tape to perfecting the peel, every step contributes to a finish that looks intentional and refined.
Whether you're refreshing a single room or tackling a full renovation, treating masking as a craft rather than a chore transforms outcomes. Apply these techniques consistently, and you’ll stop asking why paint bleeds—and start getting compliments on your sharp lines.


 浙公网安备
33010002000092号
浙公网安备
33010002000092号 浙B2-20120091-4
Comments
No comments yet. Why don't you start the discussion?