
Nail stickers have revolutionized at-home manicures, offering salon-quality designs with minimal effort. But even the most intricate sticker can fail if it doesn’t fit properly. Ill-fitting stickers lift at the edges, crease during application, or leave gaps that ruin the look and shorten wear time. The secret to flawless results isn’t just technique—it’s choosing the right size. Unlike one-size-fits-all solutions, professional-grade manicures start with precision sizing. Understanding how nail sticker dimensions interact with your natural nail shape and length is essential for durability and aesthetic appeal.
Why Nail Sticker Size Matters More Than You Think
Many people assume that all nail stickers are interchangeable, especially when marketed as “universal fit.” In reality, natural nails vary significantly in width, curvature, and free edge length. A sticker designed for almond-shaped nails may be too narrow for square or squoval tips. Similarly, a sticker meant for short beds might overhang on longer nails, creating lifting points. Poor sizing leads to premature peeling, bubbling, and misaligned patterns—especially around the cuticle or sidewalls.
The adhesive used in nail stickers is typically pressure-sensitive, meaning it bonds best when applied evenly across the entire surface. Gaps or folds prevent full adhesion, allowing moisture and air to seep underneath. Over time, this weakens the bond and causes the sticker to lift. Even slight overhangs catch on fabrics or surfaces, accelerating wear. Getting the size right ensures maximum contact, seamless blending, and a polished appearance that lasts up to two weeks with proper sealing.
“Fit determines function in nail art. A perfectly sized sticker adheres better, resists chipping, and enhances the natural shape of the nail.” — Lila Nguyen, Nail Product Developer & Educator
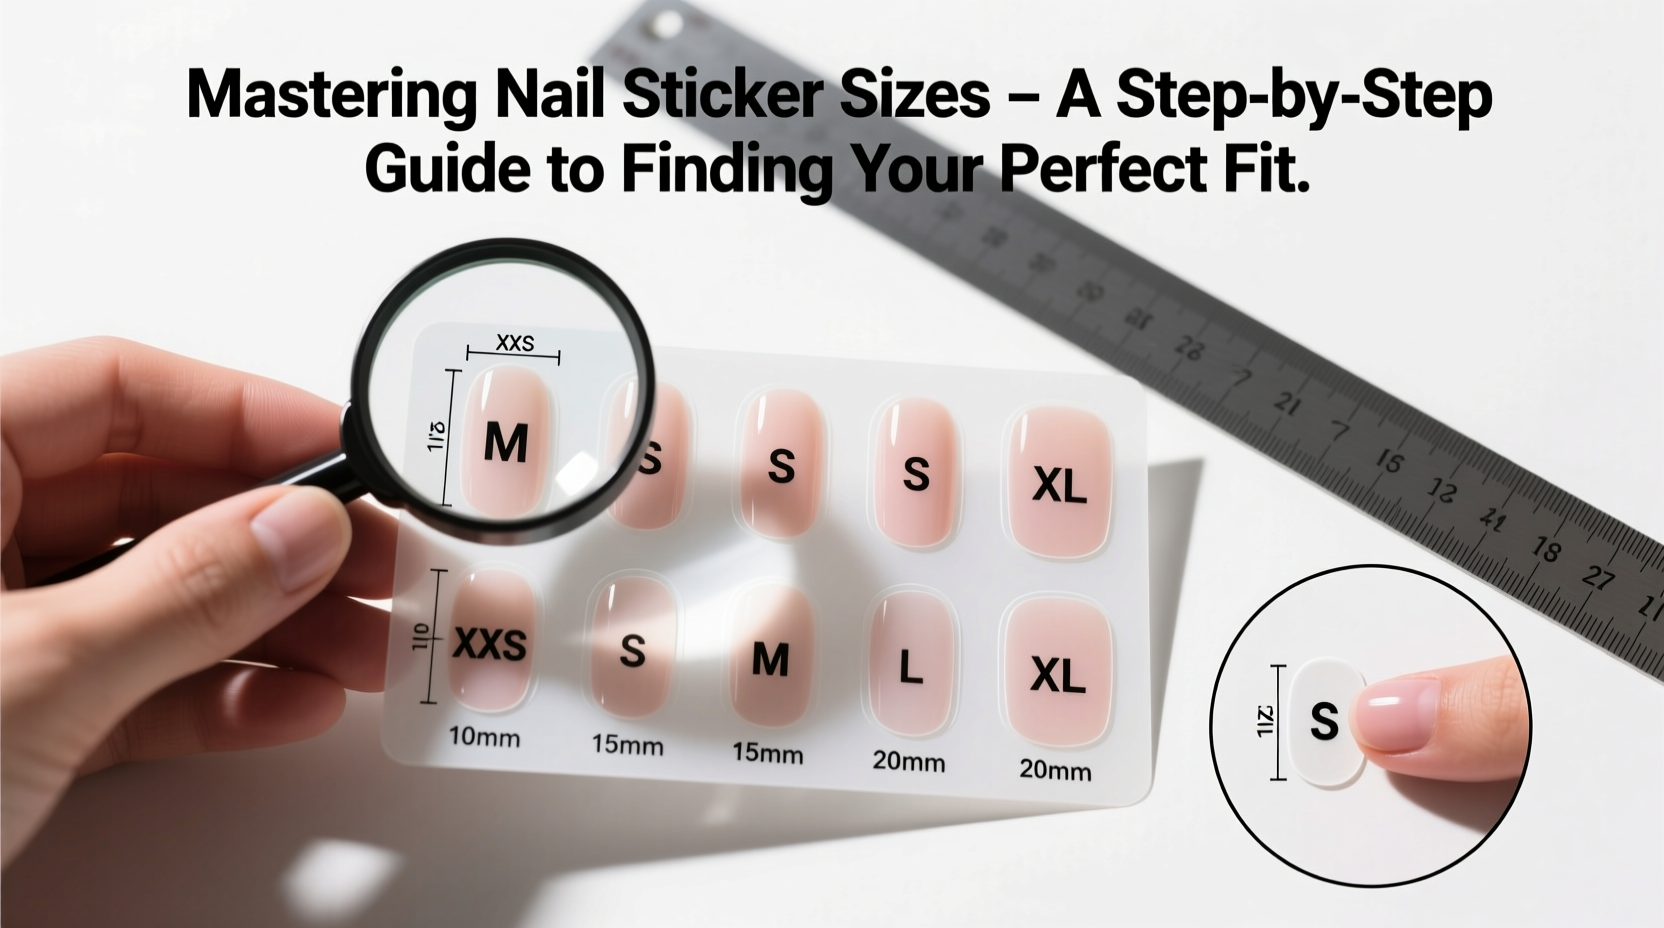
Step-by-Step Guide to Measuring Your Nails Accurately
To find your ideal sticker size, you need objective measurements—not guesswork. Follow these steps using simple tools available at home:
- Gather Supplies: Use a digital caliper or a printable millimeter ruler (available online), clean nail wipes, and a notebook.
- Clean and Prep Nails: Remove any polish or oils. Dry thoroughly so the surface is smooth and residue-free.
- Measure Width: Measure the widest part of each nail, usually near the free edge. Record in millimeters. Most adult widths range from 8mm to 18mm.
- Measure Length: From cuticle to tip, measure the visible portion of the nail bed. This helps determine coverage needs, especially for full-cover stickers.
- Note Shape Trends: Observe whether your nails are more rounded, square, oval, or pointed. This affects how stickers should taper or curve.
- Average Your Data: Calculate average width and length across all fingers. Use this as your baseline for ordering stickers.
Understanding Common Nail Sticker Sizing Systems
Not all brands label sizes the same way. Some use numbered systems (S, M, L), while others provide exact dimensions. Here’s how to interpret them:
| Size Label | Average Width (mm) | Best For Nail Shapes | Common Use Cases |
|---|---|---|---|
| XS / Petite | 7–10 mm | Almond, Oval, Short Squares | Teens, petite hands, French tip accents |
| S / Small | 10–13 mm | Oval, Round, Medium Almond | Everyday wear, subtle designs |
| M / Medium | 13–16 mm | Squoval, Square, Broad Ovals | Most adult women, full-coverage styles |
| L / Large | 16–19 mm | Wide Squares, Coffin, Stiletto | Fashion-forward looks, bold graphics |
| XL / Custom | 19+ mm | Extra-long styles, prosthetics | Extensions, stage wear, custom art |
Always check brand-specific charts before purchasing. Reputable companies list actual dimensions rather than vague categories. When in doubt, opt for medium-plus sizing if you have wide nail beds or prefer full coverage without trimming.
Real-World Example: How Sarah Fixed Her Lifting Problem
Sarah, a graphic designer from Portland, loved using floral nail stickers but found they peeled within three days. She assumed her nail oil was the culprit and tried alcohol wipes and base coats—nothing worked. After measuring her nails, she discovered her average width was 15.8mm, placing her at the upper end of “medium” but below “large” in most brands. The stickers she’d been using were labeled “one size,” averaging 14mm wide. They didn’t cover her sidewalls fully, leaving micro-gaps where moisture entered.
She switched to a brand offering precise sizing and chose “Large” (16.5mm). The difference was immediate: full adhesion, no lifting, and designs stayed intact for 14 days. By matching her anatomy to the product specs, Sarah achieved consistent results without changing her routine.
Do’s and Don’ts When Selecting Nail Sticker Sizes
- Do measure each finger—thumbs and pinkies often differ from middle fingers.
- Do consider seasonal changes; nails may swell slightly in heat or dry out in winter.
- Do test new brands with single sheets before buying full sets.
- Don’t rely solely on hand size or gender-based assumptions.
- Don’t stretch stickers to fit—they lose elasticity and adhesive strength.
- Don’t trim stickers excessively; it disrupts pattern alignment and edge integrity.
Expert Tips for Long-Term Success with Nail Stickers
For lasting wear, follow this checklist after selecting the correct size:
Nail Sticker Application Checklist
- ☑ Clean nails with acetone-free wipe
- ☑ Push back cuticles gently
- ☑ Buff surface lightly for better grip (optional)
- ☑ Align sticker center first, then press outward
- ☑ Seal edges with clear top coat immediately
- ☑ Avoid water exposure for first hour
- ☑ Reapply top coat every 2–3 days
Proper sizing combined with good prep multiplies wear time. Many users report up to 16-day durability when both factors are optimized.
Frequently Asked Questions
Can I use the same sticker size on all my fingers?
While possible, it’s not ideal. Fingers vary in width—especially the thumb and pinky. Some brands offer mixed-size sheets tailored to individual digits. For best results, use appropriately sized stickers per finger, particularly if you’re applying full-coverage designs.
What should I do if my sticker is slightly too big?
If only marginally oversized, apply carefully and let excess extend beyond the edge, then file it down gently after sealing with top coat. Never pull or stretch the sticker into place, as this distorts the design and weakens adhesion.
Are reusable nail stickers sized differently?
Yes. Reusable silicone or gel stickers often run larger because they’re designed to be trimmed and reshaped. Always read instructions and compare dimensions before assuming compatibility with traditional vinyl stickers.
Final Thoughts: Precision Is Power
Mastering nail sticker sizes transforms an inconsistent DIY experience into a reliable beauty ritual. It’s not about owning the trendiest designs—it’s about making them last. When you take the time to measure, match, and maintain, your manicure reflects intentionality and care. Whether you're preparing for a special event or elevating your everyday look, accurate sizing is the foundation of professional results.


 浙公网安备
33010002000092号
浙公网安备
33010002000092号 浙B2-20120091-4
Comments
No comments yet. Why don't you start the discussion?