
A well-organized pantry is more than just an aesthetic luxury—it’s a cornerstone of an efficient kitchen. When items are easy to find, meals come together faster, food waste decreases, and daily cooking becomes less stressful. Yet, many households struggle with overstuffed shelves, expired goods, and chaotic storage systems that defeat the purpose of having a pantry at all. The solution lies not in perfection but in practicality. By applying thoughtful strategies grounded in real-life usability, anyone can transform their pantry into a streamlined, functional hub.
Assess and Declutter: The Foundation of Organization
The first step toward mastering pantry organization is confronting what you already have. Begin by removing every item from your pantry. This may seem daunting, but it allows you to see exactly what you own, identify duplicates, and spot expired or rarely used products.
As you pull items out, sort them into three categories: keep, donate, and discard. Expired goods go straight into the trash. Unopened but unwanted items—like gifts or impulse buys—can be donated to food banks if still safe to consume. For everything else, ask yourself: “Have I used this in the past six months?” If not, consider whether it serves a realistic role in your current lifestyle.
Create Zones Based on Function and Frequency
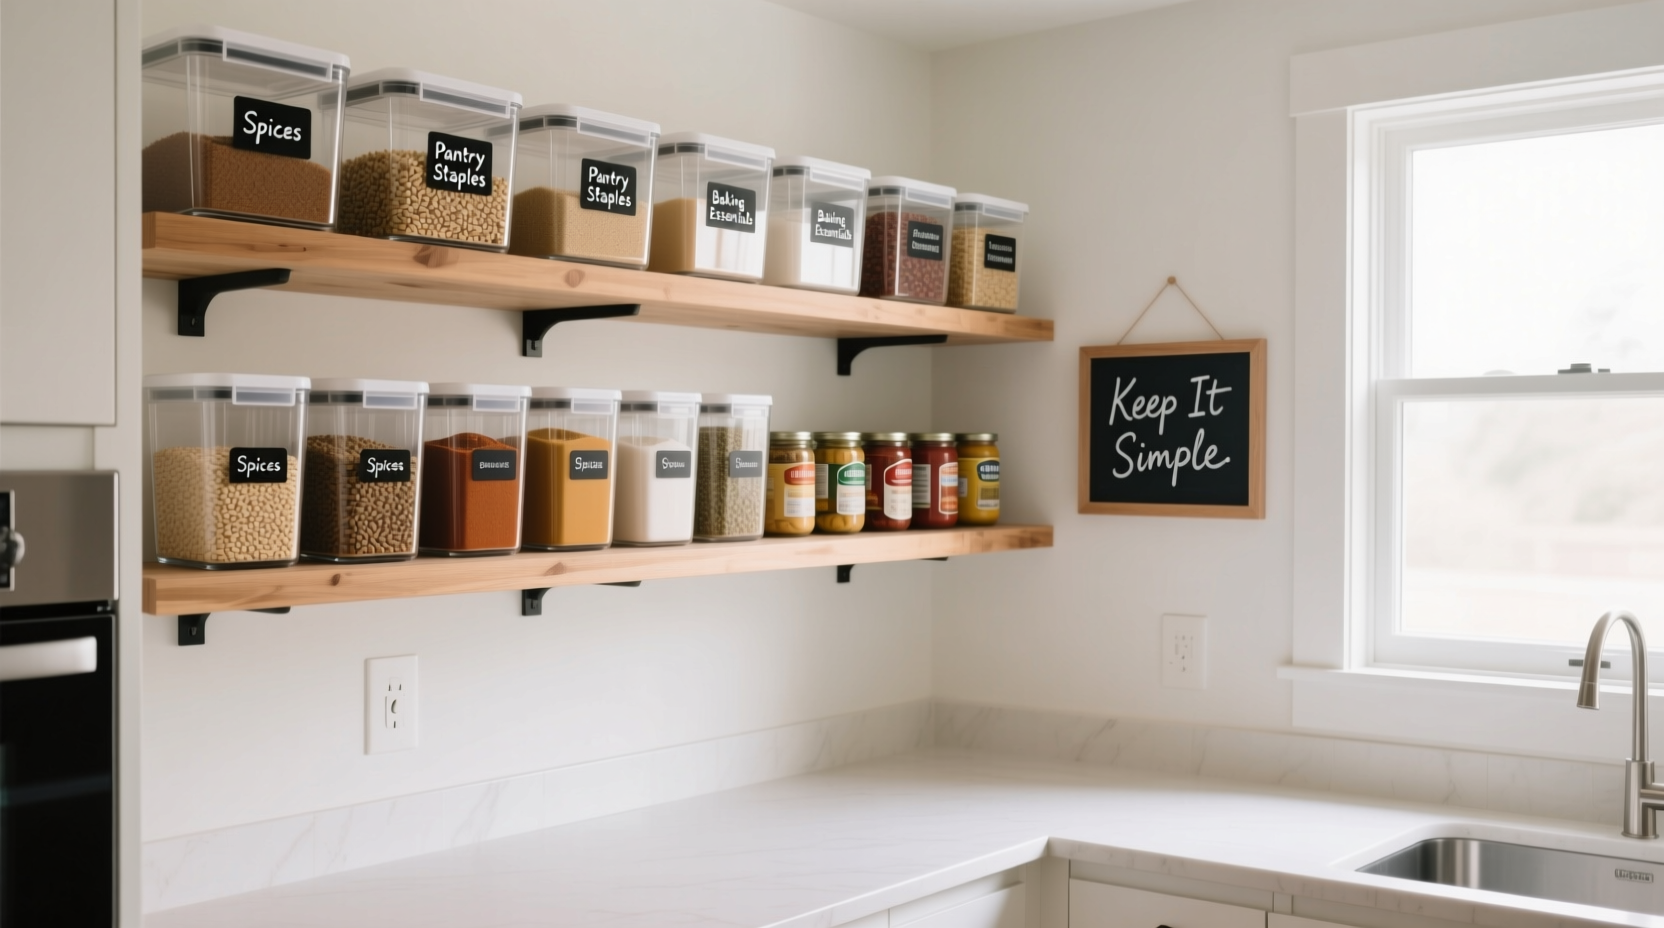
Once your pantry is empty and cleaned, it’s time to rebuild it with intention. A key principle of effective pantry design is zoning—grouping similar items together based on how they’re used and how often they’re accessed.
Common zones include:
- Baking Supplies: Flour, sugar, baking powder, chocolate chips, etc.
- Breakfast Staples: Cereal, oatmeal, granola bars, coffee, tea.
- Canned Goods: Beans, tomatoes, soups, vegetables.
- Snacks: Crackers, nuts, dried fruit, popcorn.
- Cooking Essentials: Oils, vinegar, spices, broths.
- Emergency/Backup Items: Long-shelf-life foods like rice, pasta, canned proteins.
Position high-use items at eye level and within easy reach. Reserve lower shelves for heavier goods like bottled liquids or bulk containers, and use upper shelves for lighter, less frequently used supplies.
“Organization isn’t about making things look perfect—it’s about making them work perfectly for your life.” — Sarah Thompson, Home Efficiency Consultant
Invest in Smart Storage Solutions
Containers are the backbone of a functional pantry. While original packaging may seem fine, it often leads to visual clutter and inconsistent stacking. Transferring dry goods into uniform, labeled containers improves accessibility and preserves freshness.
Choose airtight glass or BPA-free plastic containers in various sizes. Clear sides allow you to see contents at a glance. Label each container with both the item name and expiration date using a label maker or removable tape.
| Item | Best Container Type | Storage Tip |
|---|---|---|
| Pasta & Rice | Airtight plastic or glass | Use wide-mouth jars for easy scooping |
| Flour & Sugar | Large square containers | Prevents settling and maximizes shelf space |
| Spices | Small stackable jars | Store in a drawer or turntable for visibility |
| Snacks | Reusable silicone bags | Resealable and crush-resistant |
| Oils & Vinegars | Dark glass bottles | Protects from light degradation |
Additional tools like lazy Susans, tiered shelf risers, and door-mounted racks help maximize vertical space and improve access to back-row items.
Step-by-Step Guide to Pantry Reorganization
Follow this five-step process to systematically reorganize your pantry:
- Empty Everything: Remove all items and wipe down shelves, doors, and corners. Check for pests or moisture issues.
- Sort & Purge: Group items by category and discard anything expired or unnecessary.
- Plan Your Zones: Sketch a quick layout of where each category will live based on usage frequency and weight.
- Transfer & Label: Place dry goods into clear, airtight containers and label them clearly.
- Restock Strategically: Return items to the pantry following your zone plan, placing older items in front.
Real-Life Example: From Chaos to Clarity
Consider Maria, a working parent of two, whose pantry was once a dumping ground for school snacks, backup groceries, and forgotten meal kits. She spent 10–15 minutes most evenings searching for ingredients while standing amid open cereal boxes and loose pasta bags.
After dedicating a Saturday morning to reorganization, she implemented designated zones, transferred staples into matching containers, and added a small turntable for spices. She also created a “kids’ snack station” on a lower shelf with pull-out bins.
The result? Meal prep time dropped by nearly half, and her children learned to independently grab approved snacks. Within a month, Maria reported feeling less stressed and wasting fewer perishable items because visibility improved dramatically.
Pantry Maintenance Checklist
To sustain your newly organized pantry, follow this monthly maintenance checklist:
- ✓ Wipe down shelves and containers
- ✓ Rotate stock using FIFO (first in, first out)
- ✓ Check expiration dates on all visible items
- ✓ Refill or reorder low essentials
- ✓ Reassess zone effectiveness—adjust if needed
- ✓ Donate unopened surplus items before they expire
Frequently Asked Questions
How often should I completely reorganize my pantry?
A full reorganization is recommended every 6 to 12 months. However, a quick refresh—sorting, wiping, and checking dates—should be done monthly to maintain order.
Should I organize by category or by meal type?
Most people benefit more from organizing by category (e.g., baking, snacks, grains) rather than meal type. Category-based systems are easier to maintain and scale. However, if you frequently prepare specific meals, consider creating a small “meal kit” section for pre-measured ingredients.
What if I have a very small pantry?
Maximize small spaces with vertical solutions: stackable bins, over-the-door organizers, and shelf risers. Prioritize essentials and store overflow items in other areas like under-bed storage or a garage cabinet, clearly labeled for seasonal use.
Conclusion: Make Your Pantry Work for You
Mastering pantry organization isn’t about achieving a magazine-perfect look—it’s about creating a system that supports your daily life. With clear zones, consistent labeling, and routine maintenance, your pantry can become a source of calm efficiency rather than frustration. The time invested in setting up a functional layout pays dividends in reduced stress, smarter shopping, and better eating habits.


 浙公网安备
33010002000092号
浙公网安备
33010002000092号 浙B2-20120091-4
Comments
No comments yet. Why don't you start the discussion?