
Printing may seem straightforward, but a surprising number of print jobs fail at the first hurdle: incorrect paper loading. Misaligned sheets, paper jams, and inconsistent output often stem from simple mistakes during setup. Whether you're using an inkjet, laser, or multifunction printer at home or in the office, mastering paper loading is essential for reliable performance and professional-quality results. Understanding how to properly insert paper—not just where, but how—can save time, reduce waste, and extend your printer’s lifespan.
The Importance of Correct Paper Loading
Paper is more than just a passive medium; it interacts dynamically with rollers, sensors, and feed mechanisms inside the printer. Even slight deviations in orientation, stack height, or paper type can trigger errors. A poorly loaded tray disrupts the feeding process, leading to skewed prints, double feeds, or complete stoppages. Over time, repeated misfeeds wear down internal components, increasing maintenance costs.
Correct loading ensures smooth passage through the printer, consistent toner or ink application, and accurate registration on the page. It also minimizes stress on mechanical parts, contributing to quieter operation and longer device longevity.
“Over 60% of service calls for home printers are related to paper handling issues—most of which could be prevented with proper loading techniques.” — David Lin, Senior Technician at PrintCare Solutions
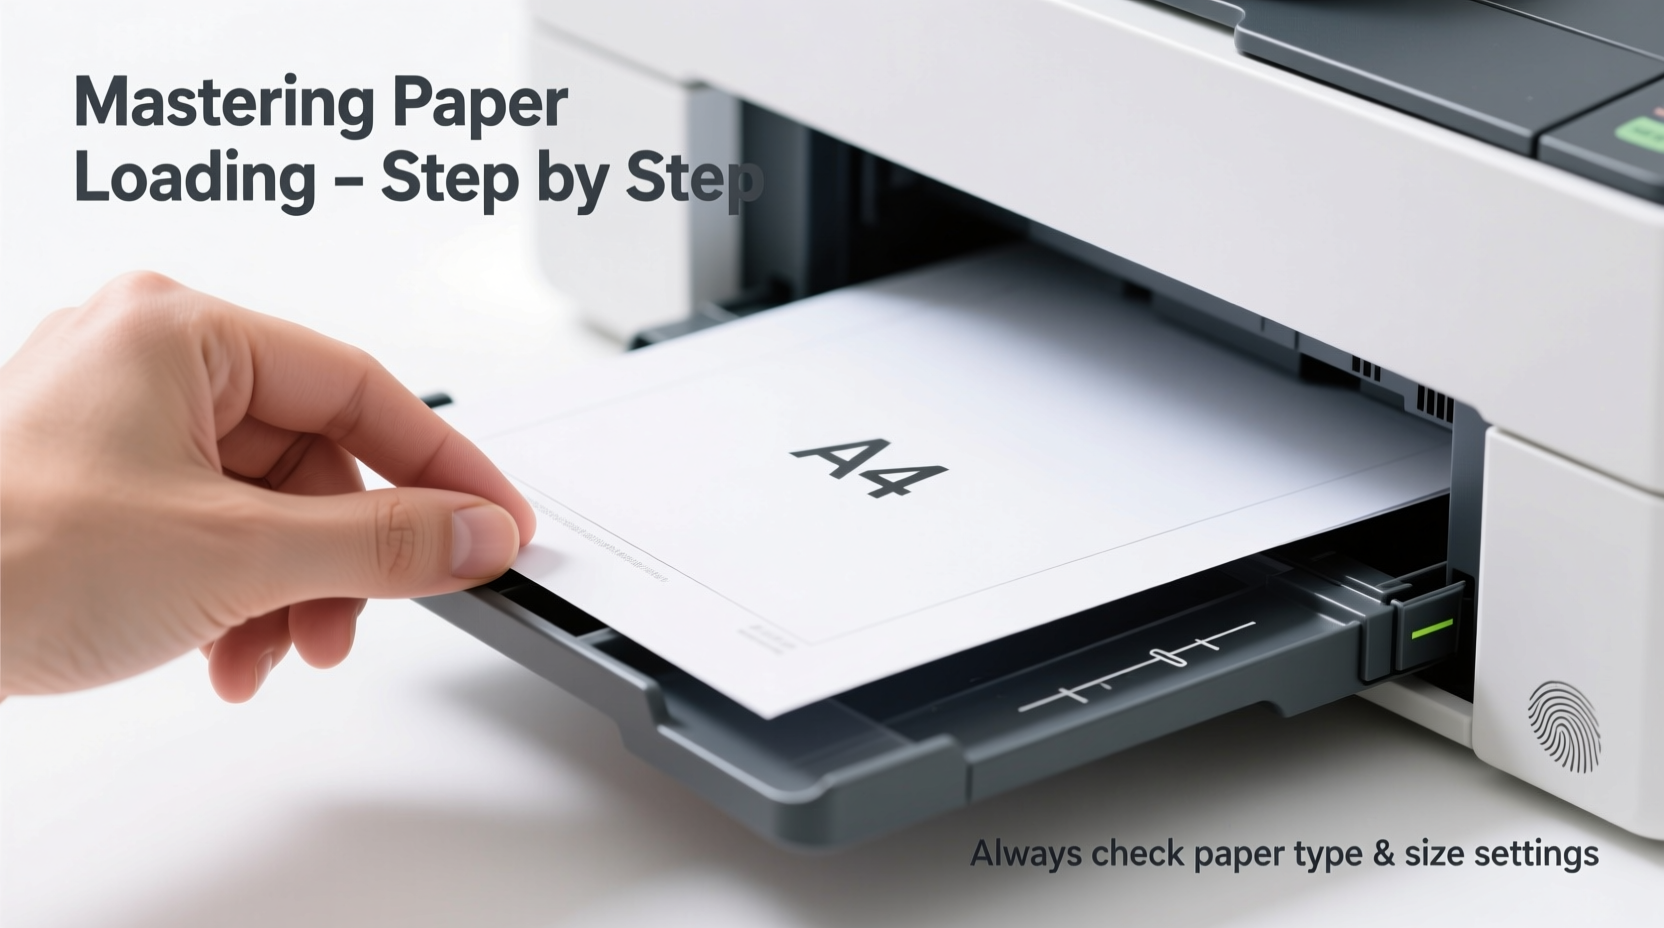
Step-by-Step Guide to Perfectly Insert Paper in Any Printer
Follow this universal sequence to load paper correctly across most desktop printers. While models vary slightly, these principles apply broadly to inkjet, laser, and all-in-one devices.
- Power off the printer – Begin with the printer turned off to prevent accidental movement during setup.
- Remove the paper tray – Gently pull it out until fully extended. Some trays lock into place; press the release lever if needed.
- Adjust the width and length guides – Slide the side and rear flaps outward to create ample space. This prevents forcing paper in, which can cause curling or misalignment.
- Select the right paper type – Use standard 20–24 lb bond paper unless printing photos, labels, or envelopes, which require specific settings.
- Fan the stack – Hold the ream at both ends and flip through the edges like a deck of cards. This separates sheets and reduces static cling.
- Align the edges – Tap the stack firmly on a flat surface to square the corners. Uneven stacks lead to skewed feeding.
- Insert the paper print-side down or up? – Check your printer’s manual. Most inkjets feed from the back with print side down; many lasers feed from the bottom with print side up.
- Slide the paper into the tray – Place it gently without tilting. Do not overfill—stay under the maximum fill line.
- Adjust the guides snugly – Move the side and rear guides inward until they lightly touch the paper. Too loose causes skewing; too tight causes resistance.
- Reinsert the tray and power on – Push it back smoothly. Turn on the printer and verify the display recognizes the paper size and type.
Avoid Common Paper Loading Mistakes
Even experienced users make subtle errors that compromise performance. Recognizing these pitfalls helps ensure every print job starts on the right foot.
| Mistake | Why It’s Problematic | How to Fix |
|---|---|---|
| Overloading the tray | Causes paper jams and roller slippage | Fill only up to the indicator line |
| Crumpled or bent paper | Leads to misfeeds and internal damage | Discard damaged sheets before loading |
| Ignoring the print-side orientation | Results in blank pages or reversed output | Check manual or tray icon for correct face direction |
| Tight guide pressure | Restricts paper movement and increases friction | Allow a slight gap—guides should align, not squeeze |
| Mixing paper types or sizes | Confuses sensors and causes formatting errors | Use one type and size per tray |
Real-World Example: Office Print Delays Solved
In a mid-sized accounting firm, weekly reports were frequently delayed due to recurring paper jams in their shared laser printer. Technicians found no hardware faults. Upon observation, staff were routinely overfilling the main tray with mixed-weight paper—some letterhead, some plain—and failing to adjust the guides. After training employees to fan, align, and load paper correctly—with strict adherence to one paper type—the jam rate dropped from 3–4 per week to zero over two months. Productivity improved, and toner usage stabilized due to fewer reprint cycles.
This case underscores how procedural discipline, not equipment upgrades, often resolves persistent printing issues.
Printer-Specific Tips for Key Brands
While core principles remain consistent, manufacturers design trays differently. These brand-specific notes help fine-tune your approach.
- HP Inkjet Printers: Most HP consumer models feed from the rear tray with paper print-side down. The top pickup roller requires clean, flat sheets. For photo paper, use the priority tray and select “photo” mode.
- Canon PIXMA Series: These often have dual input options. When using the front cassette, ensure the green adjustment lever is set to the correct paper thickness.
- Brother Laser Printers: Typically feed from the bottom with print side up. The pickup roller is sensitive to curled paper—always flatten sheets before loading.
- Epson WorkForce Models: Feature adjustable paper support wings. Extend them when using legal or ledger sizes to prevent sagging during feed.
Essential Paper Loading Checklist
Use this checklist every time you reload paper to maintain consistency and reliability:
- ✅ Power off the printer before loading
- ✅ Fan the paper stack to separate sheets
- ✅ Align edges by tapping on a flat surface
- ✅ Confirm correct print-side orientation
- ✅ Adjust side and rear guides to fit snugly
- ✅ Load below the maximum fill line
- ✅ Match paper size and type in printer settings
- ✅ Clean rollers monthly with a lint-free cloth
Frequently Asked Questions
Why does my printer keep jamming even with new paper?
Jams aren’t always caused by paper quality. Check if the guides are too tight or too loose, or if the paper is curled. Also, inspect the pickup roller—it may be dirty or worn. Cleaning it with a dry, lint-free cloth often resolves minor grip issues.
Can I use recycled paper in my printer?
Yes, but choose high-quality recycled paper with a smooth finish. Poorly processed recycled paper can be rough or uneven, increasing friction and jam risk. Test a small batch first and monitor performance.
What should I do if the printer doesn’t detect the paper?
First, ensure the tray is fully inserted. Then verify the paper size matches the setting in your print dialog. If the issue persists, clean the paper sensor—usually a small plastic tab near the pickup roller—with compressed air or a cotton swab.
Final Thoughts: Small Steps, Big Results
Perfect paper loading isn’t about technical wizardry—it’s about attention to detail. Taking an extra minute to fan, align, and adjust guides pays dividends in fewer interruptions and higher-quality output. These habits compound over time, reducing frustration and maintenance needs. Whether you print daily reports or occasional photos, precision at the start ensures success at the finish.


 浙公网安备
33010002000092号
浙公网安备
33010002000092号 浙B2-20120091-4
Comments
No comments yet. Why don't you start the discussion?