
Dyeing fabric selectively—rather than fully immersing a garment—opens the door to bold, artistic expression. Partial fabric dyeing allows you to transform ordinary clothing into wearable art, combining colors, textures, and patterns in ways that mass-produced garments never achieve. Whether you're revitalizing an old piece or customizing new apparel, mastering this technique gives you control over every hue and gradient. With careful preparation and attention to detail, you can produce professional-looking results at home using accessible tools and materials.
Why Choose Partial Fabric Dyeing?
Unlike full-submersion dyeing, which uniformly changes a garment’s color, partial dyeing targets specific areas. This method is ideal for creating ombré effects, geometric patterns, tie-dye accents, or abstract splashes. It conserves dye, reduces water usage, and enables experimentation without altering the entire piece. Designers and DIY enthusiasts alike use partial dyeing to repair stains subtly, refresh faded sections, or craft one-of-a-kind fashion statements.
Essential Materials and Preparation
Success begins with proper setup. The right supplies ensure even application, vibrant results, and minimal mess. Below is a checklist of what you'll need:
Basic Supplies Checklist
- Fabric dye (fiber-reactive for cotton, acid dyes for protein fibers like wool or silk)
- Plastic squeeze bottles or spray bottles
- Rubber gloves and protective eyewear
- Plastic drop cloths or garbage bags (to protect surfaces)
- Rubber bands, clips, or stencils (for masking)
- White vinegar or soda ash (depending on dye type)
- Measuring spoons and mixing cups
- Plastic wrap or sealable bags (for setting)
- Old brushes or sponges (for blending)
Clean the garment thoroughly before dyeing. Wash it without fabric softener, as residues can block dye absorption. Pre-wetting the fabric helps achieve smoother gradients. For best adhesion, pre-soak natural fibers in a fixative solution—soda ash for cotton, vinegar for silk or wool—according to dye manufacturer instructions.
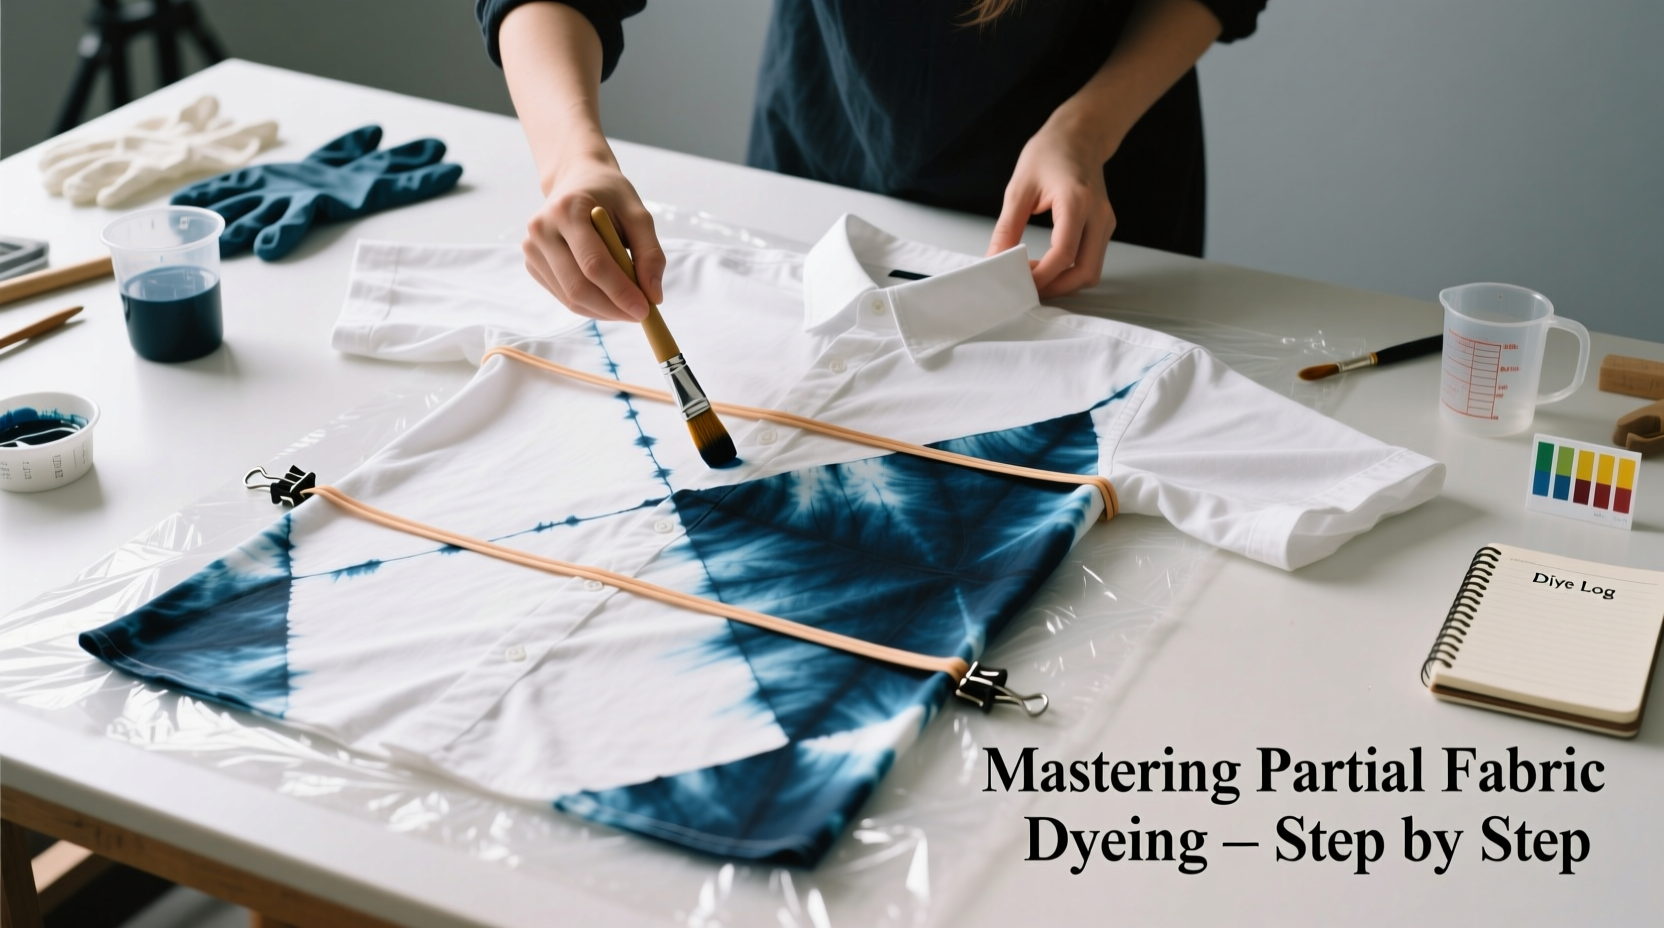
Step-by-Step Guide to Partial Fabric Dyeing
Follow this structured process to execute precise, repeatable results:
- Plan Your Design: Sketch ideas or mark zones directly on the garment with chalk. Decide whether you want sharp boundaries or blended transitions.
- Protect Untargeted Areas: Fold, bind, or tape off regions you don’t want dyed. Use plastic sheeting inside sleeves or collars to prevent bleed-through.
- Mix the Dye: Prepare dye according to package directions. Use warm water to dissolve powder completely. Pour into squeeze bottles for precision control.
- Apply the Dye: Start from the center of the target zone and work outward. Layer colors gradually to avoid muddiness. For gradients, dilute dye with water toward the edges.
- Set the Dye: Wrap dyed sections in plastic wrap or place in sealed bags. Let sit for 6–24 hours depending on dye type. Keep in a warm, flat area away from light.
- Rinse and Wash: Rinse under cold water until runoff is clear. Then wash separately in mild detergent. Air dry to preserve integrity.
“Partial dyeing rewards patience. Build color slowly—it’s easier to add depth than to correct oversaturation.” — Lena Torres, Textile Artist & Instructor
Techniques for Distinctive Effects
Varying your application method dramatically alters the outcome. Experiment with these proven approaches:
| Technique | Best For | Tools Needed | Tips |
|---|---|---|---|
| Spray Dyeing | Soft gradients, misty effects | Spray bottle, stencil | Hold bottle 6–8 inches away; apply in light layers |
| Sponge Application | Textured patterns, organic blends | Sponge, foam brush | Dab gently to avoid streaks; clean sponge between colors |
| Brush Painting | Sharp lines, detailed designs | Fine brush, palette | Use thickened dye to prevent bleeding beyond edges |
| Ice Dyeing | Marbled, unpredictable results | Crushed ice, powdered dye | Let ice melt naturally overnight for maximum diffusion |
| Resist Methods | Crisp borders, negative space | Wax, tape, rubber bands | Remove resist carefully after rinsing, before washing |
Real Example: Reviving a Faded Denim Jacket
A designer in Portland transformed a worn-out denim jacket using partial dyeing. The elbows and shoulders had faded significantly, but instead of discarding it, she decided to embrace the wear as part of the design. She masked the collar and pockets with painter’s tape, then applied indigo fiber-reactive dye only to the upper back and sleeves using a sponge. After letting it set for 12 hours, she rinsed and washed the jacket. The result was a modern, asymmetrical look where original fading contrasted with deep blue accents. Customers later asked if it was a limited-edition brand release.
Common Mistakes and How to Avoid Them
Even experienced crafters encounter issues. Awareness prevents costly errors:
- Bleeding into protected areas: Seal edges tightly with tape or fold-over clamps. Test seal integrity with water droplets before dyeing.
- Uneven saturation: Ensure fabric is uniformly damp before application. Dry spots absorb more dye, causing blotchiness.
- Color mismatch: Dye lots vary. Always mix enough dye for the entire project upfront.
- Over-saturation: Too much liquid causes pooling and migration. Apply dye in stages, allowing brief absorption time between layers.
Frequently Asked Questions
Can I partially dye synthetic fabrics like polyester?
Standard dyes won’t bond well with most synthetics. Use disperse dyes specifically formulated for polyester, and apply with heat (such as iron-on transfer methods). Results may be less vibrant than on natural fibers.
How do I stop colors from bleeding after dyeing?
After the initial rinse, wash the garment in cold water with a color-catcher sheet. Repeat until no excess dye transfers. Adding a cup of white vinegar during the first wash can help lock in color, especially for protein-based fibers.
Is partial dyeing safe to do indoors?
Yes, if properly ventilated and contained. Work near open windows, use fans, and cover floors and furniture. Wear gloves and goggles. Avoid using kitchen utensils for food afterward.
Final Thoughts and Creative Encouragement
Partial fabric dyeing isn’t just about changing color—it’s about reclaiming ownership of your wardrobe. Each piece becomes a reflection of personal taste, effort, and vision. You don’t need a studio or expensive gear; all it takes is curiosity and a willingness to experiment. Start small: refresh a sleeve, highlight a pocket, or accentuate a seam. Over time, you’ll develop an intuitive sense of how dyes behave, how fabrics respond, and how colors interact.


 浙公网安备
33010002000092号
浙公网安备
33010002000092号 浙B2-20120091-4
Comments
No comments yet. Why don't you start the discussion?