
Finding a well-fitting suit is challenging for many men, but for those in the plus size range, it often feels like an uphill battle. Off-the-rack suits are typically designed with average proportions in mind, leaving fuller figures contending with tight shoulders, pinched waists, or sleeves that fall short. The solution isn’t compromise—it’s precision. Accurate measurements are the foundation of a suit that not only fits but enhances your silhouette. This guide walks you through the essential steps to master plus size suit measurements, ensuring confidence and comfort in every wear.
Why Proper Measurements Matter for Plus Size Suits
A suit should complement your body, not fight against it. Ill-fitting garments can distort posture, restrict movement, and undermine confidence. For plus size individuals, common fit issues include:
- Tightness across the chest and shoulders
- Gaping at the back of the jacket
- Puckering around the waist or buttons straining
- Pants that bind at the thighs or sag at the seat
These problems stem from disproportionate sizing—not necessarily being “too big,” but wearing garments built on incorrect assumptions about body shape. A 46R jacket, for example, may carry extra chest room but lack corresponding adjustments in sleeve length or torso depth. That’s why personalized measurements are non-negotiable for a polished look.
“Fit is the single most important factor in how a man carries himself. When a suit fits correctly, it doesn’t hide the body—it honors it.” — Marcus Bell, Master Tailor & Bespoke Consultant
The Essential Body Measurements You Need
To order or tailor a suit, you need seven key measurements. Use a flexible tape measure and stand naturally—don’t suck in your stomach or pull the tape too tight. Have a friend assist if possible; accuracy improves with a second set of hands.
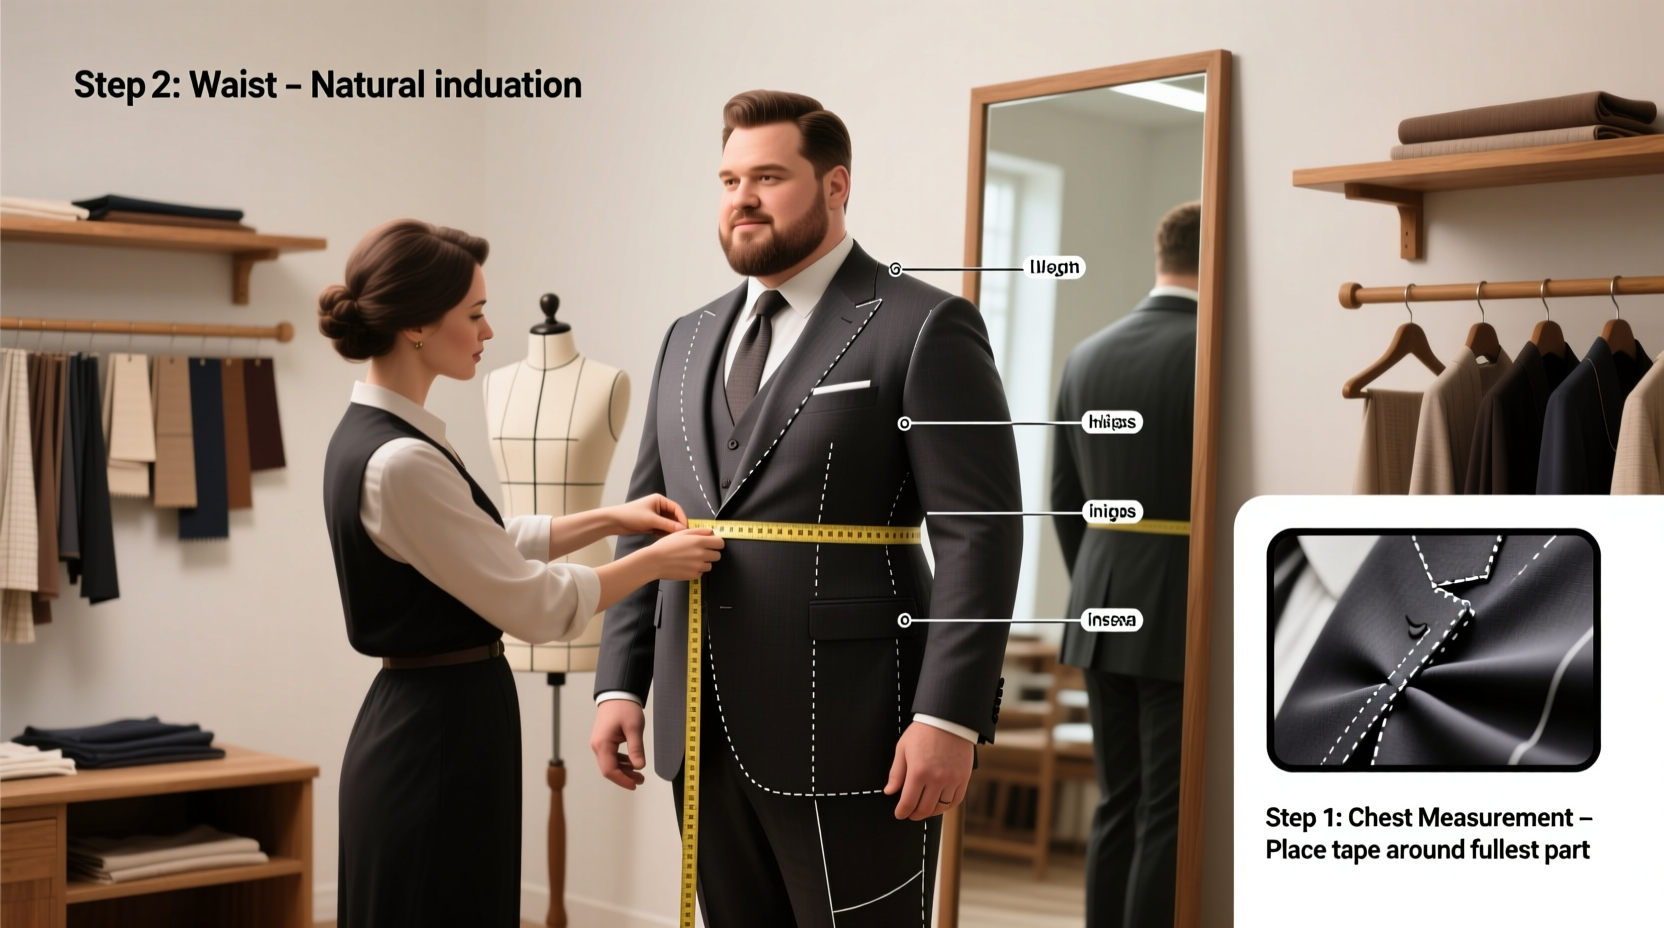
- Chest: Wrap the tape around the fullest part of your chest, under the arms, keeping it level across the shoulder blades.
- Waist: Measure around your natural waistline—the narrowest part between hips and ribs. For most, this is just above the belly button.
- Hips: Measure around the fullest part of your seat, ensuring the tape stays horizontal.
- Shoulders: From the edge of one shoulder bone (where the arm meets the torso) across the back to the other side.
- Sleeve Length: With arm slightly bent, measure from the shoulder edge through the elbow to the wrist bone. Include where you want the cuff to end.
- Neck: Around the base of the neck where the collar would sit, allowing space for one finger.
- Inseam: From the top of the inner thigh down to the floor, without shoes, for proper trouser length.
Step-by-Step Guide to Measuring Yourself Correctly
Follow this timeline to ensure consistent, accurate results:
| Step | Action | Time Required |
|---|---|---|
| 1 | Prepare tools: soft tape measure, mirror, pen, paper | 5 minutes |
| 2 | Wear slim-fit clothing (e.g., t-shirt and fitted pants) | – |
| 3 | Take chest, waist, hips, and neck measurements | 10 minutes |
| 4 | Measure shoulders and sleeve length (ask for help) | 5 minutes |
| 5 | Measure inseam using a pair of well-fitting pants as reference | 10 minutes |
| 6 | Double-check all numbers and record clearly | 5 minutes |
When measuring the inseam, lay a pair of trousers that already fit well flat on the ground. Measure from the crotch seam straight down to the hem. This avoids inaccuracies from stance or leg positioning.
Common Measurement Mistakes to Avoid
Even small errors can lead to significant fit issues. Here’s what to watch for:
| Do’s | Don’ts |
|---|---|
| Keep the tape parallel to the floor | Don’t pull the tape too tightly—allow slight slack |
| Breathe normally during measurement | Don’t measure over bulky clothing |
| Use bony landmarks (shoulder edge, hip bones) as anchors | Don’t estimate sleeve or torso length based on height alone |
| Record each number immediately | Don’t rely on brand size labels (e.g., 44L vs. 46R) |
Real Fit Success: A Case Study
James, a 42-year-old financial advisor, had avoided suits for years after repeated disappointments. Off-the-rack options either fit his broad shoulders but cut off at the waist, or accommodated his midsection but hung loosely on his frame. He decided to try a made-to-measure service and took careful measurements at home using this guide.
He discovered his true size was a hybrid: chest 45\", shoulders 19\", sleeve 34\", waist 41\". Most retailers didn’t offer this combination, but with exact specs, his tailor adjusted the pattern accordingly. The result? A navy two-button suit with a slightly extended torso, wider shoulders, and tapered waist suppression that balanced his proportions. “For the first time,” James said, “I didn’t feel like I was squeezing into a costume. I looked professional—and felt like myself.”
Checklist: Preparing for Your Suit Purchase
- ✅ Gather a soft measuring tape and form-fitting clothes
- ✅ Find a full-length mirror and enlist a helper if possible
- ✅ Take all seven core measurements accurately
- ✅ Record numbers clearly with units (inches or centimeters)
- ✅ Compare measurements to brand-specific size charts
- ✅ Note any unique proportions (e.g., long torso, wide back)
- ✅ Share measurements with tailor or retailer before ordering
Frequently Asked Questions
Can I use my shirt size to determine my suit size?
No. Shirt sizes don’t account for critical dimensions like sleeve length, shoulder width, or torso depth. A man wearing a 2XL shirt might need a 46R, 48S, or even a 50L suit depending on build. Always measure separately for suiting.
What if my chest and waist suggest different sizes?
This is common, especially in plus size ranges. For example, a 48” chest and 42” waist indicate a “short” or “regular” cut won’t work. Look for brands offering split sizing (e.g., 48 chest / 42 waist) or choose made-to-measure options where each dimension is customized.
How much ease should a suit jacket have?
A properly fitting jacket should allow about 2–3 inches of ease in the chest beyond your actual measurement. This ensures comfort and layering. Less than 2” risks tightness; more than 4” creates a baggy appearance. Always check mobility—raise your arms and twist slightly to test range of motion.
Final Thoughts: Confidence Begins with Fit
A well-fitted suit does more than make you look sharp—it changes how you carry yourself. For plus size men, mastering measurements isn’t just practical; it’s empowering. It shifts the focus from hiding your shape to celebrating it. Whether you’re shopping online, visiting a boutique, or working with a tailor, precise data gives you control over the outcome.
Stop guessing. Stop settling. Take the time to measure correctly, advocate for your proportions, and invest in clothing that respects your build. The right suit isn’t about shrinking into a mold—it’s about dressing a man who already fits perfectly within his own skin.


 浙公网安备
33010002000092号
浙公网安备
33010002000092号 浙B2-20120091-4
Comments
No comments yet. Why don't you start the discussion?