
Preserving food at home has seen a resurgence, and for good reason: it saves money, reduces waste, and gives you control over ingredients. Among preservation methods, pressure canning stands out as the only safe way to preserve low-acid foods like vegetables, meats, poultry, and seafood. Unlike water bath canning, which is suitable only for high-acid foods, pressure canning reaches temperatures above boiling—up to 240°F (116°C)—which destroys harmful bacteria like Clostridium botulinum, the cause of botulism. Mastering pressure canning isn’t just about technique; it’s about safety, precision, and confidence in your kitchen.
Understanding Pressure Canning vs. Other Methods
Many beginners confuse pressure canning with water bath canning. The key difference lies in temperature and application. Water bath canning uses boiling water (212°F or 100°C) and is appropriate only for high-acid foods such as fruits, jams, pickles, and tomatoes with added citric acid. Low-acid foods require higher temperatures to eliminate spores that thrive without oxygen—exactly the environment inside a sealed jar.
Pressure canners use steam under pressure to achieve those higher temperatures. At 10 pounds per square inch (psi) of pressure, the internal temperature reaches 240°F—sufficient to make low-acid foods shelf-stable for up to a year or more when properly processed.
Your Equipment: Types of Pressure Canners and What You Need
There are two main types of pressure canners: dial-gauge and weighted-gauge models. Both work effectively but differ in how they monitor pressure.
| Type | How It Works | Pros | Cons |
|---|---|---|---|
| Dial-Gauge | Uses a calibrated dial to display exact pressure | Precise readings; ideal for high-altitude adjustments | Dial must be tested annually for accuracy |
| Weighted-Gauge | Uses metal weights that jiggle or rock at set pressures (5, 10, or 15 psi) | No calibration needed; simpler to use | Less precise; limited to fixed pressure settings |
Regardless of type, ensure your canner is large enough to hold at least four quart-sized jars and has a tight-sealing lid, vent port, safety fuse, and rack to keep jars off the bottom. Always follow the manufacturer’s instructions specific to your model.
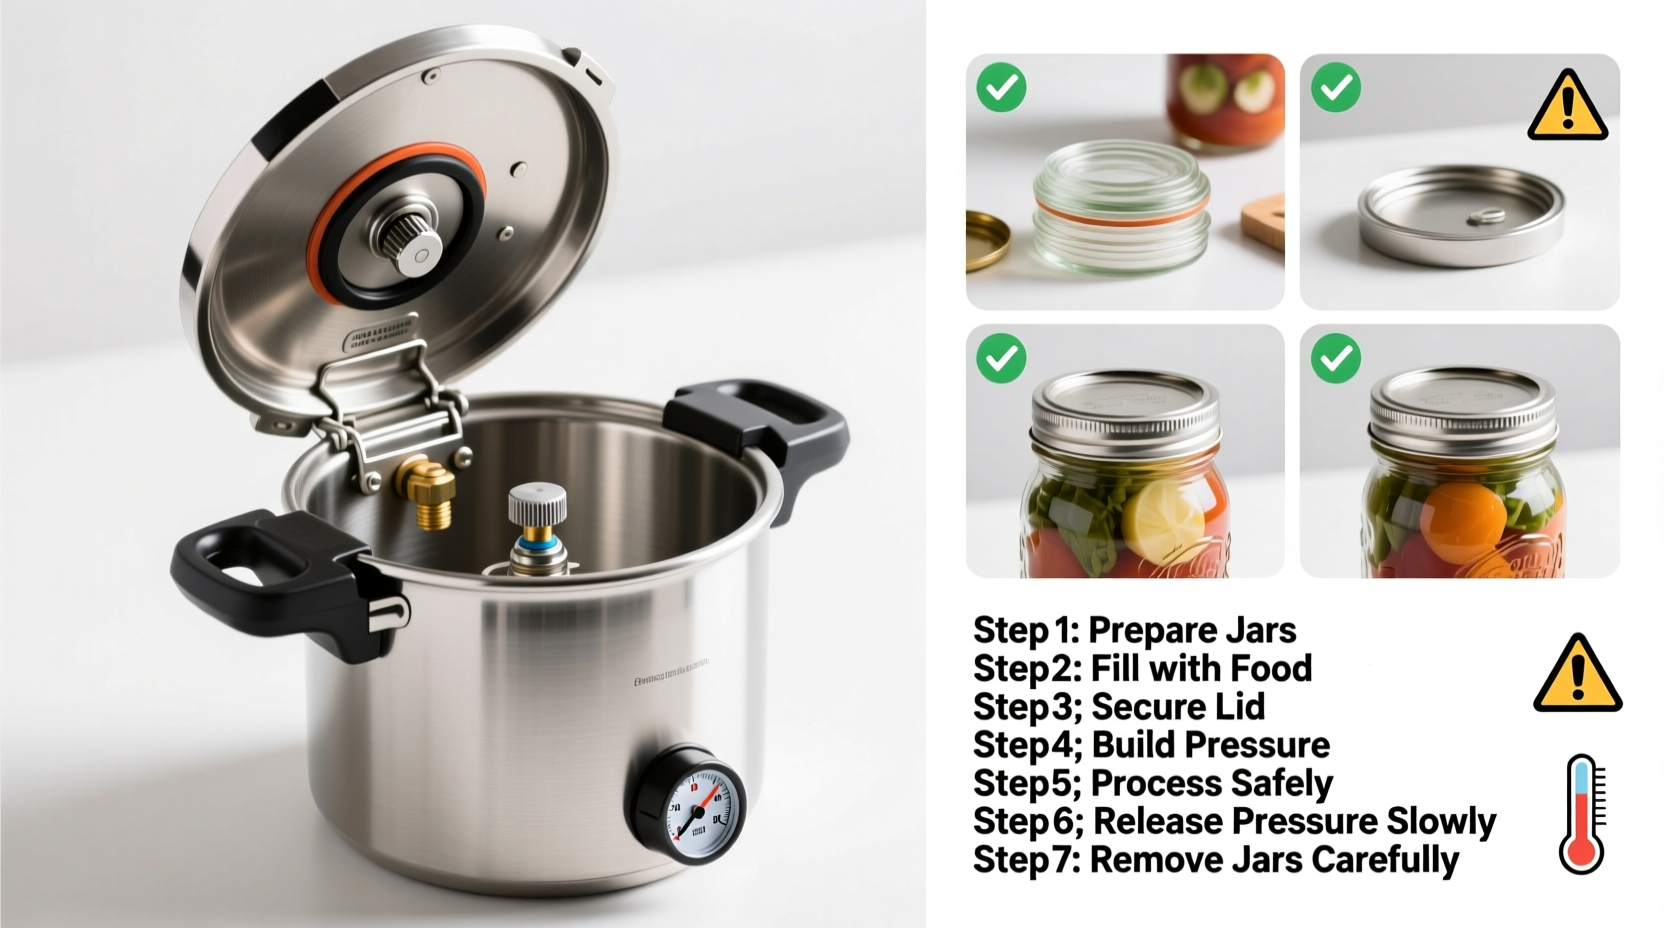
Step-by-Step Guide to Safe Pressure Canning
Safety begins before you even turn on the stove. Follow this timeline to ensure every batch is preserved correctly.
- Inspect equipment. Check hoses, gaskets, gauges, and valves for wear or blockage. Replace parts as recommended by the manufacturer.
- Prepare jars and lids. Wash jars in hot soapy water, rinse well, and keep warm. Simmer lids (not boil) to soften the sealing compound.
- Pre-cook food if required. Some recipes call for raw-pack (filling jars with unheated food), others for hot-pack (cooking food first). Hot-pack often yields better quality and easier liquid removal.
- Fill jars, leaving proper headspace. Use a funnel to avoid spills. Remove air bubbles with a non-metallic tool. Wipe rims clean with a damp cloth.
- Seal jars. Place lids on rims and screw bands on fingertip-tight—do not over-tighten.
- Add water to canner. Most manufacturers recommend 2–3 inches of hot water in the bottom before loading jars.
- Load jars onto rack. Arrange with space between them for steam circulation.
- Vent the canner. Heat on high until steam flows steadily from the vent port. Maintain for 10 minutes to remove trapped air. <9> Close the vent and build pressure. Once steam has vented, place the weight or close the petcock. Allow pressure to rise to the recommended level (usually 10 or 11 psi).
- Begin timing. When the correct pressure is reached, start your processing time. Adjust heat to maintain steady pressure—fluctuations can affect safety.
- Depressurize naturally. After processing, turn off heat and let the canner cool down with no intervention. This may take 30–60 minutes. Do not force-cool.
- Open the canner. Only after all pressure is released (gauge reads zero and weight drops) should you unlock and open the lid, tilting it away from you.
- Remove jars and cool. Use a jar lifter to place jars on a towel-lined surface. Let sit undisturbed for 12–24 hours.
- Check seals. Press the center of each lid. If it doesn’t flex, the jar is sealed. Unsealed jars should be refrigerated and used within a few days.
Common Mistakes and How to Avoid Them
Even experienced canners occasionally make errors. Awareness is the first step toward prevention.
- Skipping the venting step. Failing to vent air leads to inaccurate pressure and under-processing.
- Over-tightening lids. This prevents proper air escape during processing and may cause seal failure.
- Using outdated recipes. Older cookbooks may recommend unsafe practices like “open-kettle” canning or reducing processing times.
- Ignoring altitude adjustments. Above 1,000 feet, you must increase pressure or processing time. For example, at 2,000 feet, you’ll need 11 psi instead of 10.
- Force-cooling the canner. Rapid depressurization can cause siphoning, seal failure, or even jar breakage.
“Pressure canning is science, not guesswork. Follow tested guidelines exactly—your health depends on it.” — Dr. Beth L. Hartmann, Food Safety Extension Specialist, University of Alaska Fairbanks
Essential Checklist for Every Pressure Canning Session
Use this checklist before every batch to ensure consistency and safety:
- ✅ Inspect canner gasket, vent, and gauge
- ✅ Test dial gauge (if applicable) through your local extension office
- ✅ Wash and heat jars; simmer lids
- ✅ Prepare recipe using current, tested guidelines (e.g., National Center for Home Food Preservation)
- ✅ Fill jars with correct headspace and wipe rims
- ✅ Vent canner for full 10 minutes before pressurizing
- ✅ Monitor pressure continuously; adjust heat as needed
- ✅ Allow natural depressurization—no shortcuts
- ✅ Confirm seals after 24 hours
- ✅ Label and store jars properly
Real Example: Safely Canning Chicken Stock at Home
Sarah, a homesteader in Montana, wanted to preserve her homemade chicken stock for winter soups. She followed a tested recipe from the National Center for Home Food Preservation: she heated the stock to boiling, filled pre-warmed quart jars leaving 1-inch headspace, wiped the rims, applied lids, and loaded them into her weighted-gauge canner with 3 inches of hot water. After venting for 10 minutes, she placed the 10-psi weight on the vent. Once rocking steadily, she processed the jars for 75 minutes. She turned off the heat and waited 55 minutes for full depressurization. All seven jars sealed perfectly. Six months later, her family enjoyed flavorful, additive-free soup made from summer’s chickens—all thanks to one careful afternoon of pressure canning.
Frequently Asked Questions
Can I use a pressure cooker instead of a pressure canner?
No. Most pressure cookers are not designed for canning and lack the capacity or safety features to process jars safely. Only use a canner certified for home canning, marked as such by the manufacturer.
Why did my jar lose liquid during processing?
This is called siphoning and is usually caused by sudden pressure changes, overfilling, or rapid cooling. While the food is still safe if sealed, excessive loss may expose food to air and reduce shelf life.
How long can I store pressure-canned food?
For best quality, use within 12–18 months. While properly canned food remains safe longer, flavor, color, and nutrient levels decline over time. Always inspect jars before opening—discard if there are signs of spoilage like bulging lids, off-odors, or spurting liquid.
Final Thoughts and Call to Action
Mastering pressure canning empowers you to preserve nutritious, home-cooked meals with confidence. It’s a skill rooted in science, patience, and respect for safety protocols. Each successful batch builds experience and self-reliance. Whether you're canning garden vegetables, broths, or stews, following tested procedures ensures your efforts result in safe, delicious food for months to come.


 浙公网安备
33010002000092号
浙公网安备
33010002000092号 浙B2-20120091-4
Comments
No comments yet. Why don't you start the discussion?