
Capturing what’s on your screen is one of the most common digital tasks—whether you’re troubleshooting an error, sharing instructions, or preserving visual information. Despite its simplicity, many users underutilize the full potential of the Print Screen function in Windows. From basic keyboard shortcuts to advanced tools like Snip & Sketch and third-party utilities, mastering screenshot capture can save time, improve communication, and streamline workflows across personal and professional environments.
This comprehensive guide walks through every method available in modern Windows systems, explains best practices for organizing and editing captures, and offers real-world insights to help you become proficient in screenshot management.
Understanding the Print Screen Key and Its Variants
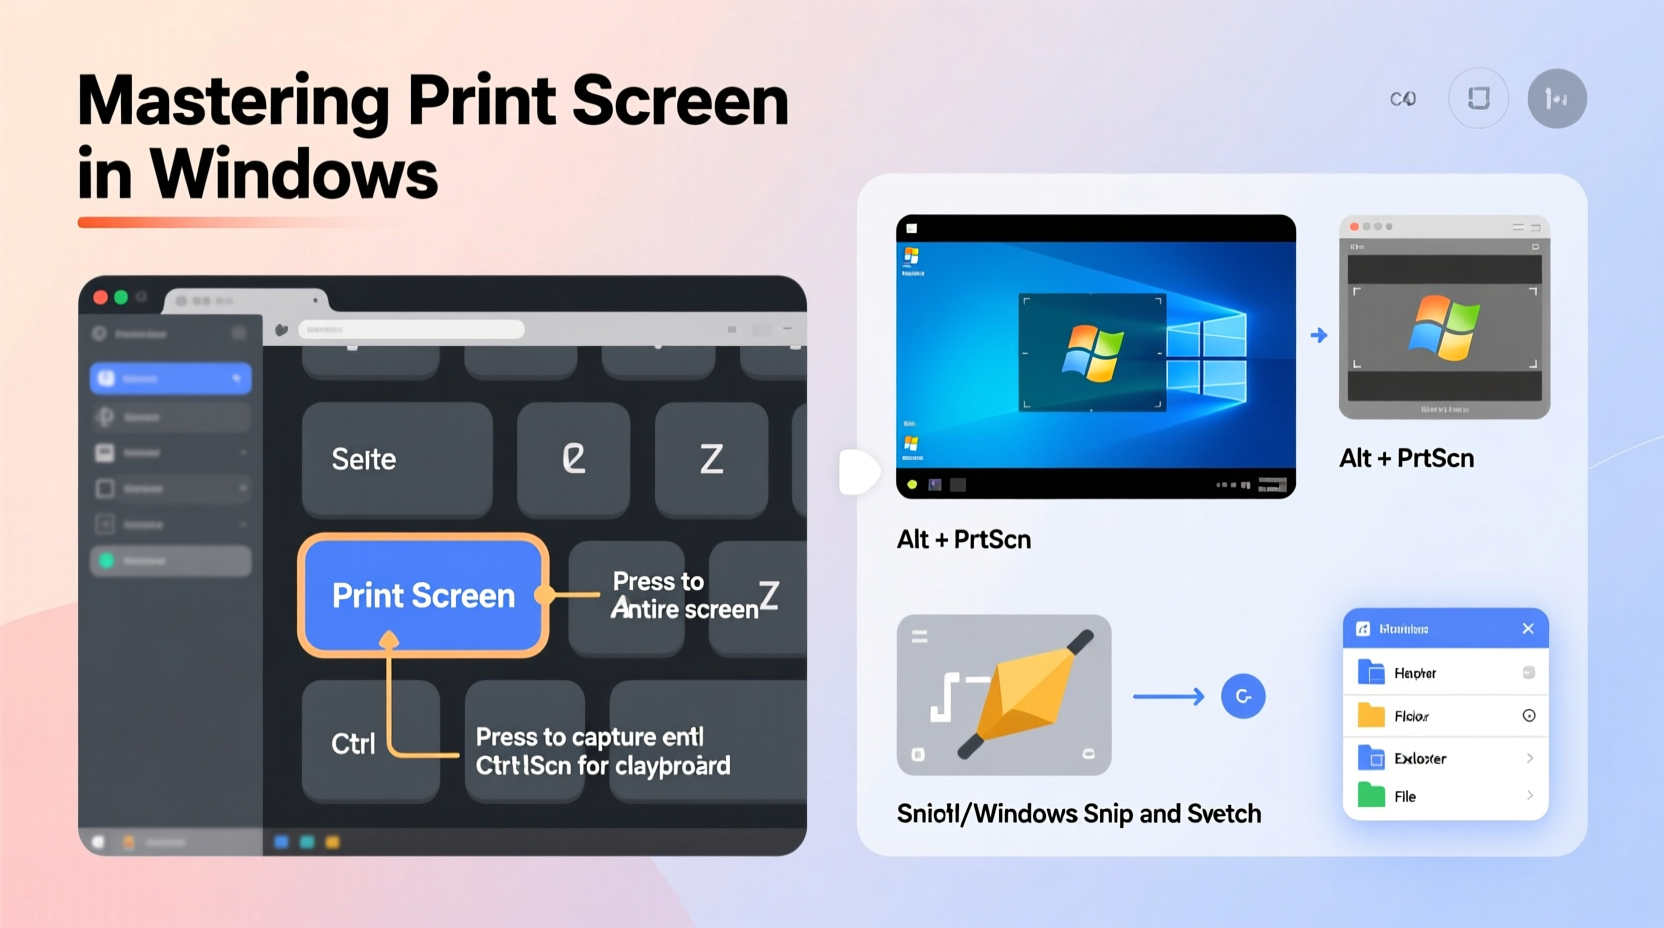
The Print Screen key (often labeled PrtScn, PrntScrn, or Print Scr) has been a staple on PC keyboards for decades. When pressed, it captures the current display and stores it temporarily in the clipboard. However, its behavior changes depending on how it's used in combination with other keys.
| Shortcut | Action | Output Location |
|---|---|---|
| Print Screen | Captures entire screen | Clipboard only |
| Alt + Print Screen | Captures active window only | Clipboard only |
| Windows + Print Screen | Captures entire screen and saves automatically | Saved as file: Screenshots folder |
| Windows + Shift + S | Opens Snip & Sketch tool for selective capture | Clipboard only |
| Windows + Alt + Print Screen (via Game Bar) | Captures active game/app window | Saved in Captures folder |
Each variation serves a specific purpose. For example, using Alt + Print Screen is ideal when you need to copy just one application window into an email or document without background clutter.
Using Built-in Tools: Snip & Sketch and Game Bar
Starting with Windows 10, Microsoft introduced Snip & Sketch as a modern replacement for the older Snipping Tool (now merged into Snip & Sketch). This utility allows freeform, rectangular, window, or full-screen snips and includes annotation features such as pen, highlighter, and eraser.
- Press Windows + Shift + S to activate the snipping toolbar.
- Select your preferred mode: rectangle, freeform, window, or full screen.
- After selection, the snippet goes to the clipboard and appears in a notification.
- Click the notification to open Snip & Sketch for editing and saving.
The Game Bar, accessible via Windows + G, isn’t just for gamers. It provides screen recording and screenshot capabilities for any desktop application. To take a screenshot:
- Open Game Bar with Windows + G.
- Ensure “Yes, this is a game” is checked if prompted.
- Click the camera icon or press Windows + Alt + PrtScn.
- Screenshots are saved in
Video\\Captureswithin your user folder.
“Modern Windows tools have reduced reliance on third-party software for most users. Snip & Sketch alone handles over 90% of typical screenshot needs.” — David Lin, UX Specialist at TechFlow Solutions
Organizing and Managing Your Screenshots
Without a system, screenshots can quickly clutter your device. By default, pressing Windows + PrtScn saves files to C:\\Users\\[Username]\\Pictures\\Screenshots. While convenient, this folder often becomes disorganized over time.
Best Practices for File Management
- Name files meaningfully: Rename screenshots immediately (e.g., \"Error_Install_Failed_June5\") instead of leaving them as “Screenshot (1).png”.
- Create subfolders: Organize by project, date, or category (e.g., Support Tickets, Tutorials, UI Bugs).
- Use cloud sync: Store important captures in OneDrive or Dropbox for access across devices.
- Delete unnecessary ones: Regularly review and remove outdated or redundant images.
Real-World Example: Resolving Software Issues Efficiently
Sarah, a technical support agent at a mid-sized SaaS company, receives dozens of tickets daily. One user reports a login failure but struggles to describe the issue. Sarah guides them to press Windows + Shift + S, select the error message, and paste it directly into the chat.
Within seconds, she sees a red banner reading “Authentication Token Expired – Contact Admin.” With visual confirmation, she resets the token and resolves the case in under three minutes. Without the screenshot, clarification could have taken multiple back-and-forths.
This scenario illustrates how fast, precise screenshots improve accuracy and reduce resolution time—especially in remote work and customer service settings.
Advanced Tips and Workflow Optimization
Power users can enhance productivity with automation and customization:
- AutoHotkey scripts: Create custom hotkeys that timestamp screenshots or save them to specific folders.
- Clipboard history: Press Windows + V to access recently copied screenshots and reuse them without reopening files.
- Third-party tools: Applications like Greenshot, ShareX, or Lightshot offer OCR, upload-to-cloud, and auto-naming features beyond native options.
Checklist: Optimizing Your Screenshot Workflow
- ✅ Identify your most common capture need (full screen, window, region).
- ✅ Set up a dedicated Screenshots folder with subdirectories.
- ✅ Use Windows + Shift + S for precision captures.
- ✅ Edit and annotate using Snip & Sketch or Paint.
- ✅ Name and archive important screenshots promptly.
- ✅ Explore tools like ShareX if you require advanced automation.
Frequently Asked Questions
Where are my screenshots saved?
If you press Windows + Print Screen, they’re saved in Pictures > Screenshots. If you only press Print Screen, the image is copied to the clipboard and must be pasted into an app like Paint or Word to save.
Can I change the default screenshot format?
Windows uses PNG by default, which preserves quality and supports transparency. There's no built-in option to change the format, but you can convert files using Paint (Save As > JPEG/BMP) or PowerShell scripts for batch processing.
Why doesn’t Print Screen work on some applications?
Some apps, particularly media players or secure financial platforms, block screenshots for copyright or security reasons. In these cases, alternative documentation methods may be required.
Conclusion
Mastery of the Print Screen function extends far beyond pressing a single key. It involves understanding the ecosystem of tools, choosing the right method for each task, and maintaining order in how captures are stored and used. Whether you're a student, professional, or casual user, efficient screenshot practices contribute to clearer communication, faster problem-solving, and better digital organization.


 浙公网安备
33010002000092号
浙公网安备
33010002000092号 浙B2-20120091-4
Comments
No comments yet. Why don't you start the discussion?