
Puff pastry is one of the most elegant and technically satisfying elements in baking. When executed well, it delivers an airy, crisp texture with hundreds of delicate, buttery layers that rise dramatically in the oven. Yet, many home bakers shy away from making it themselves, intimidated by its reputation for being finicky or prone to failure. The truth is, with the right understanding of technique, temperature, and timing, anyone can master puff pastry at home. Whether you're preparing savory vol-au-vents or sweet palmiers, consistent results are within reach.
The Science Behind the Layers
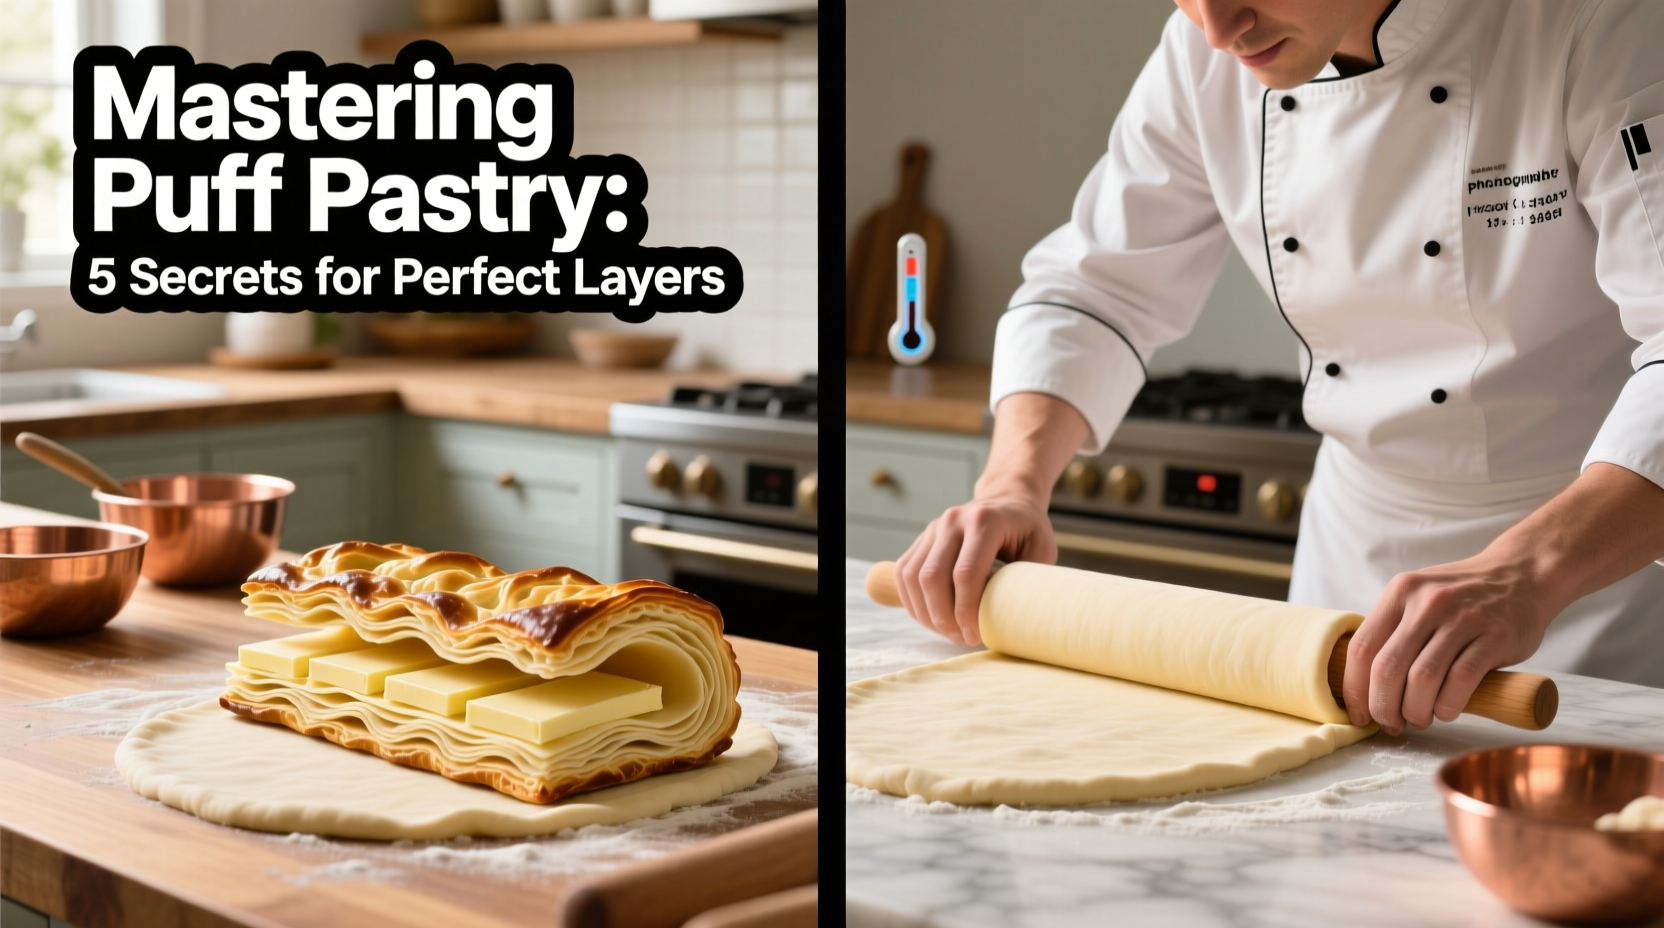
Puff pastry’s magic lies in its structure: alternating layers of dough and butter that expand when heated. As the pastry bakes, moisture in the butter turns to steam, forcing the layers apart. This process, known as lamination, is what creates the signature rise and flakiness. For this to work, the butter must remain solid during mixing and folding but melt gradually in the oven. If the butter softens too early or breaks through the dough, the layers collapse.
The key components are simple—flour, water, salt, and a high-fat butter—but their interaction is precise. Overworking the dough develops gluten excessively, leading to toughness. Conversely, under-chilling causes butter leakage. Success hinges on control, patience, and attention to detail.
“Puff pastry isn’t about perfection in each fold—it’s about consistency across all of them.” — Jacques Torres, Pastry Chef & Author
Essential Tools and Ingredients
Before beginning, gather the proper tools to ensure smooth execution:
- Heavy-duty rolling pin (preferably French-style for even pressure)
- Large, cool work surface (marble or stainless steel ideal)
- Bench scraper
- Plastic wrap
- Ruler and pastry brush
- Dough docker (optional, for blind baking)
For ingredients, quality matters. Use European-style unsalted butter with at least 82% fat content. Lower-fat butters contain more water, increasing the risk of soggy layers or premature melting. All-purpose flour works well, though some prefer a blend with a small amount of cake flour for tenderness.
Step-by-Step Guide to Homemade Puff Pastry
While store-bought options exist, homemade puff pastry offers superior flavor and control. Follow this timeline-based method for consistent results:
- Day 1 – Make the détrempe (dough base): Mix 250g flour, 1/2 tsp salt, and 150ml ice water until just combined. Form into a disk, wrap, and chill for 1 hour.
- Prepare the butter block: Pound 180g chilled butter between parchment into a 7x7 inch square. Chill again until firm.
- Encase the butter: Roll the dough into a 10x10 inch square. Place the butter block in the center and fold the corners over like an envelope. Seal edges gently with the rolling pin.
- First turn (single fold): Roll into a 20x10 inch rectangle. Fold one-third toward the center, then the other third over it—like a letter. This is a single book fold. Wrap and chill 30 minutes.
- Repeat four more times: Perform four additional single folds, chilling 30 minutes between each. Rotate the pastry 90 degrees before rolling each time.
- Final rest: After the sixth fold, wrap tightly and refrigerate overnight before use.
This six-fold method yields approximately 729 layers (3⁶). Fewer folds result in fewer, thicker layers; more than six risks over-developing gluten or breaking the laminate.
Do’s and Don’ts of Puff Pastry Handling
| Do’s | Don’ts |
|---|---|
| Keep everything cold—work quickly in a cool kitchen | Work in a hot or humid environment without air conditioning |
| Chill the pastry between every fold | Skip resting periods to save time |
| Use flour sparingly when rolling to prevent dryness | Use excessive flour, which inhibits layer bonding |
| Preheat oven to at least 400°F (200°C) before baking | Bake in a cold or under-preheated oven |
| Egg wash for shine and color (use yolk + cream) | Apply egg wash too heavily, causing sealing of layers |
Real Example: From Collapse to Celebration
Sarah, a home baker in Portland, struggled for months with flat, greasy pastries. She followed recipes precisely but couldn’t achieve lift. After consulting a local pastry instructor, she realized her kitchen was too warm (78°F), and she wasn’t chilling the dough long enough between folds. She began using a marble slab kept in the refrigerator, shortened her rolling sessions, and committed to full 30-minute chilling intervals. On her next attempt, the pastry rose nearly two inches in the oven, with crisp, golden layers. “It wasn’t the recipe,” she said. “It was the discipline around temperature.”
Common Problems and How to Fix Them
Even experienced bakers encounter setbacks. Here’s how to troubleshoot the most frequent issues:
- Pastry doesn’t rise: Likely due to butter melting before baking. Ensure thorough chilling and a fully preheated oven.
- Uneven layers: Rolling inconsistently or skipping rotation. Always roll from center outward with even pressure.
- Leaking butter: Butter was too soft during lamination. Work faster or chill longer.
- Tough texture: Over-handling developed too much gluten. Handle dough as little as possible after the initial mix.
- Browning too fast: Oven too hot or positioned too close to the top element. Use middle rack and consider lowering temperature by 25°F after initial rise.
“The moment you rush puff pastry is the moment it stops rising.” — Dorie Greenspan, Cookbook Author
Frequently Asked Questions
Can I freeze puff pastry?
Yes. Unbaked puff pastry (either store-bought or homemade) freezes exceptionally well. Wrap tightly in plastic and place in a freezer bag. It can be stored for up to 3 months. Thaw overnight in the refrigerator before use—never at room temperature.
Why does my puff pastry shrink when I bake it?
Shrinkage usually occurs when the gluten network hasn’t relaxed. Always allow the shaped pastry to rest for 10–15 minutes in the fridge before baking. Also, avoid stretching the dough when shaping.
Can I make puff pastry without butter?
Traditional puff pastry relies on butter for flavor and steam production. Margarine or shortening may create lift but lack taste and produce a waxy mouthfeel. For dairy-free alternatives, specialized plant-based blocks designed for laminated doughs are available, though results vary.
Checklist for Success
Follow this final checklist before beginning your next puff pastry project:
- ✅ Kitchen temperature below 70°F (21°C)
- ✅ Butter and dough equally firm but pliable
- ✅ Work surface and tools chilled if possible
- ✅ Flour measured and ready (use bread flour for extra strength if desired)
- ✅ Rolling pin clean and smooth
- ✅ Plastic wrap and labeled containers prepared
- ✅ Oven preheated with baking sheet inside (for immediate heat transfer)
- ✅ Timer set for each chilling phase
Conclusion
Mastering puff pastry is less about innate talent and more about disciplined repetition. Each fold builds not only layers but confidence. By respecting the role of temperature, timing, and technique, you transform a seemingly complex process into a rewarding ritual. The result—golden, shattering pastry that rises with pride—is worth every careful step.


 浙公网安备
33010002000092号
浙公网安备
33010002000092号 浙B2-20120091-4
Comments
No comments yet. Why don't you start the discussion?