
Puff pastry is one of the most elegant yet intimidating elements in baking. Its delicate, airy layers rise dramatically in the oven, creating a golden, crisp exterior that shatters with each bite. But achieving that perfect flakiness hinges on one critical skill: rolling. It’s not just about flattening dough—it’s about preserving structure, managing temperature, and applying consistent pressure. Done correctly, your pastry will bake up light and layered. Done poorly, it collapses into a dense, greasy disappointment.
The secret to mastering puff pastry lies in understanding how gluten develops, how butter behaves at different temperatures, and how rolling influences both. Whether you’re making homemade dough or working with store-bought sheets, proper rolling technique transforms good pastry into exceptional results.
The Science Behind Flaky Layers
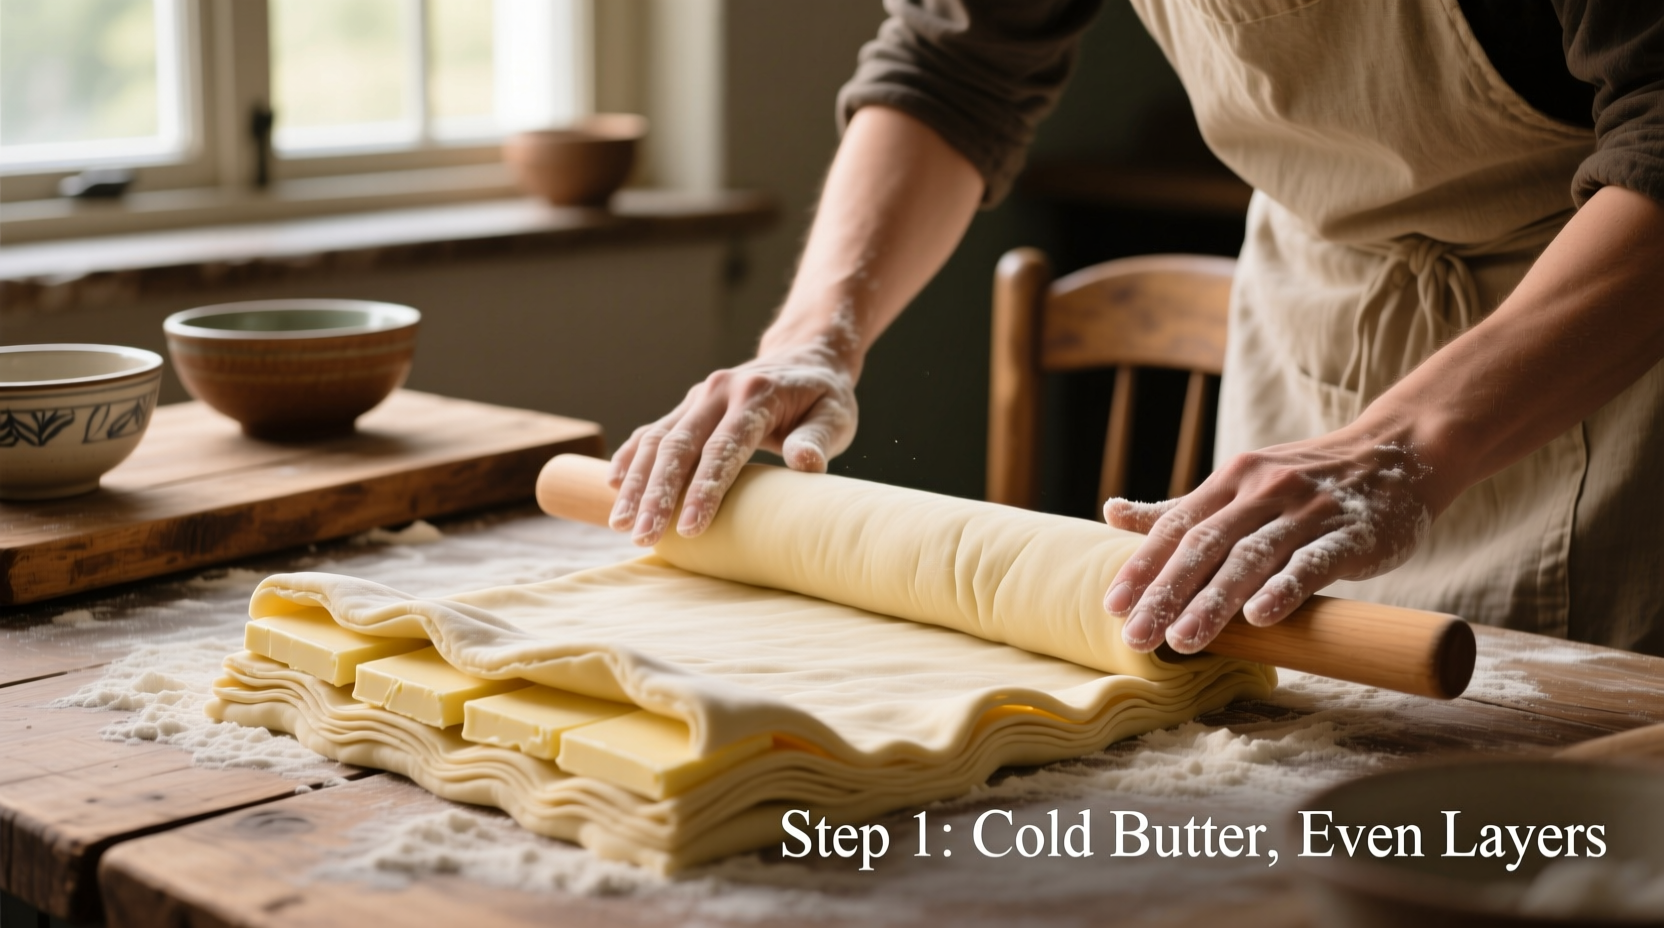
Flakiness in puff pastry comes from hundreds of alternating layers of dough and butter. When exposed to heat, the water in the butter turns to steam, forcing the dough layers apart. This expansion creates lift and separation—what we experience as “puff.” The key is keeping those layers distinct during rolling and avoiding overworking the dough.
If the butter melts into the flour during handling, the layers merge. No separation means no steam pockets—and no rise. That’s why temperature control is non-negotiable. Cold butter stays solid long enough to create defined strata; warm butter seeps, smearing across the dough like paste.
“Puff pastry isn’t baked—it’s steamed from within. Your role as a baker is to set up those steam channels through precise lamination and controlled rolling.” — Chef Antoine Morel, Pastry Instructor at Le Cordon Bleu Paris
Essential Tools and Setup
Before touching the dough, ensure your workspace supports success. Rolling puff pastry isn’t improvisational—it requires preparation.
- Cool surface: Use marble, stainless steel, or chilled granite if possible. These retain cold longer than wood or laminate.
- Rolling pin: A French-style wooden pin (without handles) offers better control and even pressure distribution.
- Dough scraper: Helps lift and turn dough without tearing.
- Plastic wrap and parchment paper: For wrapping dough between rests and preventing sticking without excess flour.
- Ruler or measuring tape: Ensures uniform thickness, especially when making multiple pieces.
Step-by-Step Rolling Technique
Whether you’ve laminated your own dough or are refining store-bought sheets, follow this sequence to maximize layer definition and minimize shrinkage.
- Start cold: Remove dough from the refrigerator. Let it sit for 5–10 minutes only—just enough to soften slightly for pliability. Never let it reach room temperature.
- Lightly flour the surface: Use minimal flour on the work surface and rolling pin. Excess flour incorporates into the dough, toughening it.
- Roll from center outward: Apply steady, even pressure, rolling away from your body and back. Lift the pin after each stroke—don’t drag it.
- Rotate the dough 90 degrees every few rolls: This ensures even thickness and prevents oval distortion.
- Aim for consistent thickness: Most recipes require 3–5 mm (⅛ to ¼ inch). Use two dowels or rolling guides for precision.
- Check for butter leakage: If butter begins to ooze, stop immediately. Wrap the dough and chill for 20 minutes before continuing.
- Rest between major shaping steps: After rolling to final thickness, chill again for 15–20 minutes before cutting or filling.
Why Resting Matters
Gluten relaxes during chilling, reducing shrinkage when baked. Butter re-solidifies, ensuring clean layer separation. Skipping rest periods leads to uneven rising and collapsed centers.
Do’s and Don’ts of Puff Pastry Rolling
| Do’s | Don’ts |
|---|---|
| Use parchment paper to prevent sticking instead of heavy flouring | Over-flour the surface or dough |
| Chill dough between rolling sessions (especially after folding) | Work too quickly without allowing dough to rest |
| Roll in one direction, lifting the pin between strokes | Press down too hard or roll back and forth aggressively |
| Trim edges cleanly with a sharp knife or pizza cutter | Squeeze or pinch cut edges together (this seals layers and inhibits rise) |
| Keep tools and workspace cool | Roll near heat sources like ovens or stoves |
Troubleshooting Common Rolling Mistakes
Even careful bakers encounter issues. Here’s how to identify and correct them early.
- Dough cracks at edges: Likely too cold or rolled too thin too fast. Let it warm slightly, then continue gently.
- Butter breaking through top layer: You’ve rolled unevenly or skipped a chill. Patch with extra dough or fold and chill again.
- Pastry shrinks drastically in oven: Dough wasn’t rested enough. Always allow at least 15 minutes in the fridge before baking.
- No rise or flat result: Over-handling melted the butter. Check your rolling duration and ambient kitchen temperature.
Real Example: From Collapse to Crown
Marie, a home baker in Portland, struggled for months with soggy-bottomed tarts and collapsed vol-au-vents. She followed recipes exactly but couldn’t replicate the bakery-style lift she wanted. After recording her process, she noticed she rolled her thawed puff pastry immediately after removing it from the fridge—no resting. She also used a thick wooden board near her preheating oven, raising the dough’s temperature rapidly.
After switching to a chilled marble slab, letting the dough acclimate for 8 minutes, and adding a post-rolling chill, her next batch rose nearly 2 inches, with crisp, defined layers. The change wasn’t in ingredients—it was in rolling discipline.
Expert Checklist for Perfect Rolling Results
Follow this checklist before every rolling session to ensure optimal conditions:
- ✅ Dough is cold but not brittle (5–10 min out of fridge)
- ✅ Work surface is clean and cool (marble, stone, or chilled tray)
- ✅ Rolling pin is lightly floured or wrapped in parchment
- ✅ Minimal flour used—only enough to prevent sticking
- ✅ Rolling motion is smooth, centered, and directional
- ✅ Dough rotated 90° every 3–4 passes
- ✅ Thickness remains uniform (use guides if needed)
- ✅ Immediate chilling if butter softens or leaks
- ✅ Final rest completed before cutting or baking
Frequently Asked Questions
Can I roll puff pastry ahead of time and refrigerate it?
Yes, but only for up to 24 hours. Wrap tightly in plastic and place on a flat tray to avoid warping. Always chill before baking, even if already refrigerated.
Why does my puff pastry stick even with flour?
Too much handling warms the butter, causing it to release moisture. Instead of more flour, roll between two sheets of parchment paper. This prevents sticking and eliminates excess flour absorption.
How many times should I roll puff pastry?
As few as necessary. Each roll risks warming and compressing layers. For store-bought, one gentle roll to adjust thickness is usually sufficient. For homemade, follow your lamination schedule precisely—typically 4–6 turns with chilling in between.
Final Thoughts: Precision Meets Patience
Mastering puff pastry rolling isn’t about strength—it’s about sensitivity. You’re not forcing the dough into submission; you’re guiding it toward its best expression. Every stroke of the pin should be deliberate. Every rest period respected. When executed with care, the result is more than technical success—it’s sensory delight.
The difference between mediocre and magnificent pastry often comes down to the quiet moments between rolls: the patience to wait, the awareness to feel the dough’s temperature, the restraint to use less flour, less pressure, less haste.


 浙公网安备
33010002000092号
浙公网安备
33010002000092号 浙B2-20120091-4
Comments
No comments yet. Why don't you start the discussion?