
Capturing what’s on your screen is a routine task for many—whether you're troubleshooting an error, sharing instructions, or saving visual data. While the traditional \"Print Screen\" key has long been the go-to method, modern Dell laptops offer far more powerful and flexible options. Knowing how to use them effectively can save time, improve clarity, and streamline communication.
From built-in Windows utilities to hardware-specific features and third-party enhancements, mastering screen capture goes well beyond pressing one button. This guide explores practical, reliable techniques tailored for Dell laptop users who want precision, speed, and versatility in their screenshots.
Why Move Beyond the Print Screen Key?
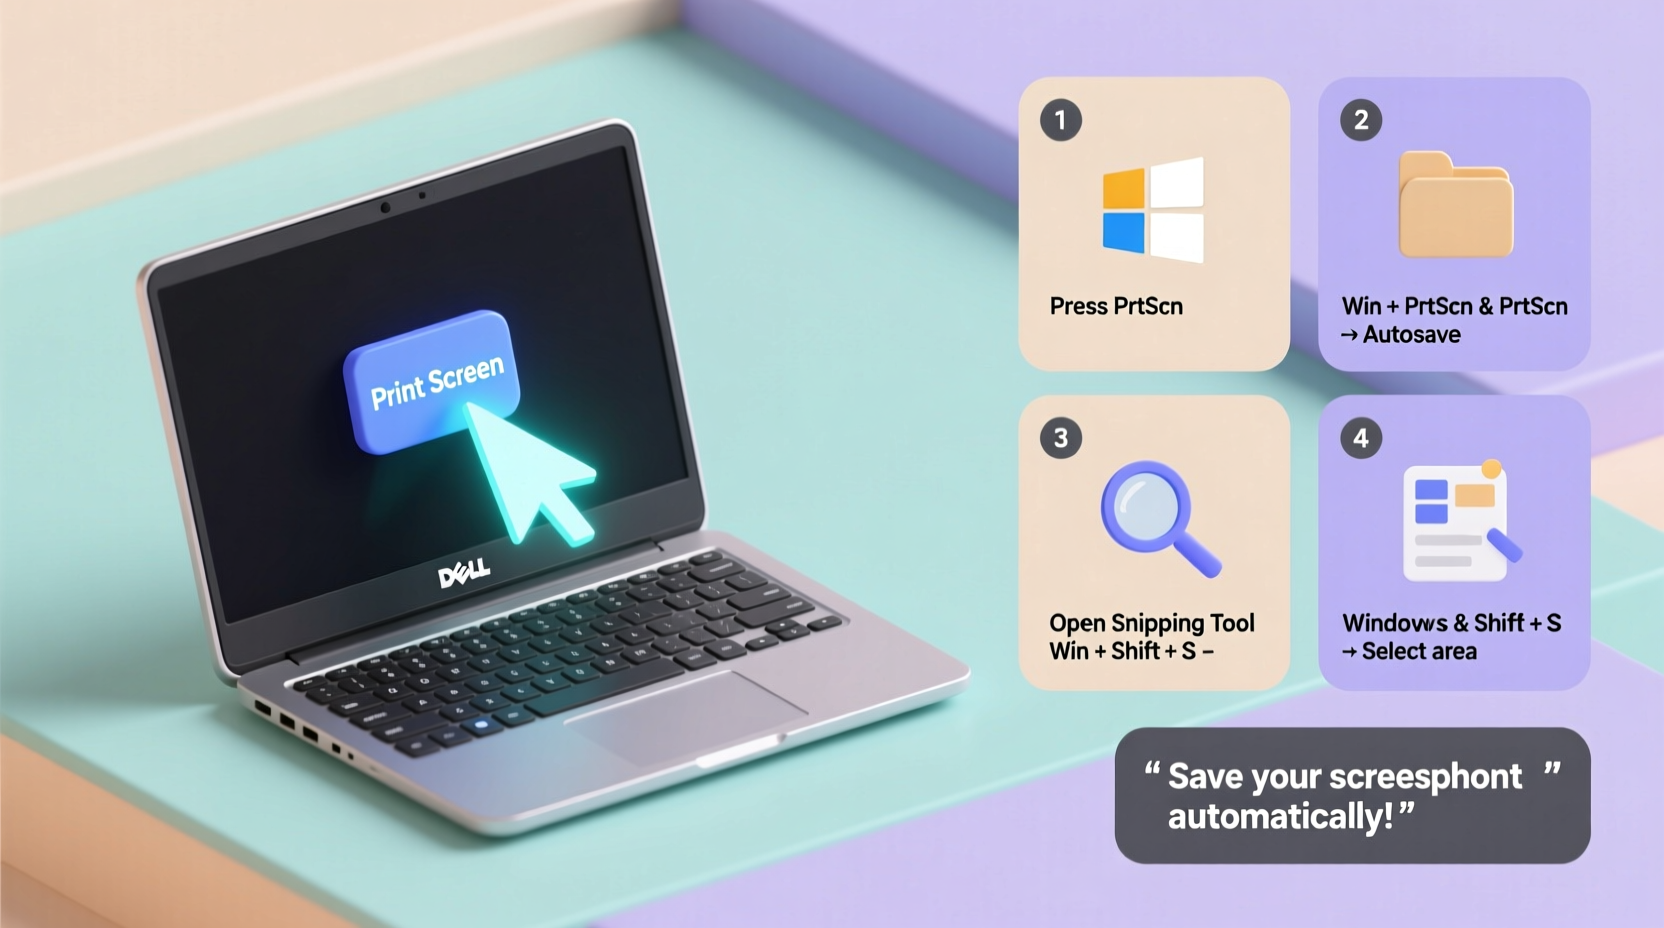
The Print Screen (PrtScn) key still works—and it's functional. Press it, open Paint or Word, and paste (Ctrl+V), and you’ve captured your entire display. But this method lacks control. You get the whole screen every time, even if you only need a small window or a specific region.
Modern workflows demand more: selective captures, instant editing, automatic saving, and annotation tools. Relying solely on PrtScn means missing out on efficiency gains available through smarter alternatives.
“Most users waste time cropping and editing full-screen grabs when they could capture exactly what they need in one step.” — Jordan Lee, UX Consultant & Productivity Trainer
Built-In Windows Tools That Outperform Print Screen
Windows 10 and 11 come equipped with advanced screenshot utilities that work seamlessly on Dell laptops. These tools are fast, intuitive, and eliminate unnecessary steps.
Snip & Sketch: Precision in Seconds
Snip & Sketch allows you to capture rectangular areas, freeform selections, full windows, or the entire screen—with immediate access to markup tools.
To use it:
- Press Win + Shift + S.
- Your screen dims, and a toolbar appears at the top.
- Select your snip type: Rectangular, Freeform, Window, or Fullscreen.
- Click and drag to capture the desired area.
- The snippet automatically copies to your clipboard and appears as a notification.
- Click the notification to open and annotate it.
Snipping Tool (Legacy Mode)
Though largely replaced by Snip & Sketch, the classic Snipping Tool remains accessible via search. It supports delayed captures—useful for grabbing pop-up menus or tooltips that disappear when you move your mouse.
Set a delay of 1–5 seconds, initiate the snip, then position your cursor over the element before it appears.
Game Bar for Active Window Capture
Even if you’re not gaming, Windows Game Bar offers a clean way to capture the active application window using a simple shortcut.
- Press Win + Alt + PrtScn to take a screenshot of the current app window.
- Screenshots save automatically to
C:\\Users\\[YourName]\\Videos\\Captures.
Note: Game Bar must be enabled in Settings > Gaming > Xbox Game Bar.
Dell-Specific Features and Function Keys
Some Dell laptops include proprietary function keys or preloaded software that enhances screen capture functionality.
For example, certain XPS and Latitude models feature a dedicated Screen Capture button on the keyboard—often labeled with a rectangle and dotted line. When pressed, it may trigger Dell QuickSet or another utility to launch a capture interface.
If your model doesn’t have a physical button, check whether Dell Mobile Connect or Dell Display Manager is installed. These applications sometimes include screen recording or snapshot features optimized for multi-monitor setups common in business environments.
| Tool | Shortcut / Method | Saves Automatically? | Best For |
|---|---|---|---|
| Print Screen | PrtScn | No (requires paste) | Full-screen backup |
| Snip & Sketch | Win + Shift + S | No (but quick edit) | Precise region capture |
| Game Bar | Win + Alt + PrtScn | Yes | Active window capture |
| Snipping Tool (Delay) | Manual launch | Yes (if configured) | Pop-up menus, tooltips |
| Dell Quick Actions | F7 or App Button | Varies | One-click capture (select models) |
Third-Party Tools for Power Users
When built-in tools fall short, third-party applications deliver enhanced flexibility. They’re ideal for frequent screen capturers—teachers, developers, technical writers, and support staff.
Lightshot
A lightweight, free tool that installs quickly and adds global activation via Ctrl + PrtScn. After capture, you can annotate, upload directly to the cloud, and share via link—perfect for remote collaboration.
Greenshot
Open-source and highly customizable. Greenshot lets you capture windows, regions, or full screens, then instantly export to file, printer, email, or clipboard. You can also define output formats and naming conventions.
ShareX
For advanced users, ShareX offers automation: capture, annotate, blur sensitive info, and upload—all in one flow. While more complex, its workflow engine saves hours over time.
Real-World Example: Solving a Software Issue Efficiently
Consider Maria, an IT support specialist at a mid-sized firm. A colleague reported an error message in Excel that vanished after closing the file. Instead of asking vague questions, Maria instructed them to press Win + Shift + S, select the error dialog, and paste it into Teams.
Within seconds, she saw the exact message: “#REF! Circular Reference Detected.” With visual confirmation, she diagnosed the formula issue immediately and sent a corrected template. What could have taken 20 minutes of back-and-forth was resolved in under five.
This scenario illustrates how precise screen capture tools reduce ambiguity and accelerate problem-solving—especially when working remotely.
Step-by-Step Guide: Optimizing Your Screenshot Workflow
Follow this sequence to build an efficient, repeatable process:
- Identify the purpose: Are you documenting a bug, creating a tutorial, or sharing information?
- Choose the right tool: Use Snip & Sketch for quick annotations; Game Bar for full-window shots; third-party apps for automated workflows.
- Capture cleanly: Close unrelated windows, disable notifications, and ensure text is readable.
- Edit if needed: Highlight important areas, crop excess space, or add arrows using built-in markup tools.
- Save or share appropriately: Save locally for records, or copy/paste into emails, docs, or chat apps. Use cloud links for large audiences.
- Organize consistently: Name files clearly (e.g., “Error_LoginScreen_20240410.png”) and store them in designated folders.
Frequently Asked Questions
Where does Win + Shift + S save screenshots?
By default, screenshots taken with Win + Shift + S are copied to the clipboard but not saved as files. To save them, you must paste into an application like Paint, Word, or an image editor and manually save. However, clicking the notification that appears lets you edit and save directly.
Can I change the default save location for Game Bar screenshots?
Yes. Go to Settings > System > Storage > Advanced storage settings > Saved games. Click “Change where new content is saved” and update the path for screenshots.
My Print Screen key isn’t working. What should I do?
First, try pressing Fn + PrtScn—some Dell laptops require this combo. If that fails, check for driver updates via Dell SupportAssist. Also, verify that Filter Keys aren’t enabled in Accessibility settings, as they can interfere with keyboard input.
Conclusion: Take Control of Your Screen Captures
Mastering screen capture on your Dell laptop isn’t about memorizing shortcuts—it’s about choosing the right method for each situation. Whether you’re using native Windows tools, leveraging Dell-specific features, or adopting powerful third-party apps, the goal is consistency, clarity, and speed.
Start integrating these techniques today. Replace blind full-screen grabs with targeted, annotated images. Automate repetitive tasks. Share insights faster and more effectively. The next time you need to communicate visually, you won’t just capture the screen—you’ll capture understanding.


 浙公网安备
33010002000092号
浙公网安备
33010002000092号 浙B2-20120091-4
Comments
No comments yet. Why don't you start the discussion?