
Beaded bracelets are more than just accessories—they’re expressions of personality, style, and craftsmanship. Yet, even the most beautifully designed piece can fall apart if the foundation—the knot—is weak. Too many handmade bracelets fail prematurely due to insecure fastenings or improper tension. The difference between a bracelet that lasts months and one that breaks in days often comes down to knotting technique. This guide walks you through the essential principles, tools, and methods for mastering secure knots that keep your beaded creations intact, wearable, and cherished.
Why Knot Security Matters in Beaded Jewelry
A beaded bracelet is only as strong as its weakest connection. Each knot serves as a structural anchor, preventing beads from scattering if the thread snaps and ensuring the band maintains its shape over time. Poorly tied knots slip, loosen, or unravel under everyday wear—especially when exposed to moisture, friction, or sudden tugs. Secure knots not only enhance durability but also contribute to comfort and aesthetics by minimizing bulk and maintaining consistent spacing.
Consider this: a single knot failure can lead to total loss of beads, especially with precious stones or sentimental pieces. Investing time in learning proper knotting techniques protects both your materials and your reputation as a craftsperson.
“Knot integrity is non-negotiable in fine jewelry making. A well-tied knot should hold firm under stress and remain invisible in design.” — Lena Torres, Master Jewelry Artisan & Educator
Essential Tools and Materials for Secure Knotting
Before tying your first knot, gather the right supplies. Using appropriate materials significantly improves knot performance and longevity.
- Beading thread: Nylon-based threads like FireLine or Silamide offer high tensile strength and resistance to abrasion.
- Needles: Size 10 or 12 beading needles allow smooth passage through small bead holes without fraying thread.
- Scissors: Sharp, precision-cutting scissors ensure clean ends that don’t fray.
- Beeswax or thread conditioner: Adds grip and reduces tangling, helping knots tighten securely.
- Clasp or closure system: Lobster clasps, toggle clasps, or elastic cord (if stretch-style) must match the knot type used.
- Glue (optional): A tiny drop of clear-drying jewelry adhesive like GS Hypo Cement can lock knots permanently.
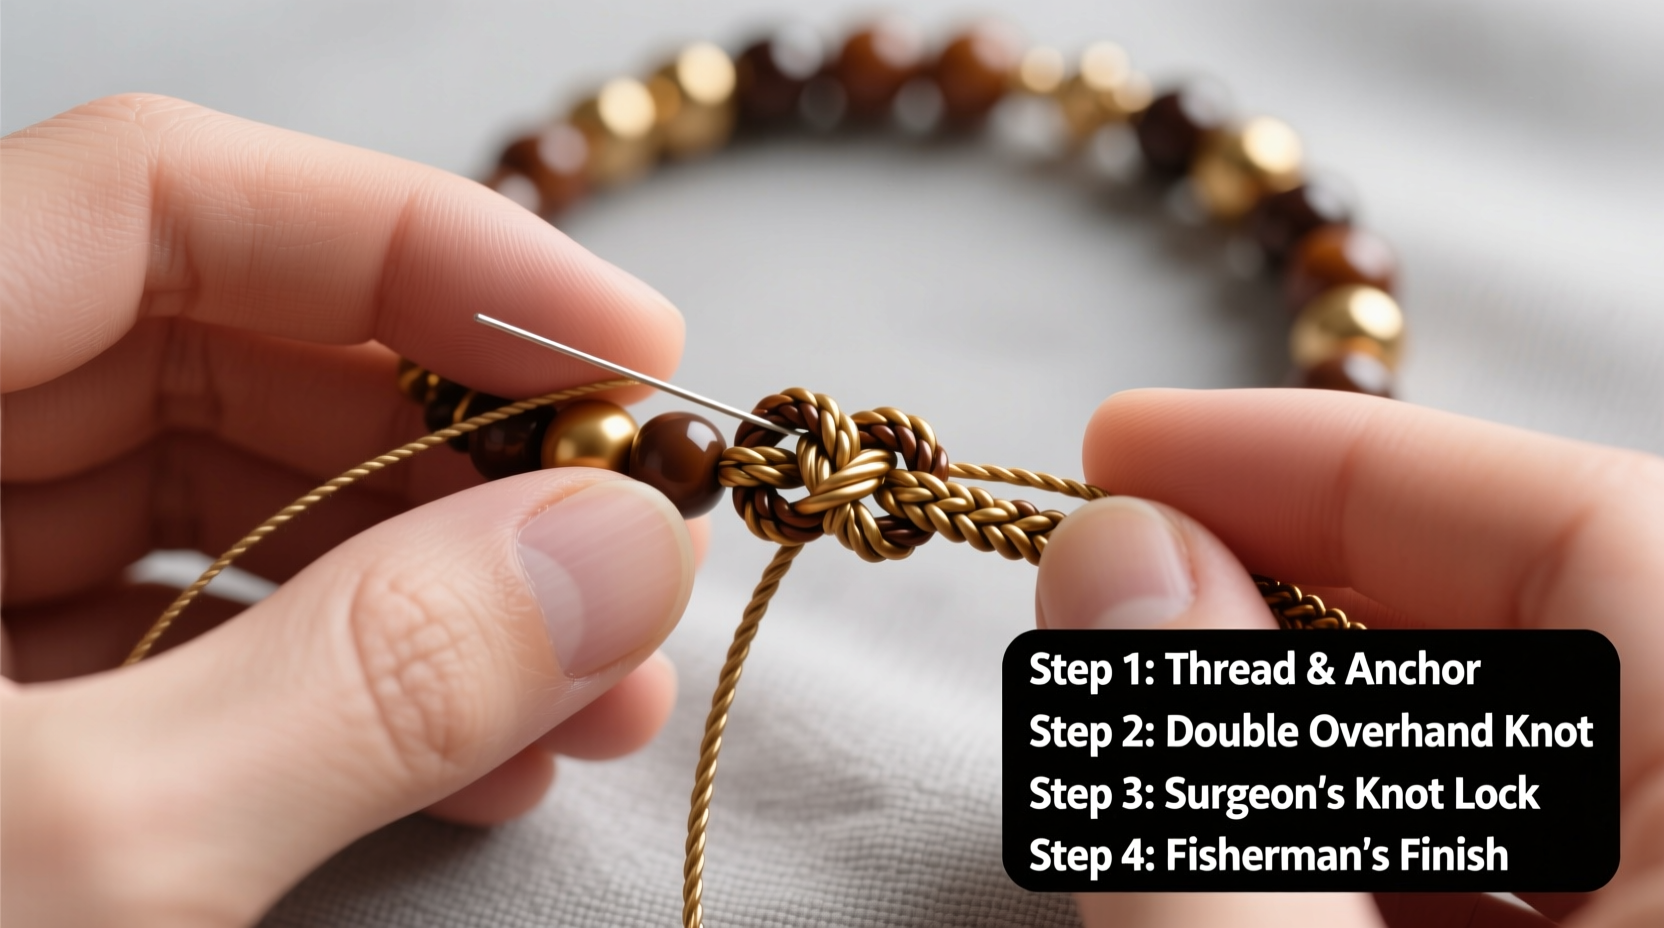
Step-by-Step Guide to Tying a Double Surgeon’s Knot for Beaded Bracelets
The double surgeon’s knot is ideal for securing the beginning and end of non-stretch beaded bracelets. It's simple, reliable, and resists slippage better than basic overhand knots.
- Thread your needle and string all desired beads, leaving a 6-inch tail at the start.
- Attach the clasp: Pass the threaded end through one side of the clasp, then back through the last bead to create a loop.
- Form the first loop: Cross the working thread over the standing part to make a simple overhand knot, but do not pull tight yet.
- Add the second loop: Repeat the same crossing motion so the thread goes around twice.
- Tighten slowly: Hold both ends and pull evenly until the knot cinches down snugly against the bead or clasp.
- Add a second identical knot: Directly on top of the first for redundancy.
- Trim excess: Cut close to the knot (about 1–2mm), optionally sealing with a touch of glue.
This method creates two interlocking loops that lock under tension. If one layer fails, the second usually holds.
Choosing the Right Knot for Your Design
Different bracelet styles require different knotting strategies. Match your knot to the material, wear frequency, and aesthetic goals.
| Knot Type | Best For | Pros | Cons |
|---|---|---|---|
| Double Surgeon’s Knot | Bracelets with clasps, rigid designs | Extremely secure, easy to learn | Slightly bulky; visible if not trimmed well |
| Granny Knot | Temporary fixes, practice pieces | Quick to tie | Poor security; slips easily |
| Surgeon’s Loop (Fixed) | Adjustable slide-knot bracelets | Allows size adjustment, elegant look | Requires precise tension control |
| Wrapped Barrel Knot | Elastic bracelets with no clasp | Smooth finish, hides well inside bead | Needs extra thread length; harder to undo |
Real Example: How One Artist Fixed Her Breakage Problem
Sophie, a handcraft seller on Etsy, received repeated complaints about her popular amethyst bracelets breaking within weeks. After reviewing customer photos, she noticed the failure point was always near the clasp—where she’d been using a single overhand knot. She switched to a double surgeon’s knot reinforced with GS Hypo Cement. Within three months, return rates dropped to zero, and customer reviews began mentioning “feels so much sturdier.” By investing less than ten seconds per bracelet in better knotting, Sophie improved product reliability and customer trust.
Checklist: Ensuring Long-Lasting Beaded Bracelets
Follow this checklist every time you finish a bracelet to maximize durability:
- ✅ Use high-strength, abrasion-resistant thread
- ✅ Condition thread with beeswax or silicone
- ✅ Tie at least two secure knots in succession
- ✅ Position knots tightly against beads or findings
- ✅ Trim ends to 1–2mm and seal with adhesive (optional)
- ✅ Test tension by gently pulling both ends
- ✅ Inspect under magnification if possible
Frequently Asked Questions
Can I use regular thread instead of beading thread?
No. Regular sewing thread lacks the tensile strength and flexibility needed for jewelry. It frays quickly and cannot withstand repeated stress. Always use purpose-made beading thread like FireLine, Nymo, or Silamide.
How do I prevent knots from coming loose over time?
Use redundant knots (two or more), maintain consistent tension while tying, and consider adding a drop of jewelry-grade adhesive. Avoid exposing finished pieces to excessive water or chemicals, which can degrade thread and weaken bonds.
Is the square knot better than the surgeon’s knot?
The square knot is balanced and flat, making it good for decorative ties, but it requires precise alignment. If tied incorrectly (as a granny knot), it fails easily. The surgeon’s knot adds an extra wrap, increasing friction and security—making it superior for load-bearing applications like bracelet ends.
Making Durability Part of Your Craft Ethic
Creating lasting jewelry isn’t just about beauty—it’s about responsibility. Every bracelet you make carries expectations: to endure daily wear, to honor the materials, and to reflect your commitment to quality. Secure knotting is not a minor detail; it’s a cornerstone of professional craftsmanship. Whether you're making gifts, selling online, or crafting for personal joy, taking the time to tie each knot with care transforms temporary adornments into enduring keepsakes.
Start applying these techniques today. Revisit past projects, test their knots, and refine your process. With attention to detail and respect for structure, your beaded bracelets won’t just look beautiful—they’ll stand the test of time.


 浙公网安备
33010002000092号
浙公网安备
33010002000092号 浙B2-20120091-4
Comments
No comments yet. Why don't you start the discussion?