
Drawing shoes may seem straightforward, but capturing the complexity of form, material, and function requires more than just tracing an outline. Whether you're a fashion student, concept artist, or hobbyist illustrator, mastering footwear illustration opens doors to design innovation and visual storytelling. Shoes combine engineering precision with aesthetic expression—every curve, seam, and texture tells a story about purpose, style, and craftsmanship. This guide breaks down the process into actionable steps, emphasizing proportion, perspective, material rendering, and creative refinement.
Understanding Footwear Anatomy and Proportions
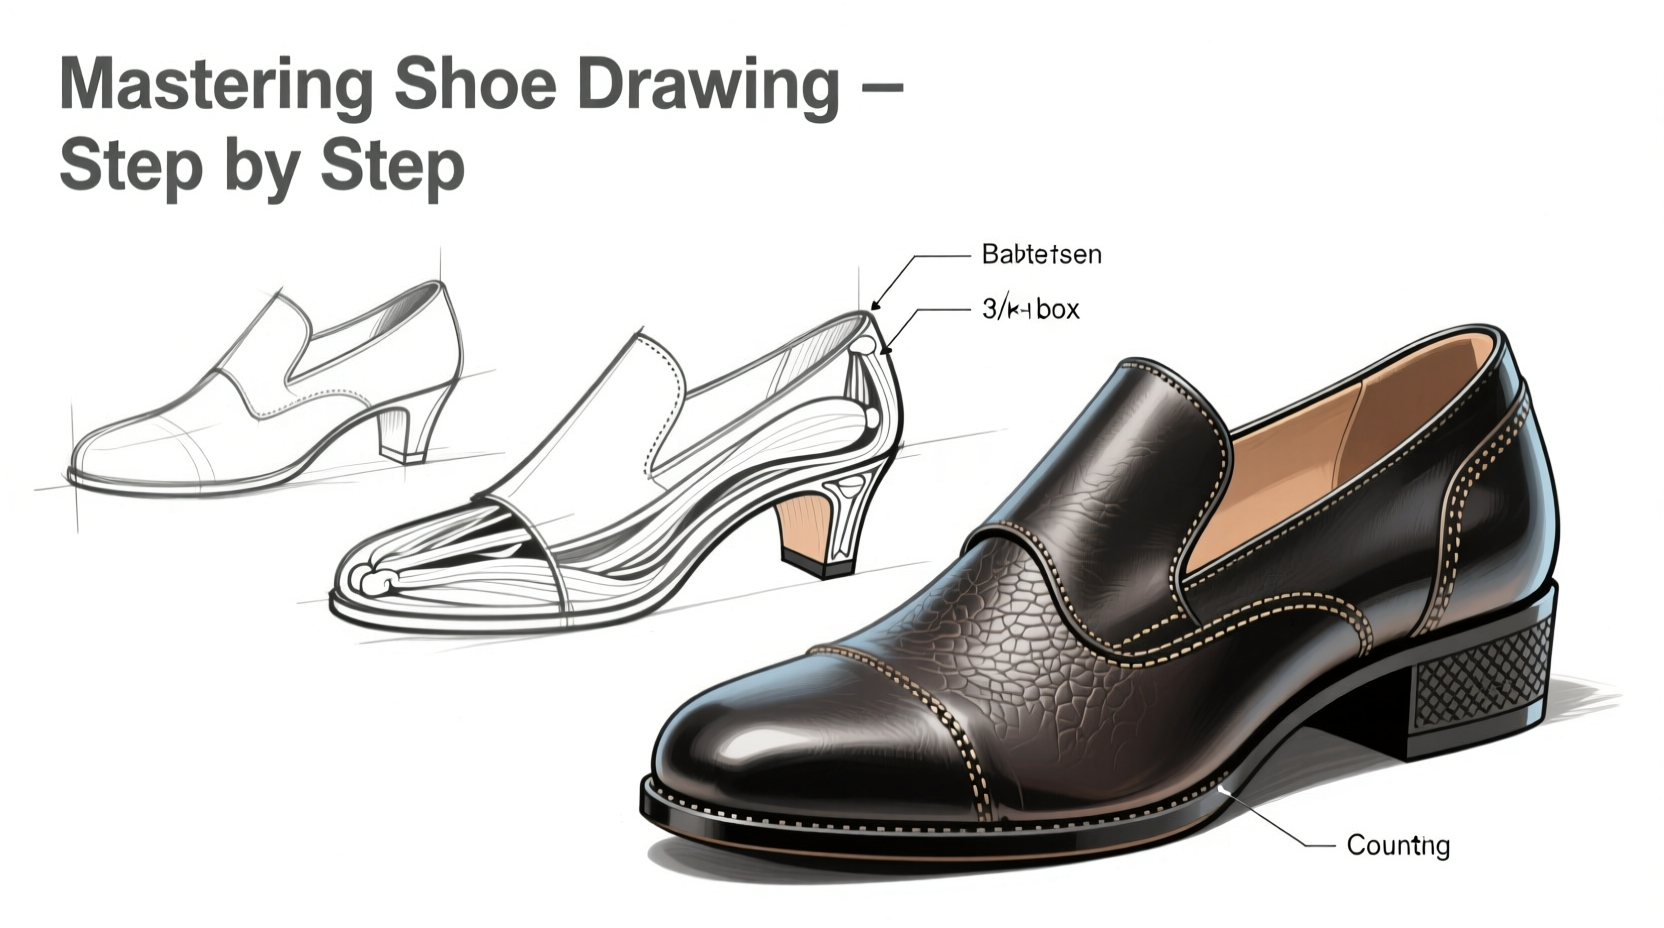
Before putting pencil to paper, study the structural components common across most footwear: toe box, vamp, heel counter, sole, tongue, laces, eyelets, and midsole. Each part serves a functional role, but also contributes to silhouette and visual rhythm. Misjudging proportions—even by a few millimeters in sketch form—can make a shoe look awkward or unbalanced.
The human foot has natural curves and angles that influence how a shoe sits on the ground. A standard adult foot is roughly three times as long as it is tall (from sole to instep). When drawing a side profile, use this ratio as a baseline. Begin with light construction lines: draw an elongated oval for the foot’s base, then overlay guidelines for heel height, arch placement, and toe extension.
Key Zones to Map Before Detailing
- Heel-to-toe axis: Establishes forward motion and stance.
- Ball-of-foot line: Critical for accurate flex point and comfort zone depiction.
- Sole thickness: Varies significantly between dress shoes (thin) and athletic models (bulky).
- Vamp length: Determines coverage and influences perceived elegance or sportiness.
Step-by-Step Guide to Drawing a Realistic Sneaker
A modern sneaker offers rich detail and layered materials, making it ideal for learning advanced rendering. Follow this sequence to build depth and accuracy:
- Sketch the foundation ellipse: Draw a horizontal oval tilted slightly upward at the toe end to suggest perspective.
- Add major landmarks: Mark heel height, ankle opening, and toe cap position using vertical and diagonal guides.
- Outline the upper shape: Connect key points with flowing lines, adjusting curvature based on intended style—sharp edges for minimalist designs, soft arcs for retro models.
- Define the sole stack: Layer out the midsole and outsole with slight separation to imply dimensionality.
- Incorporate details: Add lacing pattern, perforations, branding elements, and stitching. Keep these light until structure is confirmed.
- Refine linework: Darken final contours, erase construction lines, and finalize symmetry.
- Apply shading: Identify a single light source; shade under the sole, behind the heel, and beneath overlapping panels.
This method ensures technical correctness before artistic embellishment. Repeat the exercise with variations—high-top vs. low-cut, running vs. basketball—to internalize differences in volume and proportion.
Rendering Materials and Textures Authentically
No two shoes are made alike, and their surfaces react differently to light. Accurate texture work separates amateur sketches from professional-grade illustrations. Study how materials absorb, reflect, or scatter light:
| Material | Light Behavior | Drawing Technique |
|---|---|---|
| Polished Leather | High reflection, sharp highlights | Use smooth gradients with abrupt white accents |
| Canvas/Nylon | Diffuse reflection, matte finish | Even tone with subtle fabric weave patterns |
| Rubber Soles | Low shine, deep shadows | Dense hatching, minimal highlight |
| Mesh Uppers | Translucent, shadowed backing | Faint crosshatching with underlying tone |
| Suede | Velvety, no distinct highlight | Soft graphite smudging, avoid hard edges |
For mixed-material shoes—common in performance footwear—layer techniques accordingly. A running shoe might combine reflective TPU overlays on a breathable mesh base. Render each section separately, then blend transitions where they meet.
“Great footwear illustration doesn’t mimic photography—it interprets structure through controlled mark-making.” — Lena Torres, Senior Footwear Illustrator at Athletech Design Studio
Design Innovation Through Iterative Sketching
Once realism is mastered, push creativity by modifying existing forms. Many iconic shoe designs began as exaggerated sketches that challenged conventions. Use your foundational drawings as springboards for innovation.
Start with a base model you’ve already drawn accurately. Then explore one variable per iteration: increase heel height, narrow the toe box, invert color blocking, or introduce asymmetrical lacing. Limit changes to maintain coherence, allowing viewers to trace the evolution from original to concept.
Mini Case Study: From Classroom Sketch to Concept Launch
Jared Lin, a third-year industrial design student, entered a campus footwear competition with limited drawing experience. He began by dissecting five commercial sneakers, redrawing each in multiple perspectives over two weeks. Using those studies, he created a hybrid trail-runner/city-lifestyle shoe with modular soles and recycled uppers. His final presentation included orthographic views, exploded diagrams, and lifestyle context sketches—all rooted in disciplined draftsmanship. Judges noted his “technical clarity” as a deciding factor. The design later won sponsorship from a sustainable activewear brand for prototyping.
His success wasn't due to innate talent, but to systematic practice grounded in observation and repetition.
Essential Checklist for Polished Shoe Illustrations
Before finalizing any drawing, run through this checklist to ensure completeness and professionalism:
- ✅ Construction lines erased or minimized
- ✅ Consistent perspective maintained across all views
- ✅ Material distinctions clearly rendered
- ✅ Shadows aligned with a single light source
- ✅ Branding or logos placed appropriately (if applicable)
- ✅ Multiple angles shown (side, front, top, ¾ view) for design presentations
- ✅ Annotations added for materials, mechanisms, or innovations
This checklist is especially valuable when preparing portfolios or client submissions, where clarity and attention to detail signal expertise.
Common Questions About Shoe Drawing
How do I draw shoes in perspective?
Begin with a horizon line and vanishing point. Extend orthogonal lines to establish depth. For a three-quarter view, angle the shoe so its longest edge recedes toward the vanishing point. Use boxes as placeholders to block volume before refining organic shapes.
What tools should I use for clean line art?
Traditional artists benefit from fine liners (0.1–0.5mm) for crisp outlines. Digitally, use pressure-sensitive brushes with stabilizers (like LazyNezumi Pro or built-in smoothing in Adobe Fresco). Always sketch loosely first, then ink over cleaned-up versions.
Can I learn shoe drawing without formal training?
Absolutely. While fashion schools offer structured curricula, countless professionals are self-taught. Success hinges on consistent practice, critical self-review, and studying real products. Dissect physical shoes whenever possible—observe stitching direction, seam allowances, and panel junctions.
Conclusion: Step Into Your Creative Potential
Drawing shoes well isn’t just about replicating what exists—it’s about envisioning what could be. With strong fundamentals in proportion, perspective, and materiality, you gain the freedom to innovate confidently. Every stroke builds not only skill but also design intuition. The most compelling footwear concepts emerge not from sudden inspiration, but from hours spent refining lines, testing ideas, and learning from mistakes.


 浙公网安备
33010002000092号
浙公网安备
33010002000092号 浙B2-20120091-4
Comments
No comments yet. Why don't you start the discussion?